Wednesday, January 29, 2020

Story Break: Open Fire Cookery

Story Break

Open Fire Cookery

I don’t know why honest, God-fearing people would want to go out to the wilderness and take perfectly good food that someone worked hard to buy for the table and burn it over a stupid fire, you could go down by the park on your day off or in the back yard and take fried chicken and potato salad like real people and enjoy yourself, but if you have to insist on not listening to me, then here’s what you do.

Make your stupid fire. Just don’t let it get loose or you’ll know what for, do you hear?

Crispy Marshmallow Skins

This first one is real simple. Buy some marshmallows. Get a pointed stick. Put the marshmallow on the stick and hold it over the fire and cook until the outside gets good and brown. It should be crispy. Eat the skin and then stick it back over the fire again and keep eating the skin until it’s all gone. Don’t eat too many or it’ll give you a stomach ache, and don’t spoil your appetite before dinner.

Brown Snakes

If you get the marshmallows worked out then try this. Make some brown snakes. That’s what we call them. Get a can of biscuits like your mother uses. She probably never made you any real biscuits and thinks that they all come in a can but they don’t. Anyway that’s no nevermind, you don’t know any better so you should like this.

Open the can and take the dough out, but be careful. It’s sticky. Wrap it around a clean stick like a snake on a pole and roast over some coals until it’s brown. That means it’s done. You should know this already. I hope you were brought up well enough to know the basics like this but you never know so I’m telling you.

Take the snake off the stick and butter it up so it’s good and runny. Butter is good for you. The more the better. Then sprinkle it with cinnamon and sugar. Don’t poke yourself with the stick.

Dogs In A Snake

Use the same biscuit dough like for the brown snakes. Stick a hot dog on a stick, and wrap the dough around that. Leave enough space so the hot dog can get cooked too. Stretch the dough out so you don’t have too much for the hot dog, but be careful so it don’t fall off. Remember wasting food is a sin. You can eat if off the stick with ketchup and mustard if you can’t help yourself, but slide it onto a plate and eat it with a knife and a fork like a human being is better. Don’t poke yourself with the stick. Remember that. I have to keep telling you.

Wash your hands first.

Food And Recipes

Food And Recipes

Some weasel took the cork out of my lunch. — W. C. Fields

Mustard’s no good without roast beef. — Chico Marx

Food, the eternal problem. There are two types of food you need to consider for lightweight backpacking. We’ll call these pre-packaged and fix-yourself. These aren’t your traditional food groups, but then you aren’t doing a traditional sort of thing, so you need to warp your perspective to fit. You are now hanging out with the lunatic fringe, so get bent, Sucka.

Experts are still getting into hissing hair-pulling fights about how many food groups there are, and even whether there ARE food groups, so cut yourself some slack and try to have more fun. Get out more. Meet some new people. Spend all your allowance in one place. Eat something with tentacles. Whatever. Live a little, for crying out loud.

Food Groups

The Mayo clinic swears that there are six food groups:

  1. Vegetables
  2. Fruits
  3. Carbohydrates
  4. Protein/Dairy
  5. Fats
  6. Sweets

The Center for Health and Athletic Performance disagrees. They drop vegetables and replace them with “vegatables”.

  1. Vegatables [sic]
  2. Fruits
  3. Grains
  4. Meats and Protein
  5. Fats and Oils
  6. Dairy

The National Dairy Council disagrees with both. They cut it down to five groups, all recognizable as food to the lay person. However, they say “vegetable” but not which one. Likewise for “fruit”, “grain”, and “meat”. You’ll have to guess which fruit, which grain and which meat. Let’s assume that they don’t mean weasel meat or cat milk. Oh, crap, why not? Put back the weasel meat and cat milk. It could be fun.

  1. Milk
  2. Meat
  3. Vegetable
  4. Fruit
  5. Grain

The National Dairy Council does go the extra quarter mile (0.4025 kilometers) by providing a cute, though gender-stereotyped way to remember all five of their groups. “Mom makes very fine granola” reminds us that we should eat milk, meat, vegetable, fruit, and grain. Again, no indication of which milk, meat, etc. Use your best judgment. Just keep your hands off my weasel.

Extensive research on university campuses has revealed that graduate students (generally a very smart bunch of people, at least by some standards) recognize five food groups:

  1. Caffeine Group (four to five servings daily)
  2. Macaroni and Cheese Dinners or Ramen Noodles Group (one or more servings per day)
  3. Pizza and Beer Group (occasionally) Note: these two items must be eaten together
  4. Canned Group (one or more servings per day)
  5. Cereal and Milk Group (one or more servings per day)

If that’s too hard to remember then cut back to four groups and hope for the best:

  1. Sweet things
  2. Salty things
  3. Crunchy things
  4. Liquids

Hikers have their own perspective:

  1. Ramen Noodles Group
  2. Vitamin I Group (Ibuprofen)
  3. Chocolate Group
  4. Any-Food-That-Is-Yogied Group

Being ornery cusses, some other hikers disagree, claiming that the groups are:

  1. Dried Food Group
  2. Snickers Food group
  3. Town Food group
  4. Beer Food group

If all of the above are too much for you, then keep it short and simple:

  1. Froot Loops

Pick one of the above lists, memorize it so you can sound educated, then eat what feels right for you.

For short trips (up to two weeks) it doesn’t matter too much what you eat as long as you get enough calories. Two or three days seem like forever if you’re drooling, but even if you don’t eat at all, a couple of days with drool on your chin usually won’t kill you too much.

For longer trips, ya just gotta eat. Take enough food, and make sure it’s tasty. If you have to shove supper down your throat with a stick, or pay someone to do it for you, then you’re in trouble. Ditto if you throw food away because it makes you gag when you see it. Or even when you just think about it. These are sure signs of trouble.

Calories are the key, though. If you get enough calories then everything else lines up. Not enough calories and you have problems like frequent and uncontrollable stomach growls, weak knees, bad attitude. Terrible gnawing sounds as you sink your teeth into anything that can’t get away. And then your very own body will begin to digest itself.

First the fat goes, which is OK if you have side handles. You can do without those.

But your body needs more than energy. It needs protein to repair and build up muscles and keep everything shipshape. Guess where the fasting body goes for this protein? Right to its own muscles. Your body is so finely tuned for survival at all costs that it will begin to digest its own muscle tissue so it can build and repair that very same muscle tissue after digesting it.

Duh?

This fact alone is proof of the truth of evolution. No god, however arbitrary or stupid, would be dumb enough to come up with an idea like that. It would simply be too damn much work to invent a process like that and then to embed that much perverse stupidity right down in the very sub basement of life, and therefore it had to happen solely because it logically makes sense on its own, and developed as a survival mechanism way back when all of those noisy big ugly things were banging their heads together and eating each other, and some of the smaller, slimier and even less appetizing really nasty things were slithering hither and yon, wallowing (yes, that’s it — wallowing) in the swamps and so on, and came up with this plan for survival. And now it’s what we’ve got. Because nature is so efficient and perfect and all that crap. So we digest ourselves. Right.

Alcohol fuel

If you just eat enough to keep hunger away, and sort of eat a variety of things, then you’re probably getting enough protein, carbohydrates and fats. You might come up short on vitamins and minerals, but you can take pills for that. You’ll survive the hike. Everybody does.

If you plan to hike the Appalachian Trail, the Pacific Crest Trail, the Continental Divide Trail, or one of the other long trails, you’ll be out for months — four or five or six months. This is a different universe and requires a different strategy. You may not be able to eat enough to keep going. Women usually lose weight and add muscle. Men usually lose both weight and muscle. The metabolic thermostat gets cranked up so high that it’s nearly impossible to keep going for months on end. You just can’t eat enough on the trail. Long distance hikers can slowly starve to death.

The good news is that while you may hike for months at a time, slowly dying of starvation, you’re never too far from a town. Long distance hikers typically hit a town at least once a week or so. When in town, they stay a day or two and pig out on “town food”, or what you and I generically call “food”. Lots of it. Leafy greens, fruits, vegetables, meats, sweet things, crunchy things, salty things, liquids, and all the rest. This refreshes the hiker and rebalances the body’s needs for vitamins, minerals, and everything else. Like calories.

There is a story about four long-distance hikers sitting in a cafe. The waitress comes over. One hiker orders two complete chicken dinners with a side order of onion rings, two Cokes and a milk shake, and two slices of apple pie with ice cream. As the waitress finishes writing this down she turns to leave. The other three hikers start waving their arms — “No, no wait! We want to order too!”

Or the story about a hiker at an AYCE (All You Can Eat) buffet who waddles out of the place after snarfing down enough food to keep three people and a dog stuffed for a week, ducks into a grocery store down the street and emerges with a quart of ice cream. Then he sits on the curb and eats it all for dessert.

Hiker Food Groups

So that brings us back to our two hiker food groups: pre-packaged and fix-yourself. Fresh food is pretty well out, except for the first day or two. An apple, a carrot, some doughnuts. You can carry a little fresh food but it’s heavy and awkward and it goes bad if you don’t eat it right away. It is neither a long-term solution nor an ultralight option.

Pre-packaged foods still have to be tweaked, but gnomes in food factories already did most of the work for you. Pre-packaged foods are foods like macaroni and cheese, pre-seasoned instant mashed potatoes, ramen noodles or boxed couscous or stuffing mix. (Some people stuff themselves with stuffing mix.) About all you need to do is repackage these foods into ziplock bags and add some seasoning. Or you can supplement them with bits of dried meat or dehydrated vegetables. If you go the freeze-dried food route, you’re not one of us, so we’ll skip ahead. Normal people can’t afford to pay $5 to $10 each for meals of chemical substances that have been exploded inside vacuum chambers by pricey, over-educated technical droids.

Fix-yourself foods are foods that you put together yourself. The difference between pre-packaged and fix-yourself foods is that you just repackage the former and add a little something to it, but start from scratch with the latter, and build it up into something. Both categories start with dry ingredients.

Dry food is good because it weighs less. With water at two pounds per quart (1kg/L), moist food is heavy compared to dry food, even in small portions. Dry food keeps better, and gives off fewer inviting aromas to attract hungry critters to join you for lunch. Or for midnight snacks. Or stealthily crawl into bed with you in the deep dark of night just so they can reverently sniff your breath and gently lick your lips and nose hairs.

Note that here we’re skipping foods that require lots of preparation or ingredients that are fresh or canned. We’re focusing on the light to ultralight end of the spectrum. If you want to get fancy there are whole books on the subject of outdoor cooking, but the ultralighter wants maximum munchability and minimum weight, so we’ll continue to look at light and simple things.

Meals made from dry ingredients inhabit a sparse universe revolving around starch. These are foods made mostly from grains. The exception to the grain rule is plain instant mashed potatoes. The basic, starchy ingredients are going to be rice, wheat, corn, barley, rye, or products made from them, like pasta.

Let’s take a simple example — couscous. You can buy couscous in bulk. By itself it isn’t much. It’s like uncooked, pelletized macaroni, so you have to work some magic on it. You get it home, then measure some out, and add spices and butter. Toss in whatever makes it most edible. I usually go with butter and grated Parmesan cheese. Can’t help it. Cheeeese, Gromit!

Cheese adds salt and flavor and keeps well. (Hard cheese like Parmesan.) Beyond that you can move on to onion powder and garlic powder, herbs, pepper, and dried bouillon. Once you mix all the ingredients, you bag them and then you’re done.

That’s a simple recipe. Most of them are. You want good eats, but mostly calories. You can play with corn meal, angel hair spaghetti, minute rice, instant mashed potatoes, bulghur wheat, and anything else that seems like it might work. Try it out at home in your own kitchen first, then on shorter trips and day hikes, then pick from your list of winners and make them your tried-and-true staples.

If it makes you gag, then maybe that’s a hint. Try it again if you like, but keep in mind the ancient proverb: “If you do what you did then you’ll get what you got.” Do not expect to like something on the trail that makes you feel dizzy, queasy, rancid, putrid or foul when you try it at home. Not even if it’s sex.

Exercises

  1. Pick a fight with someone about how many food groups there are, what they’re called, and what foods are in them. You get extra credit for doing this with a complete stranger. Go to the head of the class if this actually results in a brawl. More points for serious injuries.
  2. Buy a box of Froot Loops and try to determine whether it or they actually is or are a food or foods.
  3. Have lunch. You deserve it. Try to appreciate where you would be without food. Whine less. You have it pretty soft, after all.

Wednesday, January 22, 2020

Story Break: How To Cook On An Alcohol Stove

Story Break

How To Cook On An Alcohol Stove

Finally you get to sit down and eat. Say you’re on the trail. You’ve been hiking for hours and hours. You’re hungry. You want to eat. You stop and put your pack down. Then what? How do you do this with an alcohol stove?

Think about what you do now. It’s about the same routine as with any other stove. A homemade alcohol cook set is a little different from a commercial cook set. More like a kit. Not to worry, you are now having an adventure. Relax. This is not a dress rehearsal for life, it is the real thing, and you are officially alive and having fun. Don’t argue with me, not even a little. Follow along.

If this is your first time using an ultralight alcohol stove, then take your normal outfit with you, down to your old stove. Everything. It will be there as a backup, a safety net, so you will have nothing to fear. It will stay by your side, waiting patiently in case you need it, and there’s a good chance that you won’t, but it will still be there to comfort you. Make the switch over to exclusive use of an ultralight stove when you feel comfortable with it. At your own speed and in your own time. This is not a competition.

Now, back to the subject at hand. The first thing to remember is not to set the ground on fire. Or anything else. Not at all, except for the stove of course.

Find a nice flat spot. Ideally you will find a level slab of clean concrete every place you stop to cook, but of course you will never come across anything like this. Rock is as close as you can get. While rock is nice it will not negotiate with you. Barring unexpected discovery of an absolutely flat, professionally finished concrete slab wherever you happen to stop, you need a surface that will deal with you, that has some give, a surface that will converse with you and adapt to your needs. Rock won’t burn, which is nice, very nice in fact, but if it’s lumpy or leaning one way or the other, it won’t get any better. The lump and the lean are all you get. Rock will not listen to reason. Rock will not adapt to your needs.

Aside from a chance encounter with a large stone that is smooth enough and level enough, you should look for “mineral soil”. “Mineral soil” is soil that is pure sand or plain gravel or clean dirt, or a mixture of them. Nothing but minerals that will not burn. Sand does not burn, and gravel does not, nor does clean dirt. (Like “jumbo shrimp”, “living dead”, and “relatively unique”, the phrase clean dirt is an oxymoron for most people. But for backpackers, clean dirt really is clean — clean of all burnable things.) Mineral soils like bare rock will not burn, but they can be molded and scraped to accommodate you, unlike rock.

A stream bed is good, especially if there is a shady sandbar in it where you can escape most of the bugs, and have ready access to water. If you’re on a quiet trail and have no other choices, then sometimes you can set up right there, in the middle of the trail. If you do try this gambit, then be really, really sure that you will have no unexpected guests dropping in. About the last thing you need is a dozen lug-soled hikers tramping through your kitchen while you try to cook.

If you’re on solid ground, in the trail or otherwise, pick a spot and thump the earth. If it sounds hollow, then you are standing on several inches of compacted forest duff. That’s another way of saying compacted pine needles, branches, flakes of bark, compressed leaves and grass. That’s another way of saying a forest fire just waiting to happen. Go somewhere else. To set up there is about as safe as trying to cook on your couch.

Sometimes the soil is better, and there’s only a thin layer of duff or debris on top of mineral soil. In that case you can scrape your way down to a safe surface. That’s OK. Follow the same rules as if you were going to start a wood fire. But you aren’t, so you’ll have a decent safety margin. Once you have a level, non-combustible surface, you are ready to cook.

Open up the wind screen and set it aside.

Set out the bottom reflector. This goes under the stove and provides extra fire insurance there. Besides, it reflects heat back up toward your cooking pot instead of letting it be absorbed by the earth. Think of efficiency. This is efficiency in action, and it will bring you a hot meal.

Next, set down your pot stand and test it by rocking it with your hand to make sure that you find the most stable spot. Then try the same maneuver after putting your empty pot on top. If your pot stand is built into the stove, then use the whole stove, but still do the test.

If you need to find a better spot, do it now. This is a golden window of opportunity. You really don’t want the whole thing to fall over just as you’re finishing up your cooking, and have already begun to drool. Going to bed hungry is a just punishment for stupidity, but is not fun. Since you’re traveling light, and have intelligently reduced your safety margin to a minimum level, you are not carrying much extra food in your pack, if any. Meals you mess up come right off your spare tire, if you have one, and it’s an unpleasant way to deflate it.

Fill your cooking pot with water while it is sitting firmly on the ground. (We’re assuming that you are just heating water, and not doing traditional in-the-pot cooking.) Put the lid on and place the pot on the pot stand or stove and see if it wiggles too much or leans too far one way or the other. This is your final test, a last safety check.

If everything seems OK, then set the pot to one side and put fuel in the stove. How much fuel depends on several things. For a simple rule of thumb, try a touch more than half an ounce to get 16 ounces of water hot enough for a really quick-cooking meal, something like instant mashed potatoes or couscous. Exactly how much fuel you need depends on the water temperature, the size and shape of the pot, the design of your stove, wind speed, air temperature, how well your cook set is made, and how carefully you’ve set everything up. You’ll learn to judge and fudge with experience. A tenth of an ounce of alcohol either way is usually enough to make a noticeable difference. You’ll tune in quickly after a few meals on the trail.

Use the cap of your fuel bottle as a measure. Most caps (they are pretty standard these days) hold about one quarter ounce. Whatever you use, whether it’s a bottle cap or something else, it’s a good idea to take a spare. Small things like these will run away whenever they get a chance. Half an ounce of fuel will burn roughly nine to 12 minutes, depending on your particular stove and conditions in general.

So then, back to the stove. Fuel it with the pot and pot stand sitting nearby. Light the fuel, put back the pot stand, put the pot on the stand (with the lid on the pot), and then fit the wind screen around it all. On the downwind side of the wind screen, leave a finger’s-width of space near the ground so that the stove can breathe. This is if you have a full-coverage wind screen, like a fat, inverted cup of aluminum foil. If your wind screen is open at the top then you don’t have to fuss with this, but it will also be a less-efficient wind screen.

Most small alcohol stoves are much easier to light with matches than with lighters. Some of these stoves require priming, and those would be easier to get at with a lighter since they have fuel on top or in a cup at the bottom of the stove’s outside, but most alcohol stoves are one variety or another of the basic cup shape, so it’s hard to poke a cigarette lighter down inside without burning your fingers.

When things are running, hold your bare wrist a few inches above the wind screen. You should begin to feel some heat coming up from the stove. Things get hotter as the stove warms up, and this can burn you when the stove is running at full throttle (after a minute or two) so be careful. You will learn judgment as time goes on. Later, after the stove has gone out, you’ll still be able to feel some heat, but not nearly as much. This is residual heat leaking out of the pot.

Since an alcohol stove is so quiet, guessing when it will burn out is an important skill to learn, as is testing its actual heat output. A few days on the trail and you’ll be handling this like a pro. Don’t worry about taking notes or carrying a watch. It will come to you. Let it happen.

Time to cook!

Open up the ziplock bag that your meal is in, and then put on your gloves or grab your pot lifter.

Carefully (slowly) lift off the wind screen. You don’t want to spill all your hot water at this point so be delicate. Gently remove the pot’s lid and pour hot water into the food bag, holding the bag with one hand and the pot with the other. If you pour hot water onto your hand, you’re going to be really, really sorry you did, so be careful with this step. Keep the thumb of your pouring hand out of the hot water in the pot, too, in case you’re wearing gloves instead of using a pot lifter.

Keep one hand on the bag at all times while pouring. If the bag falls over, then refer to the section above about going to bed without supper. Mommy can’t kiss you and make it all better. You will just be SO hungry all night.

Keep your gloves on, squeeze the air out of the bag, and then seal it. Carefully moosh the food around inside the bag, massaging it for a minute or so until everything is well mixed.

If you didn’t buy brand-name freezer bags, then you might find that a bag will occasionally leak, or be hard to re-seal. Once more, recall the part about going to bed without supper. Brand X bags just are not made as well. Don’t try to skimp. I’ve been there. Remember to use the FREEZER bags too. They’re thicker.

Set the bag aside, preferably inside an insulated cozy.

You can make a cozy from an old sleeping pad or even scraps of fleece fabric. When not cooking, you can use the cozy to contain your cook set, so a cozy does double duty. If you don’t have a cozy you can take off your gloves and cup them around the food bag in a protected spot. Or use a pullover cap if you brought one to sleep in.

In about 10 minutes the food will be cool enough to eat, and if you paid attention and brought really instant instant food like mashed potatoes, couscous or ramen, it will be completely cooked too. Minute rice, ground grains and similar foods don’t cook thoroughly this way. If you don’t believe me, then go ahead and do your own experiments, preferably at home, where you can either throw out the bad food or finish cooking it on your kitchen stove. It’s less exciting to learn this at home, believe me.

Let’s say you also want a hot drink like coffee or tea. So while your meal is finishing up its cooking cycle on residual heat, inside some kind of cozy, go ahead and recharge the cooking pot, and prepare the stove once more. Use about two-thirds to three-quarters as much water as you’ll need.

If making tea, then drop a tea bag into into the cold water and just leave it there, and light the stove. Be sure the water gets good and hot but doesn’t boil, or it will foam over and mess up your stove. Leave the tea bag alone after the flame goes out, and it will finish brewing right there. Your drink will stay hot inside the wind screen-sheltered pot until you’re done eating. A wind screen, especially a full-coverage one, will do a surprisingly good job of keeping heat in. About the time you finish eating you can pull the screen off, remove the tea bag, top up with cold water, and down your drink.

When you’ve practiced this a few times you’ll be able to cook, then put on tea, be eating supper a few minutes after the tea starts brewing, and have a nice cup of drinkable tea about the time you finish supper.

One more thing — use treated water for cooking, either filtered or chemically treated. That way you don’t have to boil the heck out of it just to be sure it’s safe, and you don’t have to worry either.

How To Cook On A Backpacking Stove

How To Cook On A Backpacking Stove

The Sequel

At the age of six I wanted to be a cook. At seven I wanted to be Napoleon. And my ambition has been growing steadily ever since. — Salvador Dali

Any cook should be able to run the country. — Vladimir Ilyich Lenin

Cooking. Here’s the skinny on cooking as I see it. There are seven kinds of cooking: frying, boiling, baking, simmering, warming, steaming, and bag cooking. I’m going to skip all but the last two.

“Why?” you might say, revealing all your ignorance at one stroke. You poor, wretched mortal. Hah-ha. Now I get to pontificate.

As a lightweight or ultralight hiker, you don’t need the other cooking methods. If you want to bake or fry, you need a big stove and lots of fuel, not to mention a frying pan or oven of some kind. You wouldn’t be traveling light. You really don’t even need to simmer or warm food. If it’s cooked, you can eat it, and you can cook it by just adding hot water to it, given the right choice of foods.

If you’re out to hike, and serious enough about traveling light, then you’ll be hungry and won’t have time to cook up fancy soups or stews, or hang around all day rewarming food.

Boiling is a less efficient form of steaming. Steaming is a little on the fancy side, but can be useful for some things, and can stand in for baking or frying as well.

Let’s look at two kinds of cooking: bag-hydrating and bag-steaming. Both of these can be done using a ziplock bag. Bag-hydrating means adding hot water to instant food in a bag, then eating it. Bag-steaming means adding cold water to food in a bag and then steaming the whole bag with the food inside.

Both of these keep you and your equipment clean, and they’re simple. Bag-hydrating is quicker and less fussy, but bag-steaming is a close second, and can extend your trail-cooking repertoire with hardly any extra effort.

If you really, really have to get fancy, try muffins first. Cut the bottoms off a few 5.5 ounce aluminum juice cans. Get some paper baking cups for muffins, the kind that go into muffin tins. After mixing your batter, put one of those baking cups into the bottom of each can (your “muffin tins”), and then put the batter into the paper cups.

You can just barely squeeze three of these “muffin tins” inside a Wal-Mart Grease Pot, which is about 5.5 inches (140mm) in diameter. You can make a small rack from some hardware cloth to keep all this off the bottom of the pot. Put a bit of water into the pot and steam your muffins. This will bake some really moist muffins. You WILL be surprised. The inside of the pot won’t have anything dried and cooked on, but will still need to be rinsed or washed.

Bag Steaming

Bag-steaming works about the same way. You want to have some kind of rack inside the pot to keep the plastic bag off the pot’s bottom, or it will melt. And try to keep the bag away from the pot’s sides as much as possible, for the same reason.

Small cans

Sometimes I do wonder a little tiny bit about how cooking inside plastic bags reacts with a person’s inner tube over the long term. It seems like just about everyone is cooking this way, at least part of the time, and the bags are made from polyethylene, which is pretty innocuous as things go, so maybe it’s as safe as anything else. But I might try using aluminum foil pouches for steaming.

You could carry a weightless plastic bowl to mix ingredients in, then dump them into a pouch or small “pan” that you shaped on the spot. You could also take pre-folded pouches of aluminum foil along, and then just unfold them, and mix ingredients with water in one of these pouches before steaming in it. Wouldn’t work for the bag hydrating process though. That would just leak.

But for steaming, maybe. Fold up the soiled foil when done and stuff it in with the rest of the garbage, which is mostly plastic bags. This might even weigh a bit less than a quart ziplock bag.

So, back to the details for the bag process.

Add water to the dry ingredients inside a quart-sized freezer-weight ziplock bag. Mix it all together by massaging the mixture through the sides of the bag. Squeeze ALL the excess air out of the bag, seal it, and place it on its side inside the pot. Light the stove and let it rip. This method will work for cornmeal variations, or multi-grain cereal, or oatmeal or minute rice, and anything else that cooks quickly but isn’t firmly in the “instant” category.

I’ve used it for a relatively hearty meal of mixed grains (nine tablespoons total: equal parts 7-grain cereal, corn meal, and falafel mix, along with several tablespoons each of powdered milk and Parmesan cheese and cooks on 0.75 ounce/22ml of alcohol).

Be sure to have enough water in the pot but no more than you need. If all of the water boils away, you’ll have semi-cooked food mixed with melted plastic, all stuck to the inside of your pot. If you have too much water, you’ll waste fuel bringing the water up to boiling temperature, even before steaming can start.

Steaming is more efficient than boiling for a couple of reasons.

First, steam cooks food faster. It takes a lot of heat to convert water into steam (a whole lot). This sounds bad, but it means that steam at boiling temperature carries more actual energy than liquid water at the same temperature. When this steam condenses on your food, it releases all that heat (heat of vaporization) into the food as the steam changes back into liquid water. The steam will circulate throughout the cook pot all by itself and heat every part of the food equally.

Second, if you want to boil food, you need to cover the food with hot water. You have to heat ALL the water to boiling temperature, and then keep it boiling for several minutes, and then dump out all that hot water when you’re done. Steaming requires only a few tablespoons of water — basically, just enough water to cover the bottom of the pot.

Since your food is inside a nice, tight plastic bag, the pot stays clean.

Bag Hydrating

Bag-hydrating, the other cooking method, just requires you to add hot water to food in a bag. Experiment with instant mashed potatoes. I add four tablespoons of powdered milk, and four of Parmesan cheese. And maybe some extra seasoning. For a long hike when I’ll need more calories, I’ll also add two to four tablespoons of oil or butter per bag. All of this gets mixed up and packaged at home, in my kitchen, before the hike.

The pre-seasoned bags of instant mashed potatoes are pretty good all by themselves. The milk, cheese, oil, and extra seasonings are my personal preferences. Each pouch of instant mashed potatoes, right off the store shelf, nominally holds enough for four servings, but that seems to be about right for one meal for one hungry person on the trail.

Try it at home first, to see how it works out for you.

Two other foods are couscous and ramen noodles. Minute rice and corn meal dishes need too much heat to bag-hydrate, but bag-steaming will work for them. Depending on what’s available in your area, you may find something like instant bean mixes. These work pretty well either alone or mixed half and half with instant mashed potatoes. Instant refried bean mix. Instant black bean mix.

Hummus is an option and doesn’t need to be cooked, if it suits you.

There are lots of recipe resources available for those who need them. I prefer either minimal cooking of very simple foods, or foods that don’t need cooking, like cheese crackers, corn chips, potato chips, or dry breakfast cereals.

I did hear a rumor third hand of a woman who hiked the Pacific Crest Trail in 2005, who was said to eat only canned cake frosting. I overheard one guy talking to another and the first guy said he’d talked to a third guy who saw inside this woman’s pack one day, and there was no food in there but cans of frosting. Sugar and fat. Calories. That’s really about all you need.

Take your daily vitamins, stay hydrated, and stop in town every week or so to eat your vegetables, and you’ll be OK. But calories come first.

Exercises

  1. Try steaming some cornmeal muffins at home. If you don’t like cornmeal, then try something else. Just for fun.
  2. Look through catalogs of outdoor gear. Find a portable oven that works with a backpacking stove. Buy the oven and the stove. Then keep track of how many times you use them, if ever. Write a short story about your experiences, changing your name and location so no one will ever find out you were really that dumb.
  3. Stand up, go over to the window, and stare up at the sky while you scratch yourself and yawn. Feels good, doesn’t it? You can do this every day while you go backpacking, but you have to go. (Tip for the savvy: leave the window frame at home.)

Monday, January 13, 2020

Story Break: A Wee Mouse Haggis

Story Break

A Wee Mouse Haggis

Long days on the trail really make you drag. You get tired. And hungry, so you’ll daydream about food you ate in a previous lifetime. You can’t carry enough to eat, the longer you go, so you get more and more hungry. You don’t notice this until you’re on the trail a while. Like weeks.

You start to wonder about things. You look at the sky and see cotton candy. You stop for water at a muddy stream and you want to puke it gets so hard sometimes and tired, but you have to, and while you’re topping up your bottle you start thinking about coffee with cream and sugar in it, and you don’t drink it that way. I did. I thought about it. I can’t stand coffee with cream in it, cream and sugar. How can people drink that slop I think when I see people doing it. And then all day that’s all I thought about, how the cream is smooth and fat and rich and the sugar is doing something down there mixed in with the coffee, floating around carefree and sweet, waiting to be swallowed. Everything hot and smooth almost like a full meal, thick and life sustaining. And I thought about it all day and dreamed about it all night until I almost died.

Give me a heavy mug full of hot black coffee and I’m happy. Has a sharp inky cutting edge on it. Give me just a mug full of boiling hot water and a couple tablespoons of ground coffee. I’ll throw in the coffee and I’m happy, I like it simple. You don’t need more than water and coffee and a cup. Fancy doesn’t taste good. What tastes good is what tastes good. But I wanted that cream and sugar like it was life itself.

The longer you’re out the more you think. Songs start drifting through your head. Ones you’ve heard over and over but can’t even hum. They just float up to the top and out come the words, and the melody. You sing them over and over again. Just like that. You never knew the words, you can’t sing, you can’t hold a tune and then you sing all day. And you’re always thinking about food. It gets down to that. Always food.

You start thinking about things you’ve had. Then about things you’ve never had. Hakarl: fermented Icelandic shark buried in sand for months while it ferments. Sauteed silkworms like they eat in Chinese factories, no waste. Things like that. Snake tongue on a cracker. Bat wings with peanut butter, crunchy, light, tasty. Spider salad. You daydream. In the past people took what they had and made something from it. They were hungry. Sometimes it killed them. Sometimes it didn’t, and sometimes they made it the national dish. Times were hard. You used the spare parts of everything. You had to eat.

Like with haggis. In Scotland where they had sheep and never wasted anything. In case of a sheep drought. They had sheep droughts. Poor people, they were. Like hikers. They chopped up whatever and mixed it with oats and whatever and stuffed it back into the sheep stomach and boiled it and ate it. It kept them going.

Now they throw it too. Times are better. They can take food and make a sport out of it.

McKean Foods sponsors the World Haggis Hurling Championships. They’ve made haggis since 1850, McKean has. Can’t get away from it, so they play with it. “The tradition of Haggis Hurling dates back to early Scottish Clan Gatherings, where the women folk would toss a haggis across a stream to their husbands, who would catch the haggis in their kilts.” The Scottish way — carrying a pail of boiled sheep guts out to the fields for hubby’s lunch.

Robin Dunseath started it though in 1977 at the Edinburgh Gathering of the Clans. He is an Irishman. It was his joke. He wanted to revive an ancient sport that never existed to prove how gullible people were.

Nobody questioned him, they just threw with pride. Then he started awarding certificates in the Fellowship of the Order of the Crumbs to the best ones. People who got them he called FOC-ers. Dumb FOC-ers, them, they didn’t get it. After 20 years of this he wanted to move on from this joke and confessed and no one believed him. It had to be true, they were doing it every year now, it just had to be true. They planned to make it an Olympic demonstration sport in 2004.

How to hurl haggis. It has to be done while standing on top of a whiskey barrel. Hurlers get points for distance and accuracy, but nobody says what they aim at, maybe they just try to get it as far away as they can. “The Haggis has to be edible,” that’s another rule (probably capitalized out of respect). No word on how they define edible, but the sheep stomach bag can’t break open when it hits the ground. Instant disqualification. Everyone might puke, at the least. Someone bold goes up to check on it to make sure it didn’t break.

Alan Pettigrew got the hurling world record in August 1984. He stood on his barrel at the island of Inchmurrin at Loch Lomond and heaved his one and a half pound regulation haggis 180 feet and 10 inches. The Guinness Book Of Records says so. Now some people do it professionally. They still believe it’s real. They daydream too, about the Olympics one day. Hunger will do that to you. People want something to believe in and dream about. If you walk all day, every day, you dream. Sometimes about haggis.

Mouse Haggis, An Ultralight Dining Experience

Ingredients:

  • 1 mouse stomach
  • 1 mouse liver
  • 1 mouse heart
  • 2 mouse lungs
  • 1 mouse brain
  • 3 and a half thimbles of quick-cooking oatmeal
  • 1 thimble of chopped onion
  • 1 thimble of suet or butter
  • 1 pinch cayenne pepper
  • 1 pinch grated nutmeg
  • Salt & pepper to taste

Remove the mouse stomach, cut it open and discard undigested food.

Place the mouse’s liver, heart, lungs and brain into a tiny pot and cover with cold water. Bring to a boil and simmer for one hour. Chop the organs into small bits. Keep the the liquid.

Toast the oatmeal. Mix the other ingredients with the oatmeal and add the liquid.

Fill the stomach with all this and pin it closed with a toothpick or a thorn. It’s too small to sew shut the normal way so don’t even try.

Simmer the filled mouse stomach for one hour. Poke a few holes in the stomach while cooking to keep it from exploding. You probably don’t have to do this unless you sew it shut. Don’t get carried away and try any needlepoint. You just want supper.

To serve, drain the haggis, place it on a plate, open the stomach, and spoon out the filling. Or just swallow it all because it’s small. You’d need a doll spoon anyway.

Note: The U.S. government has declared that sheep lungs are dangerous for human consumption, so traditional haggis is illegal in the U.S. Some state and local laws ban the sale or consumption of sheep stomachs and/or brains. Probably goes for mouse organs too.

While your haggis is simmering you can go ahead and butcher the rest of the mouse. Try not to cut yourself. It’s a wild mouse and you don’t know where it’s been. Try not to drool. That’s bad too.

You have some sort of knife even if you’re going light. Take it and skin the mouse carefully. When the skin’s off you can remove the meat. The chuck is up front where the shoulders are, like on a beef carcass. Take a hunk off of each side as far down each front leg as it’s worth going.

Find what you can around the ribs, but there won’t be much. Mice don’t bulk up much, even the ones that are body builders, and the wild ones never are, they’re runners and diggers — mostly shoulders and butts.

You should get some more meat along the spine though. The rib eye, tenderloin and sirloin areas where mice have well-developed muscles are back there. The rear is going to be your other big bonus. This is where you’ll find the rump roast. Use your judgment in how far down the back legs to go. Set all the cuts aside on a clean rock or a leaf while you’re doing the butchering. You can fry up the pieces, or throw them in with the haggis, or roast them on the end of a small stick while the haggis is cooking.

If you’re a good mouse hunter you’ll have more than one. Mice are nutritious.

They Know How To Do It In Zambia:

How to Cook Mice

The cooking of the mice is very simple. The mice are gutted, boiled in plain water for about half an hour and salted. They are then fire dried until they are nearly bone dry. Mice are never cooked any other way.

Some do not know how to cook mice.
Onion, tomatoes in the mice.
Onion, cooking oil in the mice.*

So goes the song about a silly young modern housewife who did not learn proper mouse cookery. She made a grave mistake. These ingredients are taboo in Zambian mouse cookery. Don’t be an embarrassment on the trail. Learn how to cook your mice. Don’t play with your food. Your world record for hurling mouse haggis will not count, whether it is from your hand or out of your mouth.

* “Mice as a Delicacy: the Significance of Mice in the Diet of the Tumbuka People of Eastern Zambia”, by Mwizenge S. Tembo, Ph.D. See https://bit.ly/2T77zWR (Bridgewater.edu) or http://bit.ly/JPMtoG (Internet Archive) for more info.

How To Cook On A Backpacking Stove

How To Cook On A Backpacking Stove

Tis an ill cook that cannot lick his own fingers. — William Shakespeare

A near tragedy: the first week out on the expedition someone lost the bottle opener, and for the rest of the trip we had to subsist on food and water. — W.C. Fields

Finally!  We’re!  Getting!  Some!  Where!  Here’s the basic level of stuff you need: a stove, a pot support, a pot, and a wind screen.  I also add a metal reflector to go under the stove, and a lid for the pot.  Confession time: my pot isn’t really a pot and doesn’t come with a lid.

Pots

My usual pot is a 16-ounce aluminum measuring cup, once available from an outfit called “Gooseberry Patch”. It was priced at $5.95. As far as I’m concerned these are just about ideal. The cups I have are fat, short, stable cylinders with a handle on one side, weigh 1.9 ounces (54 g), and are pretty darn small, cheap, durable, and also are so easy to operate that I can even use my spare hand to scratch with and not get into serious trouble.

This arrangement has only two problems as I see it: (1) there is no lid to my pot, and (2) the handle sticks out, sorta, and doesn’t fold. For a lid, I use a piece of aluminum foil, and just swear at the handle every now and then. Mostly, we get along just fine. So far the pot has never sworn back at me. It’s too good for that. I am so ashamed of myself.

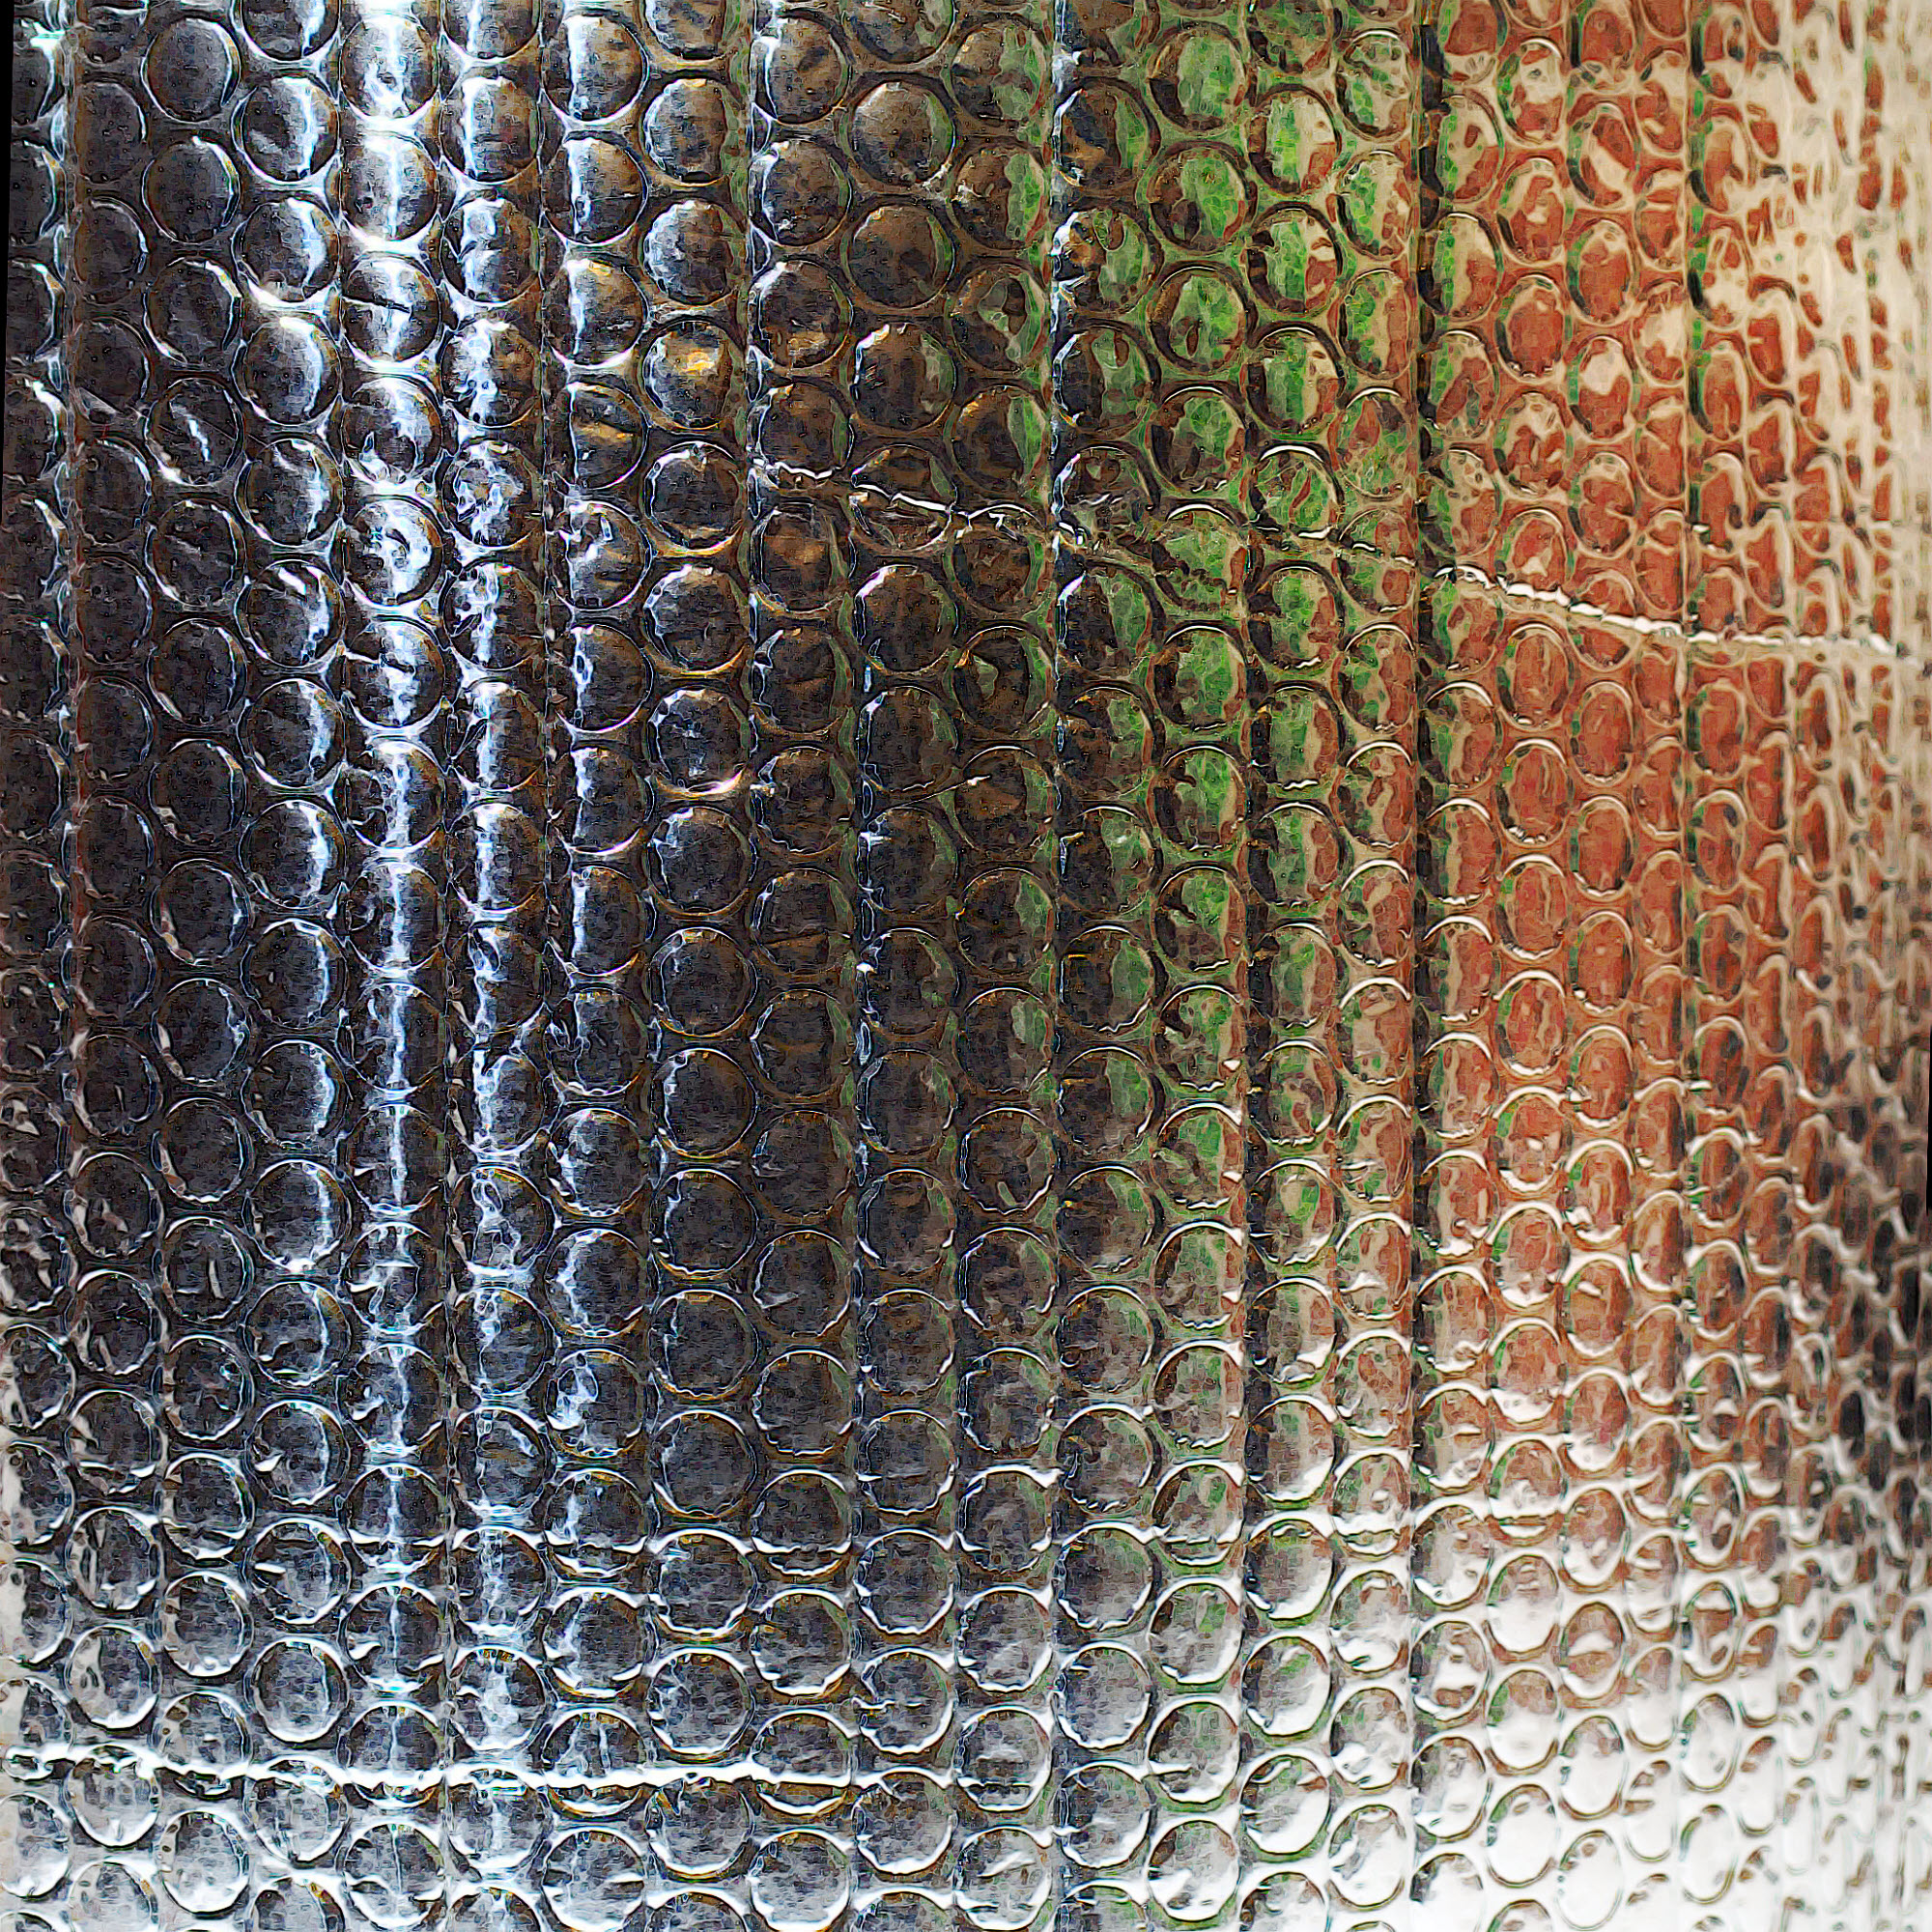
The next non-essential item that’s essential for me is a cozy of some kind. I carry my cook kit inside this, and use it to hold cooked food (inside a plastic bag) before eating it. The cozy is made of a “foil-bubble-foil” material (aluminized bubble-wrap). The stuff I have goes under the “Reflectix” brand and is available at building supply stores. You can cut it with a scissors. With heavy aluminum foil on each side and a middle layer of bubble wrap, it does a great job, and it’s stiff enough to make a nice container to carry your cook kit in. With a scissors and a little duct tape you can make any size and shape you want.
Reflectix

My wind screen is made from two or three layers of regular household aluminum foil. I pull off enough to form into a cylinder around my pot while it’s on the stove. (Fold over the two free ends and staple them together and you have a hollow cylinder.) The width of the aluminum foil is the vertical height of the wind screen and it’s just about right for my low-profile setup. If the inner sides of the screen stay away from the flame, it works OK. If the flame touches the foil, it gets brittle and crumbles. Therefore I makes ’em big, using plenty-o-foil. Weighs less than an ounce (28g).

I keep the wind screen folded up and either wrapped around the outside of the cooking pot (when using my 16-ounce/0.5L cup) or tucked inside if using a larger pot. That’s one nice thing about the foil: you can fold it or roll it up. With care one foil wind screen can last at least two weeks, even if used twice a day. I’ve done it.

The wind screen forms an open cylinder. One end sits on the ground and I pucker the other end so it’s almost closed, resembling a stuff sack with its drawstring pulled tight. This leaves a little hole at the top for the stove exhaust to get out, but protects the stove and pot from cold air and wind.

I take care to lift the bottom edge of the wind screen about a half inch (13mm) from the ground so the stove can get enough oxygen, and if the weather is a little too breezy, I put a small stone or two on top of the wind screen to keep it in place.

These days there are lots of options for lightweight cook sets. You really don’t need much of anything other than a metal container to heat water in. MSR, Olicamp, Evernew, Snow Peak and others make an amazing collection of gem-like titanium pots. Expect to pay $25 to $80 or more, depending on your needs. Or go cheep-cheep, and cheap out.

Wal-Mart, our beloved all-American, impersonal mega-institution, used to sell a generous-sized aluminum pot-like thingy (my best guess is 40 ounces or 1.2 L). They called it a “Grease Pot”, and I guess it’s normally bought by people who cook a lot of fatty meat, day after day, and can’t eat all the grease at once, but just can’t bear to throw the stuff away either.
Aluminum can

You could buy one (the pot, not the grease), throw out the included strainer and the plastic knob on top, and you had a sort of pot. The last price I saw was $5.47, down from the stratospheric $6.97 I paid three years earlier. But not every good deal lasts forever. This item seems to have disappeared from the product lineup (they’re going upscale now), so check around and see if there’s still something similar, somewhere.

Use your gloves as potholders. Don’t actually cook food either. Just heat water. This keeps things clean (keeps any pot clean), and avoids dealing with a super-thin pot that easily carbonizes its contents.

If this option is too easy for you, then sniff around a low-end store somewhere, or a GoodWill, and look for cheap aluminum cookware. A company called “Mirro” is the champion. You might not want to buy a full set to show off in your kitchen but it’s just right for the trail. Cheap, light, small and simple. You may even find something with a lid. Take a look at the smallest coffee pots — after all, you’re just heating water, right?

Here’s how I carry my stove and cook set: Put the stove, under-stove reflector, pot support, and matches or lighter inside the pot. I carry a box of strike-on-box matches (usually two boxes worth of matches in one box), and protect them with a sandwich-size ziplock bag.

If the pot is big enough, stuff in the wind screen, which should go in first, curled around the inside wall of the pot. You can carefully fold and flatten this screen, into a thin band. When you’re done you’ll have a sort of flat strip about two or three inches wide (50 - 75mm) and as long as your roll of aluminum foil was wide. When using my 16-ounce measuring cup, I wrap it around the outside, since the cup is way too small to hold the wind screen and the stove and so on.

When done with all this folding and stuffing, put the whole thing inside your pot cozy, and then inside a gallon-size ziplock bag. The bag keeps everything together, keeps dust, dirt, bugs and twigs out, and protects your pack from absorbing food odors. It also keeps food odors in, so you aren’t trailing a scent stream behind your blind side as you walk along.

Utensils

I munch a lot of mooshy stuff, cooked in a ziplock bag, and used to eat out of the bag using a spoon. One day the spoon broke. Oh, noes!

After sitting down for a while to decide if swearing and waving my arms around would really help, I decided that it wouldn’t, so I made double sure that the bag of warm, cooked potatoes was tightly sealed, rolled over that end a turn or two to be extra double sure sure, held it tightly, and tore one corner off the bottom of the bag with my teeth. Then I squeezed the potatoes out like squirting toothpaste from a tube, into my mouth. Guess what? Works great, and now I never carry a spoon.

Now I don’t have to keep track of a spoon, replace one that breaks, or worry about whether licking it off after each meal is really the same as washing it.

Fueling

Let’s stick with alcohol stoves here. We’ll mention wood stoves later on.

To fuel an alcohol stove, first you have to carry fuel. I use a Platypus brand half-liter bottle. My old-style “Li’l Nipper” bottles weigh 0.7 ounces (20 g) empty. Newer bottles of the same capacity are probably close. These are small enough to be handy, but hold enough for several days, and if you squeeze out the excess air you don’t find them expanding to the danger point if you gain a lot of altitude. With hard-sided bottles you can’t remove the air unless you fill them to the top, or carry them nice and flat inside a pack pocket. And with the Platypus bottles, you can easily bring two for longer trips, or to split your fuel into two packages so you won’t be totally out of luck if something happens to one bottle.

Back to our story.

The cap on all Platypus bottles holds 0.25 ounces (7 ml) of fuel, so it makes a good measure. Usually, for 16 ounces of tea, using treated water (so it doesn’t have to be boiled), about 1.25 to 1.3 caps full will do the trick, bringing 12 ounces or so of water up to just short of boiling temperature. After the tea has steeped I can add cold water to get it down to drinking temperature, and have at it. Instant coffee would be easier — you wouldn’t need to get the water so hot, so you could use less fuel.

To fill the stove, pour fuel from the bottle into the cap, being careful not to spill, then with equal care pour it into the stove. Put the cap back onto the fuel bottle and squeeze the air out before tightening down the cap. This prevents pressure buildup in the bottle (and possible leakage) when you gain a lot of altitude.

If you set the fuel bottle down while you’re filling the stove, you stand an excellent chance of having it fall over and spilling all your fuel, so watch out.

I tried a push-pull type cap for the fuel bottle, but mysteriously kept losing large amounts of fuel, even while being careful to carry the bottle absolutely upright in the pack. The push-pull cap is one that telescopes open when you pull on it, and pops closed when you push on it — no screwing off and on again. It was just loose enough to let the alcohol vaporize and leak out of the bottle. This was not at all funny when I got halfway through a trip and ran out of fuel, so expect the same results if you go this route.

Priming And Lighting

There are two kinds of people: bigots, and good, reasonable folk who agree with me.

Likewise, you can say that there are two kinds of stove: those that need priming and those that don’t. I don’t like to prime a stove. The alcohol stoves that don’t need it are non-pressurized. They range from a simple cup to fancy and esoteric constructs of baffles, conduits, air holes, and multiple walls. Non-pressurized stoves have the fuel open to the air, so you can stick a match in there and light it. We’ll see more on these topics in the section on making stoves.

Conversely, pressurized stoves have to be sealed up while they’re burning, so you can’t just light them right off. You have to fill the stove, seal it up tight, prime it by dumping some fuel somewhere, light that, let it burn, AND THEN light the stove.

You get to choose your own preferences, but for me, I like to keep it really simple, and use a non-pressurized, non-priming stove.

These stoves are really easy to use. Just add fuel and light. If the weather is cold (like under 40 degrees F/22 C), you may have to stick the match almost into the fuel to get it going. Using a cigarette lighter with cold fuel is a lot harder than using a match, so that’s why I prefer matches, though I always carry a lighter as a backup. Using a fiberglass wick reduces the cold weather problems to almost zero.

To light a cold stove using a cigarette lighter, you have to flick the lighter on, then turn it so the flame is pointing down, and then sort of stick the flame into the fuel until it catches. Well, guess what? The flame doesn’t like to burn downhill. It always curves back up again and gnaws on my fingers. Ow! I can’t take much of that, so I use matches.

Snuffing And Storing

Some alcohol stoves allow differing degrees of simmering. If you get into that end of things, you’ll eventually end up with some excess fuel left in the stove. The Swedish Trangia commercial stove has both a simmering option and a screw-on top that allows you to keep unused fuel right in the stove.

Home-made stoves have no screw tops to keep unused fuel inside them, so they need to be emptied of excess fuel. This can be messy. You’re guaranteed to get most of the fuel spilled on your hands, over the sides of your fuel bottle, or on the ground unless you go to the trouble of carrying a funnel. More things to keep track of, and more fuss, and even a funnel won’t really solve the whole problem.

The Trangia stove is pretty good in this regard, with its fancy screw-on lid with O-ring and all, but the stove alone weighs three ounces (85g), so it’s outside our arbitrary limit for ultralight stoves, but it might suit you nevertheless. REI (Recreational Equipment, Inc.) sold me a complete lightweight Trangia outfit with stove, pot support, pot and lid, and pot lifter for about $30. Total weight, just under 12 ounces (340g). This is the alcohol-burning outfit I started with, before eventually deciding to make my own.

Staying really simple, you can just heat water for tea, coffee, cocoa or whatever else excites you as a hot drink, and heat water for all your cooking. If you do that, and don’t simmer or cook in the pot, you can keep things clean. Learn to measure out the right amount of fuel, dump it into the stove, light it, put on the wind screen, and come back when the fuel has burned out. Forget about fussing with simmer rings and draining the stove. And about washing pots.

But these ideas are only a guide. You yourself have to decide what’s right for you.

Exercises

  1. If you haven’t cooked outdoors before, learn how before your first backpacking trip. Try cooking in a local park (yes,one that allows it). Work out your technique before you commit to a real backpacking trip.
  2. Start a blog. Seventy-five thousand people a day do this, so why not you? I mean, c’mon! You’ll eventually find something to write about.
  3. Remember, today is the first day of the rest of your life. This is especially true if you’re in the witness protection program. Don’t try to contact me. Too dangerous for both of us. Go back and delete that blog thing too. Right now.
  4. Make your first trip to Wal-Mart. It’s a little like going to another planet. Keep your guard up, or let it down, as appropriate.

Wednesday, January 8, 2020

Story Break: Cleaning Your Stove

Story Break

Cleaning Your Stove

One of the simple beauties of a lightweight alcohol stove is that you never need to clean the little sucker. Or adjust anything. The alcohol stove is basically a little cup with or without hollow walls.

It might be partially pressurized (if you want to get fancy), but probably not, and it doesn’t matter anyway. Alcohol burns cleanly, these stoves have no moving parts for the most part, and the one or two that do have moving parts don’t have any that need cleaning or adjustment.

That’s about it, unless you get a pinch of dirt or a few pine needles into the cup of your stove. If you do and the stove isn’t burning at the time (i.e. it’s “out” as the experts say), turn it upside down and tap it a couple of times, and then blow into it. Bingo. You are now an expert at the art of cleaning stoves. If you would like a certificate to show off to your friends, please send a money order for $29.95, and be prepared to wait six weeks. Add $10 if you would like that framed.

A clean stove is a happy stove. You can tell if your stove is happy by filling it with fuel, lighting it, and waiting a couple of minutes. After it gets hot the alcohol in the stove will begin to boil. Get down on your hands and knees and turn your ear toward it. If you are an old guy, then try to remember which of your ears is the good one, and turn that one toward it.

If you do this right you will be able to hear the stove singing quietly to itself as the fuel boils inside it. This is the sound of a happy stove. A happy stove is a fulfilled stove, and a happy, fulfilled stove will be ever so glad to help you out any old time at all. With the cooking, for example, each and every day.

If you do this wrong however, you will set your hair on fire and have to run around screaming until someone puts you out. This is not necessarily a sign that your stove harbors any ill will toward you. It could just mean that your stove is a little too eager to share its joy and has gotten a tad out of bounds, without actually meaning to. Or it may simply mean that you are a clumsy idiot.

You might notice some pain after experiencing this effect. It is one of those “growing pains” that you thought were just stories that your parents made up. A growing pain is in fact a feeling that accompanies an increase in intelligence, and is often associated with the concepts of “trial and error” and “learning from experience”. Don’t worry about it at all. It is completely normal. Enjoy it.

If you do decide that the stove is out to get you, perhaps after a counseling session or two to confirm your suspicions, remember that you can always smash the little wart flat into the ground by stomping on it any time you want. You really are that much bigger and stronger, and always will be. Of course if you do this you will have to make another stove, so in most cases it’s just better to try getting along and staying friends, you and your stove.

Group Backpacking Issues

Group Backpacking Issues

One man alone can be pretty dumb sometimes, but for real bona fide stupidity there ain’t nothing can beat teamwork — Mark Twain

OK, then, so you finally found some friends. Then what? Well, a small, light stove is still a small, light stove. But you may want to practice groupitude and cook together on one stove, in one pot, at one time.

Generally, this is going to be difficult for the average shirtpocket-sized alcohol or Esbit stove to handle, or even for a small wood-burner. If we stick to our definition of an ultralight stove weighing no more than half an ounce (14g), or of a wood-burner coming in at no more than five ounces (142g), we’re kind of restricted. But one way to look at these numbers is “by person”. Remember now, you’re not alone any more. Start with a two-ounce stove, to be used by four people, and divide. Hmmm. Two divided by four is oh, let’s say half an ounce, which puts us back into the middle of the same ballpark.

Since a heavier stove of a given design uses the same materials put together in the same way, then a heavier stove has to be a bigger one, and will be putting out more heat. The exception may be the solid-fuel-tablet stoves. I’ve experimented enough with fuel tabs to decide that I didn’t like them. They work fine for some people, but not for me. Probably my fault, but then so much is, these days.

Maybe I wasn’t meant for these things because many people do like them, and use them all the time, but they will definitely pose a larger problem for group meals, since with fuel tabs you don’t get a bigger stove with a bigger burner. Each each fuel tablet is its own burner.

Larger alcohol stoves are a little on the odd side of things, too, but they scale up pretty well. They’re even used in the Iditarod sled dog race (yes, this is the one in Alaska, the cold place) to melt water for the dogs and mushers, and to heat water for cooking. These are much bigger stoves though. I’ve seen one, and it’s about the size of a gallon paint can, made of tough enameled steel, and it takes up to a pint of alcohol at one filling. A serious BTU generator.

Instead of making a stove from a 12-ounce aluminum soda or beer can, or even a 5.5-ounce juice can (for those who tingle at the thought of jewel-like tiny things), you can make the same sort of stove from a 25-ounce can. See the big Foster’s or Heineken beer cans, or any other large-diameter container that suits you, and hack away.

Wood-burning stoves scale up too. Use a bigger stove that can handle more fuel and get a bigger flame. Cook for more people at one shot. Simple physics.

Small cans

What we’re getting at here is not that versions of ultralight stoves can be made to fit any circumstances, but that the concept can stretch if you want it to. Probably the practical limit is cooking for two or three people at a time, using a larger version of your shirt-pocket stove, and even that is a stretch.

As the group size gets bigger the requirements change, but so does the whole cooking landscape. If something fails, you have two, three, or even more heads to figure things out. If things go really bad and you lose the use of a stove entirely, you can depend on one another.

White gas and canister stoves have a bigger payoff in groups. They just put out more heat than any quarter-ounce alcohol stove can. Dinner for four may cook faster on a manufactured stove than a tiny and elegant home-made one. It becomes easier to manage fuel canisters if you know you’ll be draining one every four or five days while cooking for a group of four, versus using a sip of fuel on this trip and that, going solo, and never being quite sure when the dang thing is too low to depend on. It’s pretty easy to have a partner carry a backup fuel container for the group.

Then again, if each person in a group does their own cooking, the advantage snicks back a notch. Have more stoves, and they can just as well be smaller. Have an accident, lose one stove, and you still have two or three more in the group. You may have to wait in line to cook dinner, but you can still cook, and each person is still carrying only a small weight.

Pretty much up to you and your own sense of style, this one.

Exercises

  1. Practice being dumb for a while. Then practice being smart. Spend more time on the one you have less experience with, until you’re equally good at both. Then write up your experiences, and try to decide which one is better. If you have trouble doing this, then you need more practice at being smart. See if your friends can help. Try finding some friends.
  2. If you still can’t get any friends, then buy a sock puppet. You need someone to talk to, and sometimes these little guys can be just the ticket. Take your puppet to dinner and get to know each other. Ignore anyone who stares at you. This is your life, not theirs. My sock puppet and I can almost pass for identical twins now, but it did take practice.
  3. Remember, even if your sock puppet runs away, there’s still hope. Fake sanity and join a hiking club — they aren’t too discriminating. Over a period of years they may gradually come to trust you.