Batch-Loaded, Inverted Down-Draft Gassifier
(wood gas stove)
Name of stove: Inverted downdraft wood gas.
Type of stove: A wood-burner that works with one charge of fuel at a time to produce a hot, smokeless fire.
URL of original instructions: Rick “Risk” Allnut did a lot of work (http://bit.ly/Ky3CCG), as did Ray Garlington (http://bit.ly/L3xpjN) Unfortunately, both web sites are now gone, and you'll have to work with the Internet Archive.
For general info on light weight do-it-yourself stoves, see the Zenstoves links page at http://bit.ly/9fZe6O.
Also check out the Sierra stove at http://bit.ly/dv0Cp6, or at the Intrnet Archive (https://bit.ly/2z0dWln and https://bit.ly/2yTEHYR).
Description of difficulty: Requires drilling a lot of holes, cutting and positioning springy and prickly hardware cloth, reaching into a sharp-edged small can to place bolts. Not too hard. Not harder than the DOSIP semi-pressurized alcohol stove, but if you have large hands you’ll need to start with a bigger can. Overall, this is no harder than anything else here, but is larger and involves working with steel rather than aluminum. You’ll need some “real” tools.
Overview: This is about the simplest wood-burning stove that’s worth building. There is a whole subculture of stove makers who have followed ZZ Manufacturing’s lead and have produced wood-burning stoves with battery-powered fans, to match the “Sierra” commercial stove. All of these home-made stoves are clever, and some of them are elegant and well-finished. Then again, they are all dependent on battery power and electrical circuits.
A big step down from a stove with an electric fan is a can with some holes punched into it. This will do, but it is crude and smoky.
The wood gas stove falls in between, but not exactly in the middle. This stove is extremely simple, much more so than a can with a battery and computer fan, but yet it is also extremely sophisticated, and still has absolutely no moving parts whatsoever.
The operating principle of the wood gas stove is that burning wood produces smoke, and it is also actually not the wood but the smoke that burns. It is also the smoke that makes a stove smoky (Duh!), so the trick is to generate lots of smoke and then burn it before it gets into your eyes.
Commercial wood gas stoves use fans and flaps and doors and whatnot to control the flow of air and smoke, but our stove is just a cylinder in which you burn wood. That’s a big plus. The fuel supply (if you have dry wood) is infinite, so you don’t need to carry any. The stove is dead simple. Once you get it built, that’s it — nothing to adjust or maintain.
This stove also operates a little differently. Take the name: “inverted downdraft”. Well, that’s an updraft, an “inverted downdraft” is. Commercial wood gas stoves pull air in from the top and force it down from top to bottom using fans. This air flow is a downdraft. Our stove lets air flow from bottom to top, which is either an inverted downdraft or an updraft, depending on how fancy you want to sound.
OK, aside from being really simple in principle, the inverted downdraft wood gas stove is a little harder to make than most of the alcohol stoves here, even the fancier ones. You need an electric drill and a punch, and you have to assemble some parts using bolts and nuts and so on, so it’s a bigger deal to make it. But once it’s done, it’s done.
It is also larger and heavier, and although you don’t have to carry fuel, you do have to scrounge fuel on the trail, and you’re dependent on finding suitable, dry fuel as you travel.
To use this stove, fill it about half full of fine, dry twigs, no larger than the thickness of a pencil. Even that is a little thick. Ideally, the pieces should be about an inch long and about a quarter inch thick, but it can be hard to break twigs that short, especially so as they get thicker. Finer is generally better, but also harder to find.
Once the stove is loaded with fuel, sprinkle a bit of stove oil or alcohol onto the top of the wood — maybe a teaspoonful — as a primer. This should soak in a bit, and supposedly stove oil works better, but alcohol works fine. Light it at the top, and the wood burns from the top down.
The heat of the flames at the top vaporizes the wood below the flame, and the open bottom of the stove allows fresh air to rush in and create a strong updraft. Additional air holes near the top of the stove mix in more air. All these vents, combined with keeping the cooking pot two inches or more above the top of the stove allows complete combustion.
Fuel should be loaded in horizontal layers. Oddly, having the fuel densely layered-in is better than having it loose. Dropping in twigs vertically or letting them all jumble together does not work as well. Short pieces of fuel all laid down flat in layers works best.
When loaded, lit, and used properly, this stove will burn almost without smoke. You will get an occasional wisp or two, but that should be about it. This is totally unlike the average wood fire or can stove, which has to be constantly tended, and which smokes before it gets going, while it’s burning, and after it burns down again.
The wood gas stove burns cleanly, and quiets down from a roaring blowtorch to a cool smolder once all the volatile gases have burned off. At the end you get a clean, warm charcoal glow, which eventually burns out, leaving a little clean ash behind.
If you don’t get enough fuel into the stove to complete your cooking, let it burn out and then recharge with fresh fuel, prime it again, light it, and start over with the new charge of fuel. Adding more fuel while the stove is burning will produce lots of smoke. Maybe that’s OK from time to time, but don’t be surprised by it. If this stove does not produce enough heat for you, build one using a larger can that holds more fuel. Scale up the measurements accordingly.
Technical details:
Warning: The stove described here is made using just about the smallest possible can. Larger stoves may be easier to make but will also be heavier and bulkier. You can twiddle to your heart’s content. If you are a normal-sized man with normal-sized hands then you probably need to use a larger can, or check a different set of plans to see how other people did it. To make this stove you have to reach one hand inside the can to get a nut threaded onto a bolt, and the can recommended here is less than three inches in diameter. If you can manage this with tools instead of your hand, OK, otherwise you’ll need a bigger can.
Height (can only): 4.4" (112 mm).
Diameter (can only): 2.9" (74 mm).
Full dimensions (including top and bottom supports): Height: 6.6" (168 mm); Diameter: 2.9" (74 mm).
Weight: 3.8 ounces (108 g).
Volume: Doesn’t hold liquid fuel, but about an 8-ounce (237 ml) equivalent, when filled with broken twigs.
Composition: Steel. Steel can (Del Monte sliced peaches in the 15.25 ounce size), galvanized hardware cloth top and bottom (to serve as integral legs and pot stand), plus a few bolts, nuts and washers.
Cost: Free, if you have the materials. Requires some ½" hardware cloth, some bolts, washers, and nuts.
Materials list:
One empty 15.25 ounce (451 ml) Del Monte sliced peaches can or equivalent.
Marking pen
Galvanized ½" hardware cloth (a piece 4" by 24" (102 by 610 mm ought to be enough)
Ruler
Sandpaper (100 grit, or thereabouts)
Electric or manual drill, with 1/16" (or 3/32"), and 1/4" bits
Paper hole punch
Sheet of paper
Tape
Wire cutters
Screwdriver
Pliers
Work gloves
Wire
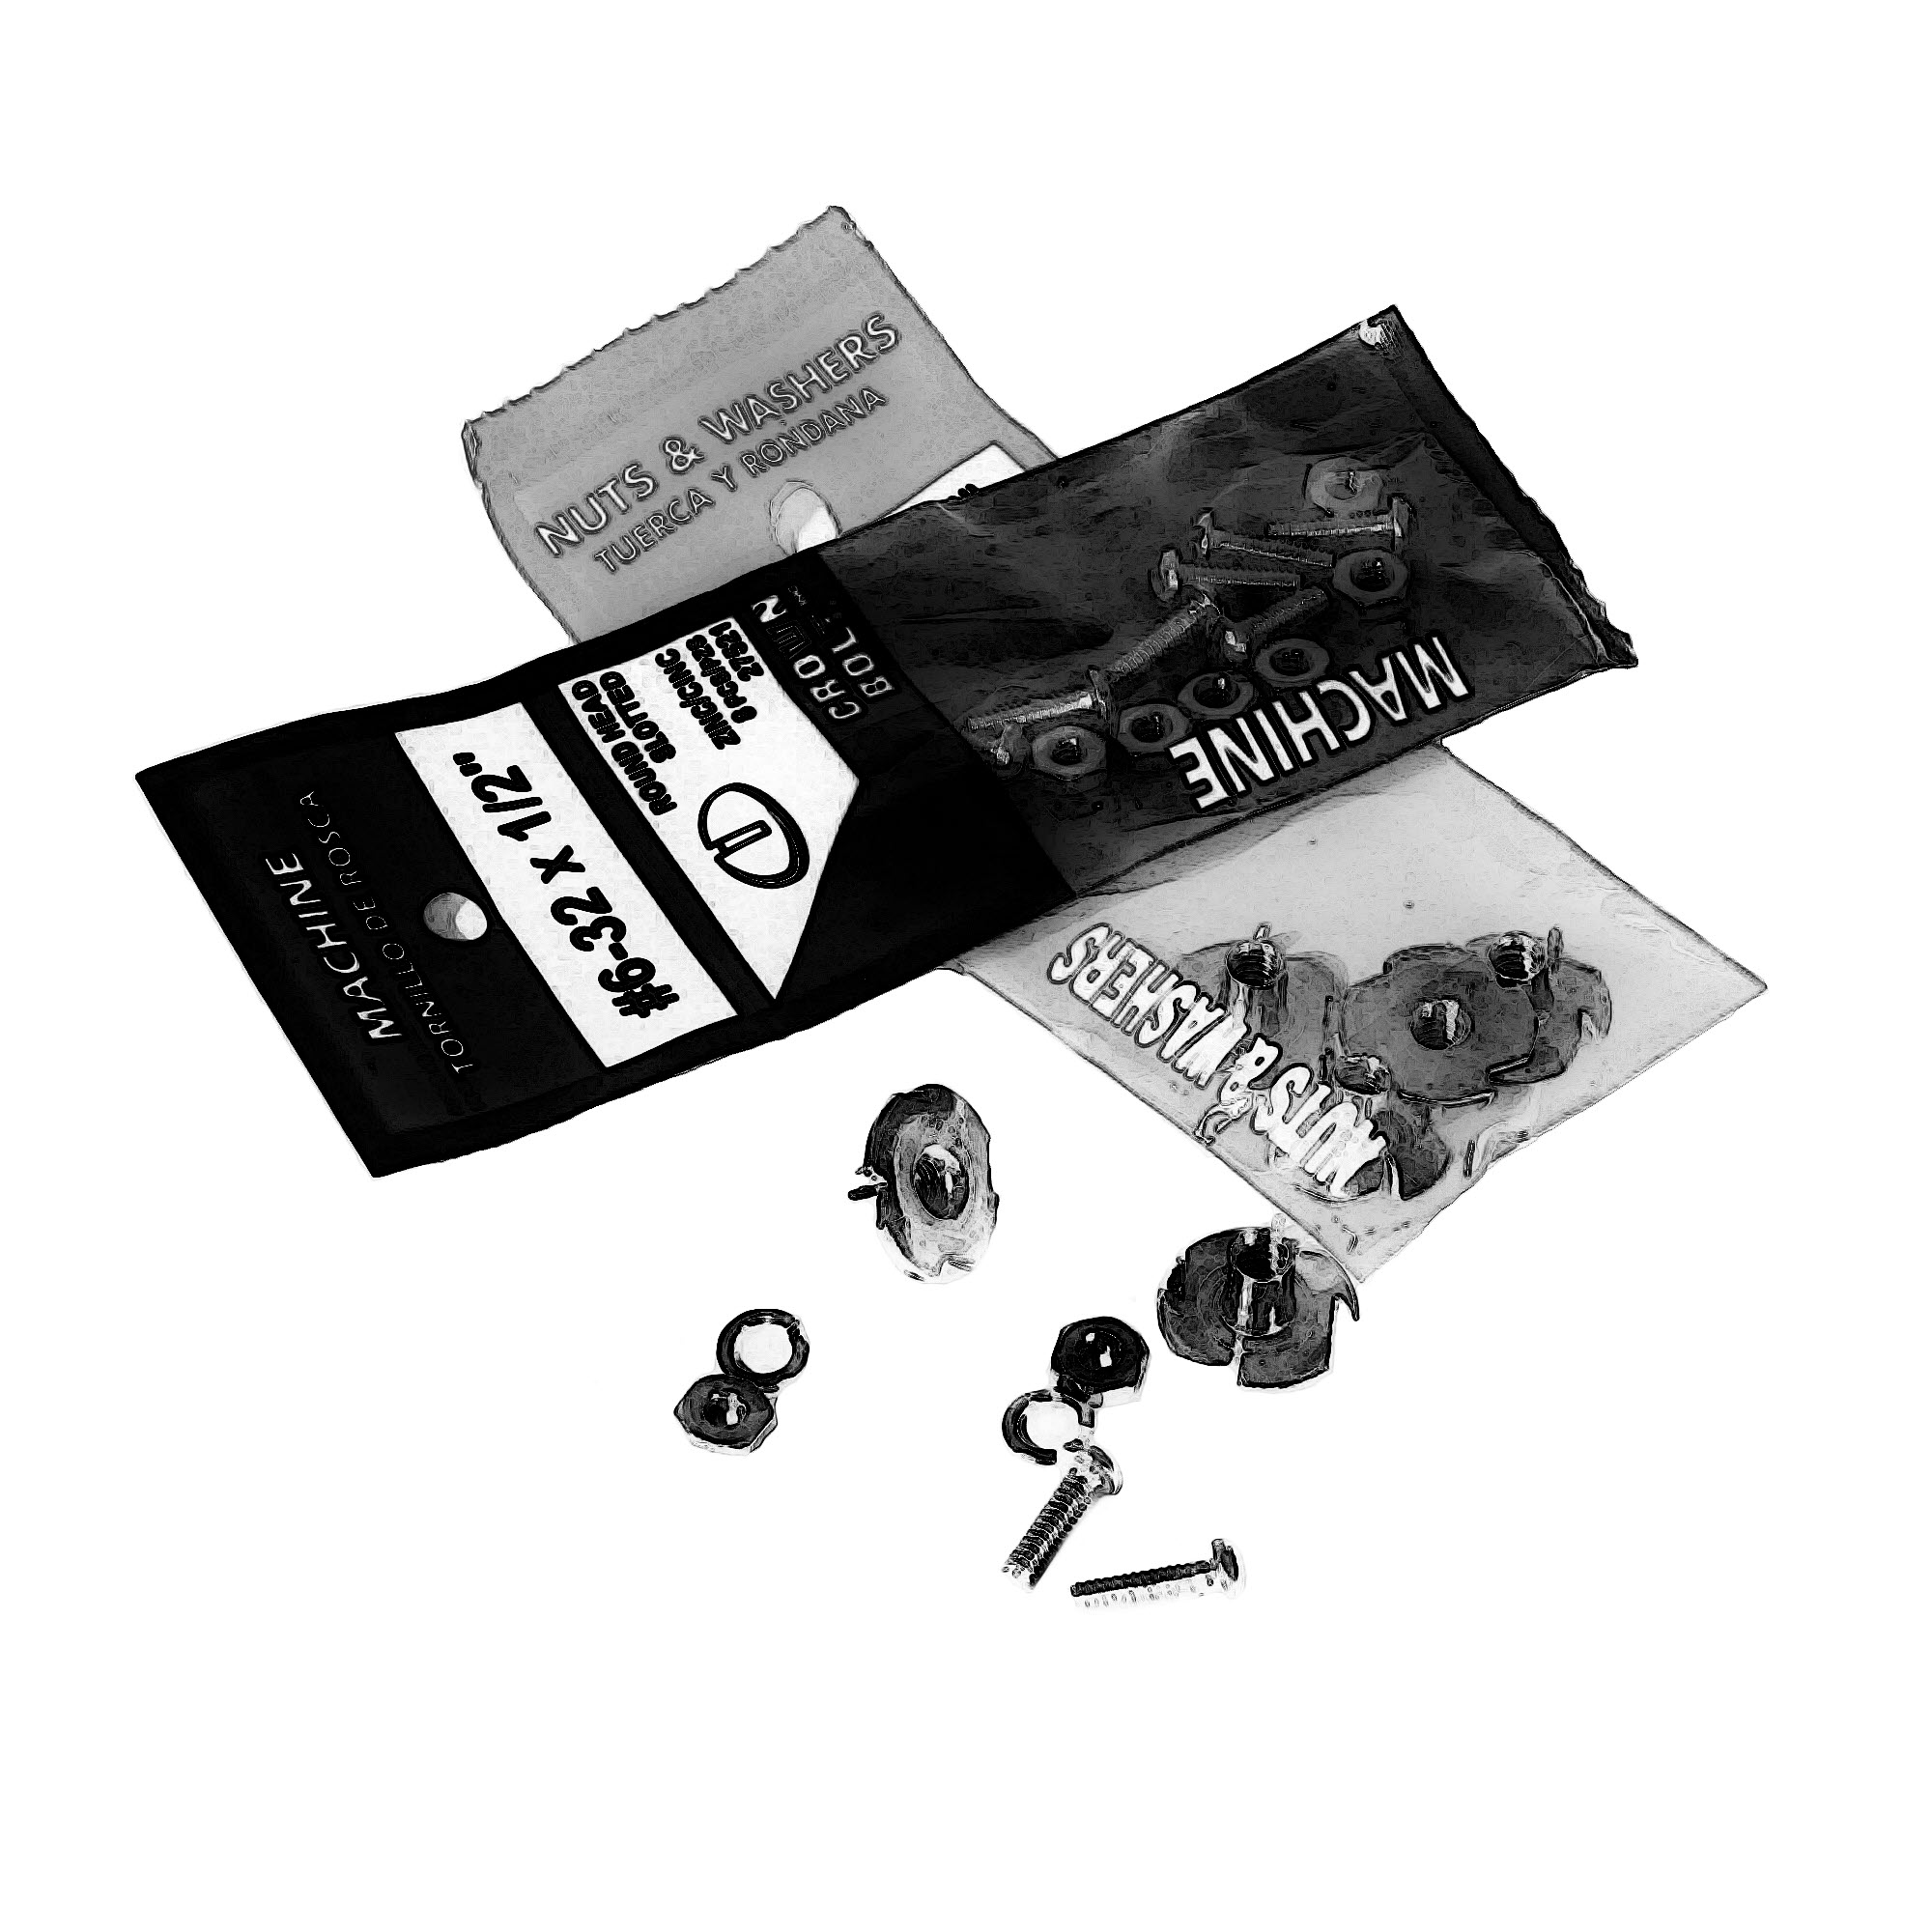
#6-32 x ½" slot-head machine screws (or equivalent)
#10-24 x 5/16" Tee Nuts (or equivalent flat washers)
Lock washers
Overview of construction process: Drill some holes in the bottom and sides of the can, then bolt a collar of hardware cloth to both the top and bottom.
Step-by-step construction:
1: Start.
Open the can. Eat the contents. Remove the top of the can, the label, and wash the can. Sand down any sharp edges inside the top of the can.

Now try to stick your hand inside the can. If you can’t, then you need a bigger can. This is OK. A bigger can is both taller and wider. Wider means more stable. It also means that the stove will be able to hold more fuel, making it easier to cook for two or more people. Look for a can about twice as tall as it is wide (think “smokestack”).
2: Drill ventilation holes in the bottom.
You will end up with two sets of holes, one in the bottom of the can, and one in the side of the can. We start with the bottom of the can.

Lay a ruler across the bottom of the can. Try to find the widest point, which means your ruler will be bisecting the can’s bottom. Mark the halfway point. Repeat this two or three times and you should have a set of points that pretty well overlap, and indicate the center of the can. Put a big dot there.
Mark two more spots between the first dot and the outside edge of the can’s bottom at approximately 0.5" (13 mm) intervals. This won’t quite work out evenly, but think of it as a good chance to exercise your intelligence and judgment.
Repeat this on the opposite side of the central dot, and then at 90 degrees, so you have a cross pattern. Then make some more marks in an X pattern. Altogether, if you use this size can, you’ll have about 33 dots.
Drill these out, first making a pilot hole with a small bit, and then with the large bit. It might help to take a nail or something else you can use as a punch and first make a small dent in the can’s bottom at each dot before drilling each hole. Place the punch, give it a light tap, then drill the pilot hole.

Then use a small bit and drill a line of holes just inside the can bottom’s outer edge. Check the accompanying photograph.
When you’re done, you’ll have the bottom of the can chock full-o-holes. This will form a fire grate.
3: Drill ventilation holes in the side of the can.
Now for some fresh air vents near the top of the can.
Make a ventilation template by taking a full-sized sheet of paper (8.5" by 11") and cutting off a strip along the long edge. It should be 1.5" (38 mm) to 2" (50 mm) wide.

Take this strip of paper and wrap it around the can, overlapping the ends. Mark the point where the paper overlaps itself, remove the paper from the can, and cut off the short end.
Measure down from the top rim of the can about 1.4" (36 mm) and see where you are. The side of the peach can is corrugated. You want to be in the trough (low point) of one of these corrugations. Find the nearest trough and record that distance. It might be 1.4" or 1.5" or 1.55" or 1.6", but it shouldn’t be less than 1.4". Let’s assume that it is exactly 1.4".
Take your actual measurement and mark your strip of paper with it. You want to get a line running the length of this paper strip, and 1.4" (36 mm) in from the factory edge, but use your actual measurement. Then fold the paper in half four times and crease it hard. Unfold it and punch a hole at each point where the line you drew intersects with a crease. You will have 15 holes.

Wrap the paper strip around the can again, with one side of it snug up with the top of the can, and tape it in place. Arrange it so that none of the holes or the taped ends fall over the seam in the side of the can.
Mark the can at the center of each hole you punched in the paper strip, and put a sixteenth mark at the point where the two ends of the paper strip meet, in line with the other marks.
Now drill a small hole at each mark, then go back and drill them out to full size with a larger bit.
Now you’ll have the bottom of the can full of holes, and you’ll have another 16 holes in the side of the can roughly 1.4" (36 mm) from the top edge of the can, and the can will have no top. Sand off any sharp edges.
4: Drill holes for the pot support.
Take a strip of paper as before and wrap it around the can, then cut it to length. It should be 0.6" (16 mm) wide. It will turn out to be just about exactly nine inches (229 mm) long. “Just about exactly” is close enough for us.

Measure in three inches (76 mm) from one end and draw a line across the strip. Repeat from the other end. Now you’ll have a strip 0.6" wide by nine inches long (16 by 229 mm), with two marks dividing it into thirds.
Wrap this strip of paper around the top of the can. Arrange it so that none of the marks or the taped ends fall over the seam in the side of the can. Then use a small drill to bore a hole at each mark.
This hole may be big enough, depending on the size of your drill bit and the size of the machine screws you’re using. But you can drill them out a little larger if you like. And in fact this might be better because it gives you a little fudge factor for positioning. Bottom line, as they say, you can always make the hole bigger later on, but no matter how often you drill it, it will never get smaller.

Just so you have three holes equally spaced around the can, and about 0.6" (16 mm) down from the top edge of the can.
5: Drill holes for the stove base.
Do the same as in the last step, but use a strip of paper 0.5" (13 mm) wide. Wrap this around the bottom of the can. Arrange the paper strip so that none of the marks or the taped ends fall over the seam in the side of the can and drill your holes.
OK, now you have a can with three evenly-spaced holes in its side, near the top, and another three near the bottom.
6: Cut and attach stove base.
Warning: To do this part, you’ll have to stick your hand inside the can in order to get a lock washer and nut attached to the three machine screws that hold the stove base in place. If the can described here is too narrow for your hand, then you’ll need to use a larger can. Or figure out another way to do this. Also, make sure you’ve dulled any of the can’s sharp edges, or you WILL get cut.
The pot support and stove base are both made from half-inch hardware cloth.
Hardware cloth, if you’re not familiar with it, is sort of like cheesecloth, but with a looser weave, and made from steel wire instead of cotton. And then it’s galvanized (coated with zinc) to keep it from rusting.
For the stove base and pot support, you want to cut hardware cloth, gently bend it into a cylinder, and then bolt it to the stove. And look out for the edges. There is a sharp nubbin of wire every half inch, and they all bite.
Put on your work gloves to protect your hands. Using your wire cutter, cut a piece of hardware cloth 1.5" by 10.5" (38 by 267 mm). Using your wire cutter again, trim back any stray pieces of wire as much as you can. Sand down any nubbins that are still too sharp.
Bend the strip of hardware cloth into a loose cylinder to match the shape of the can. There should be one square of overlap at the ends (½ inch) when you wrap this around the can.

Slide a machine screw through one of the flat washers. (Note: I used Tee nuts, flattened their teeth with a pliers, and used a hacksaw to cut their necks off, to make them flat enough to fit. I did this because I couldn’t find any flat washers that were both big enough in diameter and as light as these). Use what you can find — you just need some fairly light washer that’s big enough in diameter to cover the 1/2" by 1/2" hole in the hardware cloth.
Squeeze the hardware cloth together with one hand and fit it over the bottom end of the can. A heavy rubber band might be helpful to hold this together. With the other hand, slide the machine screw with the washer attached through the topmost square in the hardware cloth where the two ends overlap, and then through the hole in the top of the can.
Reach inside the can and slip a lock washer over the machine screw, and then thread on a nut. Hold the nut in place first with your fingertips, and then with a pliers and tighten the screw with a screwdriver, but don’t cinch it down yet. Just get it snug.
Place the other two machine screws, make sure that everything is in place and level, then tighten down all three screws to the max.
Now one “rung” of the hardware cloth should be resting on the bottom edge of each machine screw, and the flat washers on the outside will be holding the hardware cloth tight against the side of the can.
Go back to the place where the two ends of the hardware cloth overlap and add a piece or two of wire as needed to hold those two ends tightly together. Twist the wire it into place using a pliers, then clip off the excess and tuck it in so it won’t snag on anything or cut you.
When you’re done, you’ll have the bottom of the can sitting 1/2 inch (13 mm) off the ground, held up by the cylinder of hardware cloth firmly attached to the can. This will provide enough room for air to flow in and up through the stove. There will be one “rung” of hardware cloth up against the BOTTOM of the machine screws.

7: Cut and attach pot support.
Put on your work gloves to protect your hands. Using your wire cutter, cut a piece of hardware cloth 2.5" by 10.5" (64 by 267 mm). Using your wire cutter again, trim back stray pieces of wire and sand down any nubbins that are still too sharp.
Repeat the process you used to make the pot support.
The pot support will have its weight bearing down on the TOP of the screws that hold it, while the stove base will have its weight bearing up on the BOTTOM of the screws there. This probably doesn’t matter too much since the screws and washers are going to be squeezing everything pretty tightly together, and the whole shebang isn’t really that heavy. You’ll see how it works as you put it together. Now you know.
OK, done. The parts won’t all be exactly square with each other, but they should be close enough so you can’t tell from a foot away. The stove should stand straight and not be obviously leaning.
One advantage of the hardware cloth is that it has all those little sharp, pointy nubbins. These are like sharp little teeth, and while you have to be careful not to cut yourself or snag clothing on these, they also help to hold your pot in place, and on the bottom side they will grip too (even though you want to use this stove on a fireproof sheet of metal, just to be safe).
8: Burning in and testing.
The stove needs to be fired before using it to cook with.
The hardware cloth you’ve used is galvanized, and the inside of the can may be as well, depending on what product it was used for. Both these parts need to be seriously scorched before you use the stove to cook with, because zinc is the galvanizing stuff, and fumes from zinc are toxic. You don’t want to breathe these fumes or get them into your food.

Choose a safe, fireproof area such as a fire grate at a local park and charge the stove with dry twigs until it is about half full (don’t overfill, less fuel is better, leave the side vents uncovered). Then light the stove and let it burn out. This will take around 20 minutes, because once the wood burns down you’ll be left with charcoal, which will slowly burn down without smoke. You will be surprised at how long this takes.
Repeat this a couple of times. You should see very little wood smoke, and after the first burn, you should notice no smoke from the galvanized metal parts, or smell anything odd. The zinc smoke is very acrid. Don’t breathe it. Keep a pot of water nearby in case you need to quench any flames, or the stove gets knocked over while it’s burning.
As always, watch for problems, take your time. Relax, and keep it fun. Try boiling a pot of water. Yowsa! This stove puts out a huge amount of heat compared to the alcohol ones, and it burns just about forever, relatively speaking.
9: Using.
Plan on using a pot lifter. You’ll want to take your pot off the stove before the fuel burns out, and you won’t be able to grab it with your bare hands, or gloved hands either. You do not want to introduce the sleeves of your clothing to the roaring flame that this stove produces. Using a pot gripper will allow you to manage the handling of your pot(s), and you may be able to both heat water for a meal, and then put on some more water for a hot drink without burning a second batch of fuel.
If you try putting on a pot of water and just letting the stove burn out, you may just boil away all your water, so plan ahead. You can buy a separate pot gripper or lifter at outdoor shops, or you can get a small pliers to take along. Maybe your pot has a bail handle that will let you use a tent stake or a long stick. Whatever works for you.
To use this stove, put down a sheet of aluminum foil (either from a roll or cut out of an oven liner) charge with fuel, set the stove on the foil, and light it.
The fuel for this stove is twigs. Finer twigs are better — they should be no thicker than a pencil, and should be broken into one inch (25 mm) pieces if possible. Unless you find extremely thin twigs you will not be able to break them this short, but shorter is better. Do your best. Experiment.
Once the stove is charged, sprinkle a bit of flammable oil or alcohol on top of the fuel. Use about one teaspoonful and let it soak in briefly. Do not under any circumstances use gasoline, turpentine, thinner, acetone, or anything else explosive. Lamp oil is said to be best, kerosene is not explosive and should work. I’ve used only alcohol, which evaporates, or soaks in a little too fast, but it does work, and I always have it around for my alcohol stoves. You may be able to use some light paper, or fine, wispy, dry inner bark, if you can find this. But you will have to experiment.

Once lightly primed with a flammable liquid, light the fuel at the top.
The fuel will take half a minute or so to get fully lit. Before long you’ll have a flame that looks a lot like it’s coming out of a jet engine with the afterburner turned up to 11, and there will be almost no smoke.
Three things are critical: good ventilation through the bottom of the stove, where most of the air enters, ventilation from the holes around the side of the stove, which inject extra air into the smoke and flame, and the height of the pot support.
The height of the pot support is critical. The pot should be two inches (50 mm) or more from the top of the stove. The stove we’ve just made here has a space that is a little less than that, but it works well enough most of the time. Decreasing the free space between the top of the stove and the pot results in a stove that smokes badly, so if you have problems with smoke, chances are that the ventilation through the bottom isn’t good enough, the vents in the side of the stove aren’t good enough, or the pot support is too short. In the last case, make a taller pot support and retrofit it. You may also have fuel problems, but fuel varies from use to use, so it’s hard to make a strict, foolproof rule.
Note: The vents in the side of the stove are also critical, and should be able to breathe freely, and should not be drilled higher in the stove. A little lower down is OK, but too high up is not. You need to inject fresh air into the smoke to help it burn, and that’s what these side vents do.
The can used for these plans is very small and narrow. Because of that it’s also relatively unstable. It’s one of those ultralight tradeoffs. Using a wider can for your stove will give you a more stable stove, and your stove can also be taller overall while retaining stability. This is one of your personal choices, which is what the ultralight idea is all about anyway. Feel free to experiment.


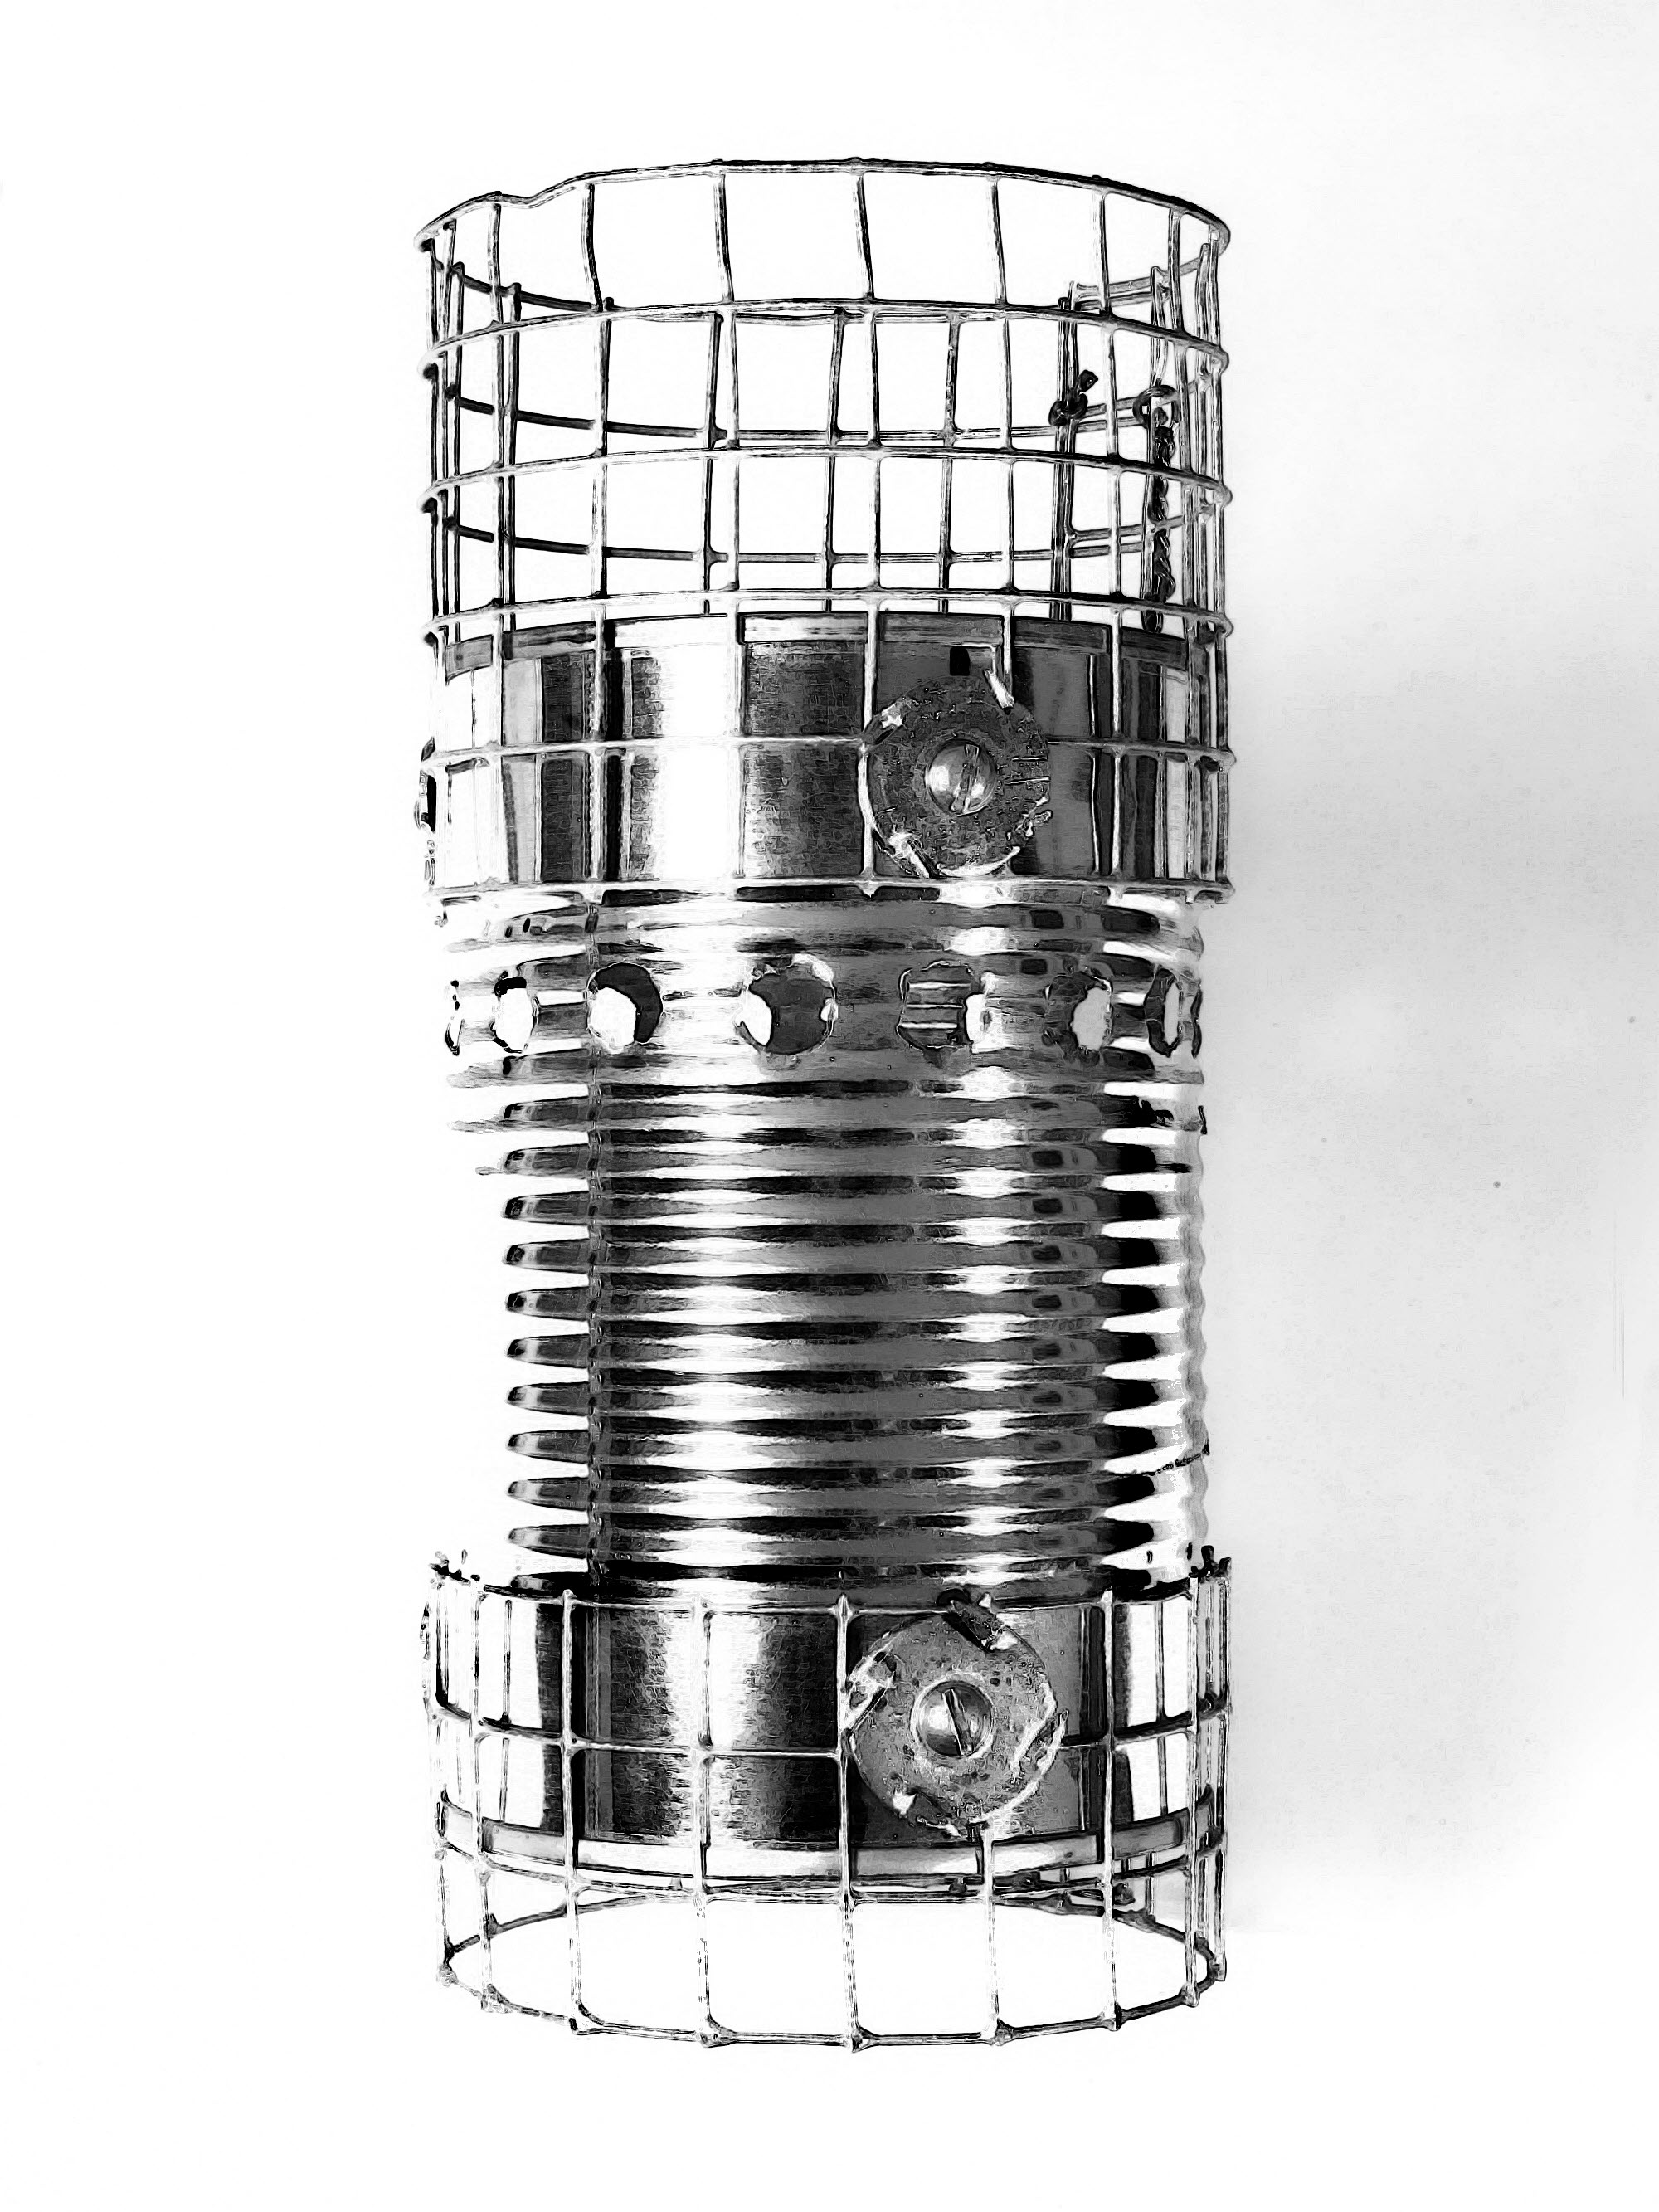
Various views of the can that is the basis for this stove. Evenly spaced holes in the bottom provide the primary ventilation. Holes in the side of the can, higher up, give the combustion process a boost, allowing the thick rising smoke to burn cleanly in a constant bath of fresh air. The pot stand and bottom support are not shown here, but just bolt on. The core of this stove is very simple and solid — just one steel can.
Now for something completely different...
For more information, check out "A WOOD-GAS STOVE FOR DEVELOPING COUNTRIES" by T. B. Reed and Ronal Larson The Biomass Energy Foundation, Golden, CO. It's a PDF file that you can find here and here
ABSTRACT
Through the millennia wood stoves for cooking have been notoriously inefficient and slow. Electricity, gas or liquid fuels are preferred for cooking - when they can be obtained. In the last few decades a number of improvements have been made in woodstoves, but still the improved wood stoves are difficult to control and manufacture and are often not accepted by the cook.
Gasification of wood (or other biomass) offers the possibility of cleaner, better controlled gas cooking for developing countries. In this paper we describe a wood-gas stove based on a new, simplified wood gasifier. It offers the advantages of "cooking with gas" while using a wide variety of biomass fuels. Gas for the stove is generated using the "inverted downdraft gasifier" principle. In one mode of operation it also produces 20-25% charcoal (dry basis).
The stove operates using natural convection only. It achieves clean "blue flame" combustion using an "air wick" that optimizes draft and stabilizes the flame position.
The emissions from the close coupled gasifier-burner are quite low and the stove can be operated indoors.
Keywords: inverted downdraft gasifier, domestic cooking stove, natural draft
The following image pretty much represents my design though also based based on what they developed...
