Open Cup Stove
Name of stove: OCUP (Open Cup stove. Originally “Fritz Krueger PASS Plain And Simple Stove”.)
Type of stove: Simple cup, with ventilation holes added.
URL of original instructions: See Fritz Krueger’s PASS (Plain And Simple Stove) http://bit.ly/K36FOS or http://bit.ly/LlWjeN (For general info on light weight do-it-yourself stoves, see the Zenstoves links page at http://bit.ly/9fZe6O)
Description of difficulty: This is a smallish to tiny, extremely light stove that can easily be made with the simplest tools.
Overview: This is one of the simplest stoves possible. The large opening at the top produces a wide flame, so this kind of stove will burn through its fuel relatively rapidly.
The only simpler stove is one made without any manipulation at all. If you want the simplest of the simplest, buy a box of tea candles, remove one candle from its aluminum cup base, and use the cup. These are said to weigh about 1/16 ounce (0.06 ounces, or 1.8 g). I use the scale at the post office, and it won’t register anything that light, so let’s just assume that this figure is right. It doesn’t get any simpler or lighter than that.
A perforated cup breathes a little better though, and takes hardly any extra effort to make. It’s also slightly bigger and heavier, no matter what you make it out of (it’s going to be bigger than the tea candle base) but not enough to matter. Hey, we’re talking a few tenths of an ounce here. For raw material you can use either a 12 ounce or a 5.5 ounce aluminum can.
This stove is a little on the delicate side, since its top us just a cutaway can. It is easy to bend out of shape, but also easy to bend back into shape. Because the bare edge of the cut can is exposed, you have to be especially careful in cutting away the top of the can and in smoothing down this edge when done.
Because it’s so simple and easy to make, though, this stove is a good place to start. Get familiar with it, see how it works, and then decide whether alcohol stoves are for you. You can always move up later.
These directions use a 12-ounce can, but if you want a smaller version, use a 5.5 ounce juice can and reduce the dimensions as needed.
Technical details:
Height:1.75" (44 mm)
Width:2.6" (65 mm).
Weight:No more than 0.1 ounce (2.8 g).
Volume:3.5 ounces (104 ml).
Composition:Aluminum drink can (12 ounce version) or juice can (5.5 ounce version).
Cost:Free, with contents of cans.
Materials list:
Empty 12 ounce (355 ml) aluminum can
Ruler
Hole punch for paper
Magazines, cardboard, thin books
Marking pen
Sandpaper (100 grit, or thereabouts)
Sheet of paper
Tape
Utility knife
Work gloves
Step-by-step construction:
1: Mark the can.
Put a line on the side of the can to show you where to cut.
Set the can down on a smooth surface like a kitchen counter top. Next to it, plunk down several magazines. Lay your marking pen on the top magazine, push the can over to it, and measure where the point of the pen meets the can. You’re looking for a point 1.75" (44 mm) up from the bottom of the can.
If the pen point is either too high or too low, shuffle different magazines until you get a stack that’s the right height. You may have to do some fine tuning with scrap sheets of cardboard from the back of a tablet of paper, or use several thicknesses of paper — what you use doesn’t matter much. You can sandwich any loose sheets of paper in between two of the magazines and that will keep them in place.
Then hold down the pen and turn the can through one or two revolutions until you have a clear, dark line of ink going around the can at a height of 1.75" (44 mm).
Cutting at this height will give the stove a deep well for fuel and will leave plenty of room in the stove’s side walls for ventilation holes.
2: Score the can.
Once you have a line drawn around the outside of the can, set aside the pen and put the utility knife in its place. Be sure the knife has a sharp, new blade in it. And it’s a good idea to wear work gloves for this step, especially leather gloves if you have them.

Lay the knife down flat on its side on top of your pile of magazines and put the blade’s point up to the can. Adjust the height until the point hits the line you’ve just drawn. Hold the knife down with one hand and rotate the can with the other hand, scoring the can. Push the blade against the can, but not hard enough to dent it.
Keep turning the can carefully for several revolutions. You want to make a deeper and deeper score line in the side of the can, and you want to keep the knife in the same groove on each pass. This is pretty hard to do perfectly, but get as close as you can. You are not trying to cut through the can, only to score it.
3: Break off the bottom of the can.
When you think you’ve cut most of the way through the side wall of the can you need to stress it. Use the back side of your knife’s blade (the dull side) or your thumb. Press hard enough to flex the side of the can a little without denting it, and move back and forth along the score line.

Stress a short section of the the can wall this way over and over again. What you’re doing here is trying to fatigue the metal of the can until it breaks apart. This will give you a cleaner result than if you cut through the can with the knife.
This part of the process is trial and error, so just keep at it until you find a scored part of the can’s wall that just lets go. You can go back to scoring the side again for awhile, to deepen the cut if this doesn’t seem to be working. It takes a while to start working.
Once part of the scored line breaks through you can keep working along it, turning the can and breaking it apart along your scored line until the top part separates from the bottom part. Once you get the process started, it will be a give and take between stressing the metal and gently pulling the two halves of the can away from each other.
Work very gently. The two main things to keep in mind are not to damage the can and not to get cut. The can will separate when it’s ready.
When done with this first step you’ll have the bottom 1.75" of the can separated from the top.
4: Dull the sharp edges.
Now take up your sandpaper, hold the bottom (your new stove, the cup-like part) in one hand, the sandpaper in the other, and scuff the fresh edge with the sandpaper. You want to run the sandpaper in three different directions: flat across the cut edge, outside, but angled toward the inside of the stove, and inside, but angled toward the outside.
In other words, you want to cover all the angles, and remove every sharp edge there is. This is important, because this thin metal is just about as close as you can get to a free-range razor blade. It is deadly sharp. Please read that again if it didn’t sink in. IT IS SHARP!
5: Make a ventilation template.
Take a full-sized sheet of paper (8.5" by 11") and cut off a strip along the long edge. It should measure 1.5" by 11" (36 by 279 mm).
Make several marks 0.5" (13 mm) in from the straight factory-cut edge and use a ruler to connect them so you have a line.
Using a small piece of tape (so you can easily remove it again in just a minute) stick one end of this paper strip to the side of the can.

Then wrap this strip of paper around the can, overlap the two ends, and mark the inner layer where the outer layer of the paper strip overlaps it. Take the paper off the can.
Now you’ll have a strip of paper with a mark on it. Cut at the mark. What you have left is a strip of paper equal in length to the can’s circumference. That’s what you want.
Then fold this strip of paper in half three times (the long way). Unfold it and mark the point where each crease intersects the line you drew lengthwise along the strip. You will have seven marks. These will mark seven of your eight ventilation holes. The eighth hole will go where the two ends of the paper strip meet when you tape it back onto the can.
6: Make ventilation holes.
Wrap the paper strip around the top edge of the stove (with the marks on the outside, toward the top — the cut edge of the stove). Then connect the ends of the strip and hold it in place with another small piece of tape. Leave this spot until last.

Center your paper punch over the next mark you come to and punch a hole through the paper strip and the wall of the can.
Keep this up until you come back to the tape, and make your final hole there. Remove the tape, put your gloves on, and sand down both the insides and outsides of the holes until you’re sure that they are safe enough to handle with bare hands.
7: Burn in.
The stove needs to be fired before using it to cook with.
The exterior of the stove is covered with printing. It will stink and smoke until you get that burned off.
Choose a safe, fireproof area such as a fire grate at a local park, add a small amount of denatured alcohol fuel to the stove, and burn it. About a quarter ounce will do. Check it out afterward and repeat as many times as you need to until you don’t get any smoke or burning smells coming from the stove.
Don’t set the stove on a wood fire to burn it in or you will melt it (it’s pretty thin). Take your time. Relax. Keep it fun.
Keep a pot of water nearby in case you need to quench any flames, or the stove gets knocked over while it’s burning.
To use, put down a sheet of aluminum foil (either from a roll or cut out of an oven liner) put fuel in the cup, set it on the foil, and light it. A pot stand (described later) will serve to support your cooking pot over this stove.

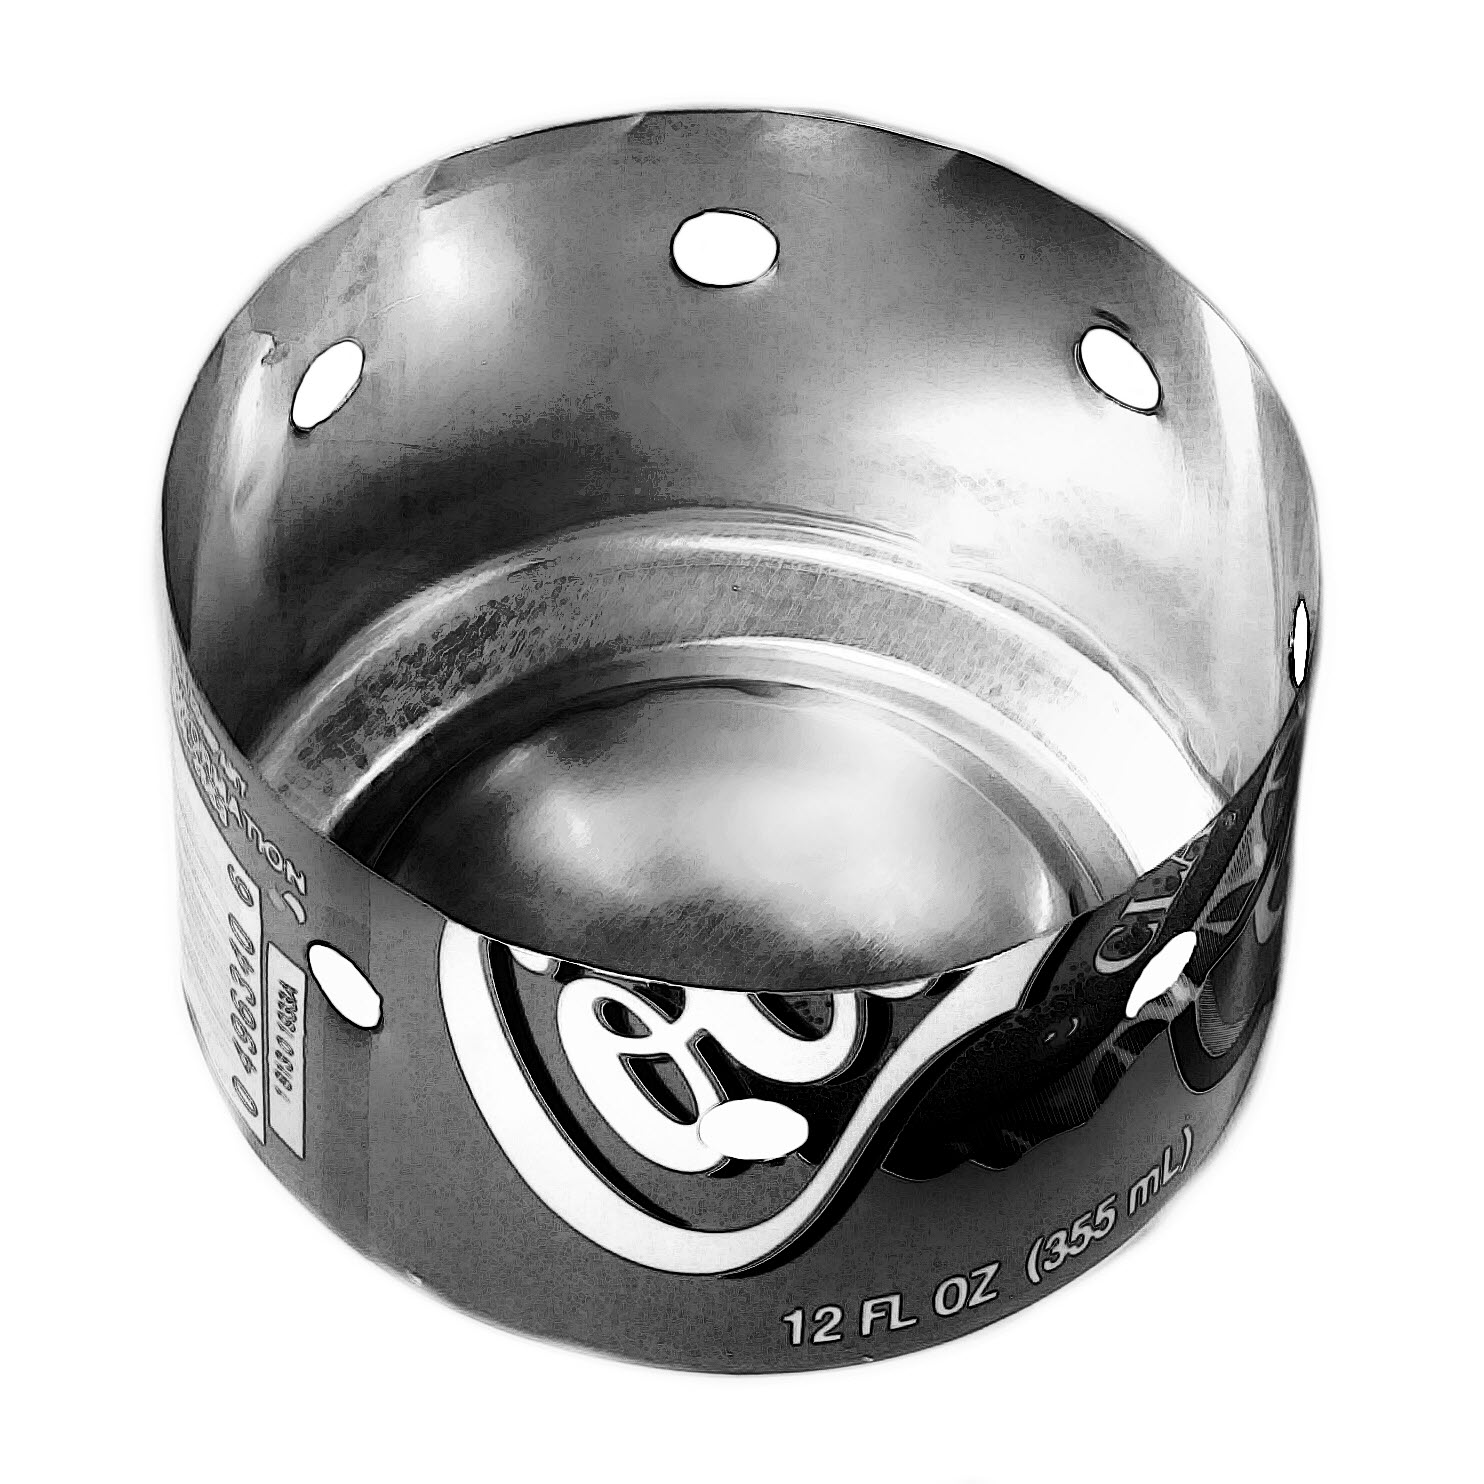
Finished. Stove shown upright. Crunches right up if you step on it. Pretty big as these things go and produces a large flame.

Steps in cutting down can and punching holes in side. One, two, three. That’s about it.