Spamster Stove
Name of stove: Spamster.
Type of stove: Another cup, though at first glance it doesn’t look like one.
URL of original instructions: N/A, this is an original. (For general info on light weight do-it-yourself stoves, see the Zenstoves links page at http://bit.ly/9fZe6O)
Description of difficulty: This stove is slightly more difficult than the OCUP stove, but worth it. To make it you will need some kind of drill to put ventilation holes in the can walls. Otherwise, it’s as simple as the first stove.
Overview: This stove is a little more complex than the OCUP stove. It is much sturdier because even though you’ll be doing some cutting and poking at it, what you end up with is still one continuous piece of metal.

This stove also is more efficient because its airflow is more restricted. The OCUP stove runs at full bore. It’s wide open, and so there can’t be any explosion, but since the OCUP stove has such a wide opening at the top the combustion process is just a runaway chemical reaction.
The Spamster stove’s more restricted airflow slows things down. It’s also smaller, and its heat output is more focused, so you won’t end up with flames uselessly lapping up around the sides of your cooking pot. With the Spamster stove, all the flame will stay under the pot where it belongs.
Technical details:
Height:1.4" (36 mm)
Width:2.5" (65 mm)
Weight:0.30 ounce (8.5 g)
Volume:2 ounces (59 ml)
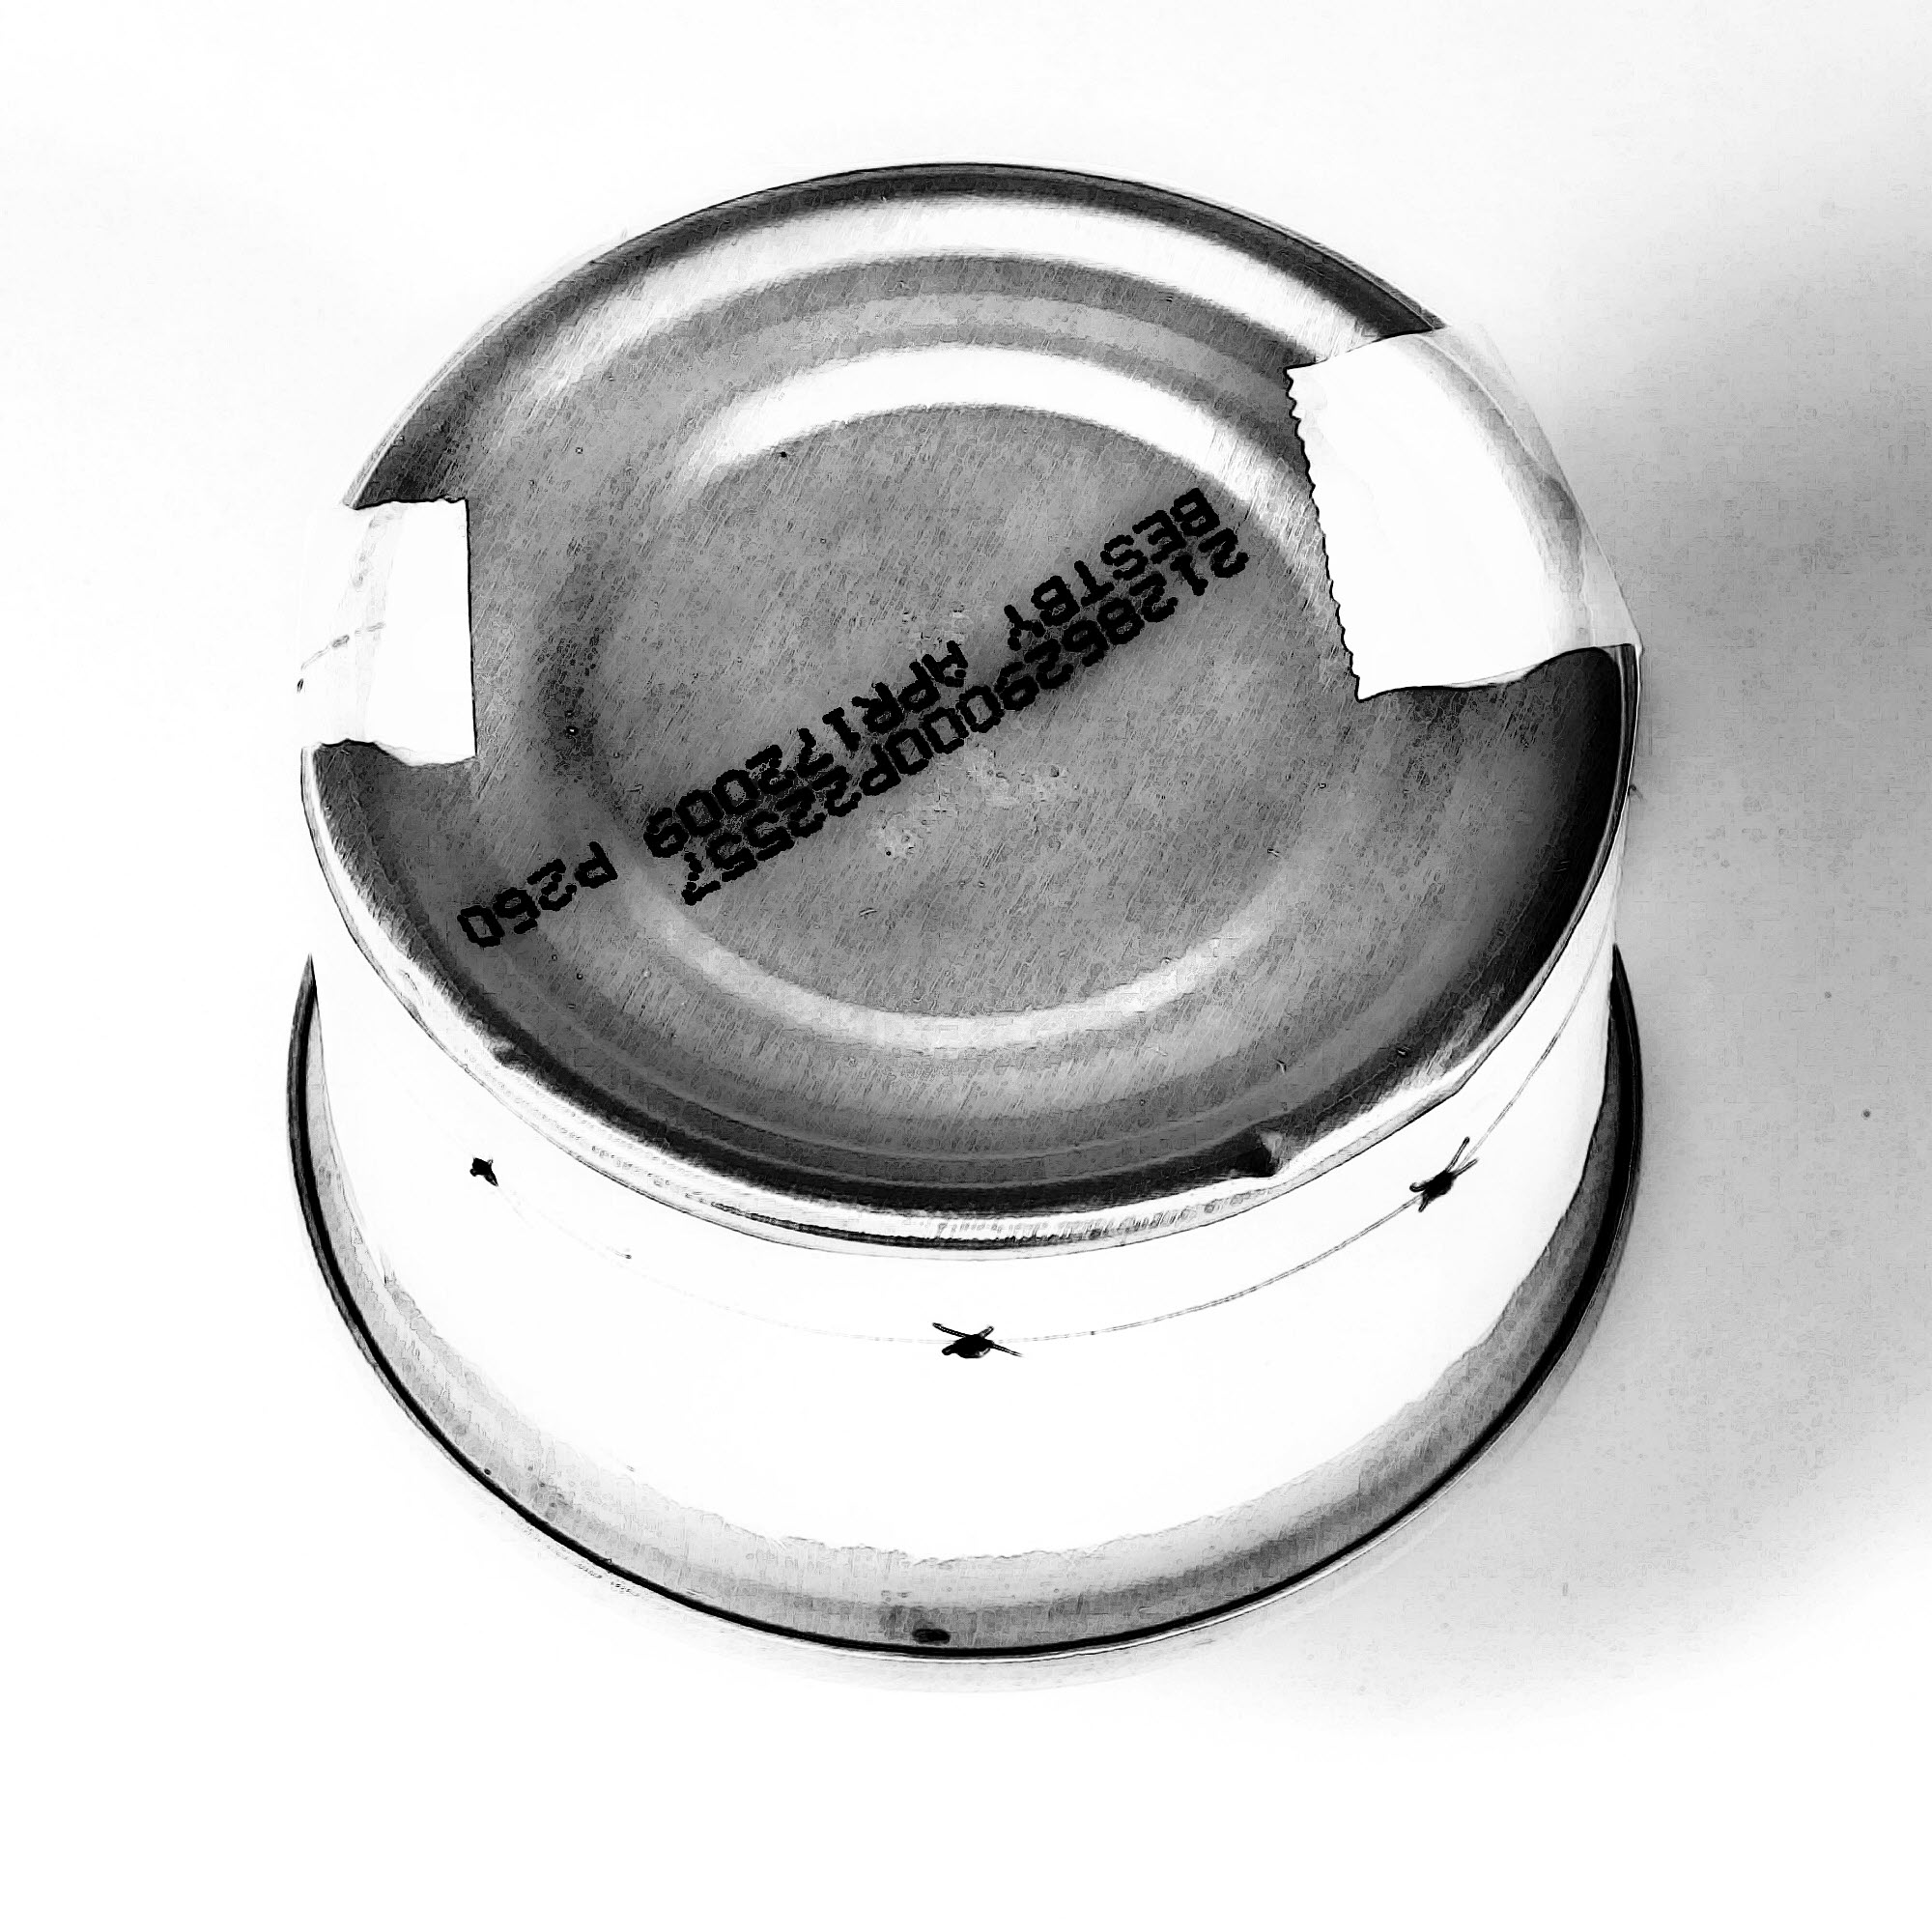
Composition:Aluminum can of Spam sandwich spread, pet food, or a similar can, unopened.
Materials list:
Empty Spam sandwich spread can, or a similar can, unopened
Ruler
Electric or manual drill, with 1/16" (or 3/32"), and 1/4" bits
Leather work gloves
Marking pen
Pushpin, large safety pin, or heavy needle
Sandpaper (100 grit, or thereabouts)
Sheet of paper
Tape
Utility knife
Overview of construction process: You’ll drill vent holes in the side of the can and cut a round hole in the top of the can.
Step-by-step construction:
1: Chill the can.
Leave it in the refrigerator for a few hours. This will congeal the yummy high-fat contents so they won’t be so likely to come oozing out and chase you around the room.

2: Make a ventilation template.
First, remove the label from the can.
Take a full-sized sheet of paper (8.5" by 11") and cut off a strip along the long edge. It should be one inch wide (25 mm). The whole strip should measure 1" by 11" (25 by 279 mm).
Make several marks 0.25" (6 mm) in from the factory-cut edge and use them and a ruler to make a line.
Using a small piece of tape (so you can easily remove it again in just a minute), stick one end of this paper strip to the side of the can. Then wrap this strip of paper around the can, overlap the two ends, and mark the inner layer where the outer layer of the paper strip overlaps it. Take the paper off the can.
Now you’ll have a strip of paper with a mark on it. Cut at the mark. What you have left is a strip of paper equal in length to the can’s circumference. That’s what you want.

Now fold the strip in half three times (the long way). Unfold it and mark the point where each crease intersects with the line you drew. You will have seven marks. These will mark seven of your eight ventilation holes. The eighth hole will go where the two ends of the paper strip meet when you tape it onto the can.
3: Drill vent holes in the can.
For this stove we’re going to leave the top of the can intact, so turn the can bottom side up. Then tape the paper template to the can with the factory edge of the paper along the bottom of the can (which will now be the side that’s up).
First, use a pushpin to start with. Use the pushpin to punch a hole through the can wall at each place where you have a mark on the template. Then remove the paper template.
Use a fine bit, about 1/16" or smaller, and drill a hole through the can wall at each puncture. You’ll have eight holes.
When you’re done drilling these holes, enlarge them. Do this by redrilling them with a 1/4" bit. We’re doing it this way because the can wall is thin and a large bit requires lots of pressure to get started. We don’t want the can wall to crumple from the pressure of shoving the drill bit against it. A smaller bit bites better and makes a good pilot hole for the larger bit.
At this point you will have some potted meat oozing out of can. (In case you hadn’t noticed.) You can wipe it off and cover the holes with a couple wraps of tape to get you through the next step or two.
4: Cut the burner hole.
Put on your gloves. Use the utility knife, and put its point inside the central concave spot in the bottom of the can (the side that you’ve had up). Put the knife point right on the line where this central depression starts. Keep the knife point there with a medium amount of pressure and turn the can around and around. You want to score the aluminum until you can pop out the whole center part as one disk.

This process will take a while so be patient, and try to make things more efficient by keeping the knife point running in one track, like a phonograph needle in the record groove (for any of you old enough to remember vinyl records).
Go around and around and around, until...you’ve cut deeply enough that you can tap the bottom of the can and it breaks loose. Don’t be in a hurry. This will take like what seems forever. You may have to keep scoring the can for 50 or 100 revolutions. Going slowly is not only safer, but it will give you a better result. In fact, it’s the only way to get it done. Force will not work. Let things happen in their own time.
The bottom of the can will first break through in just one spot – the whole thing won’t suddenly pop out cleanly, but you can keep working at it until you’ve got it all removed.
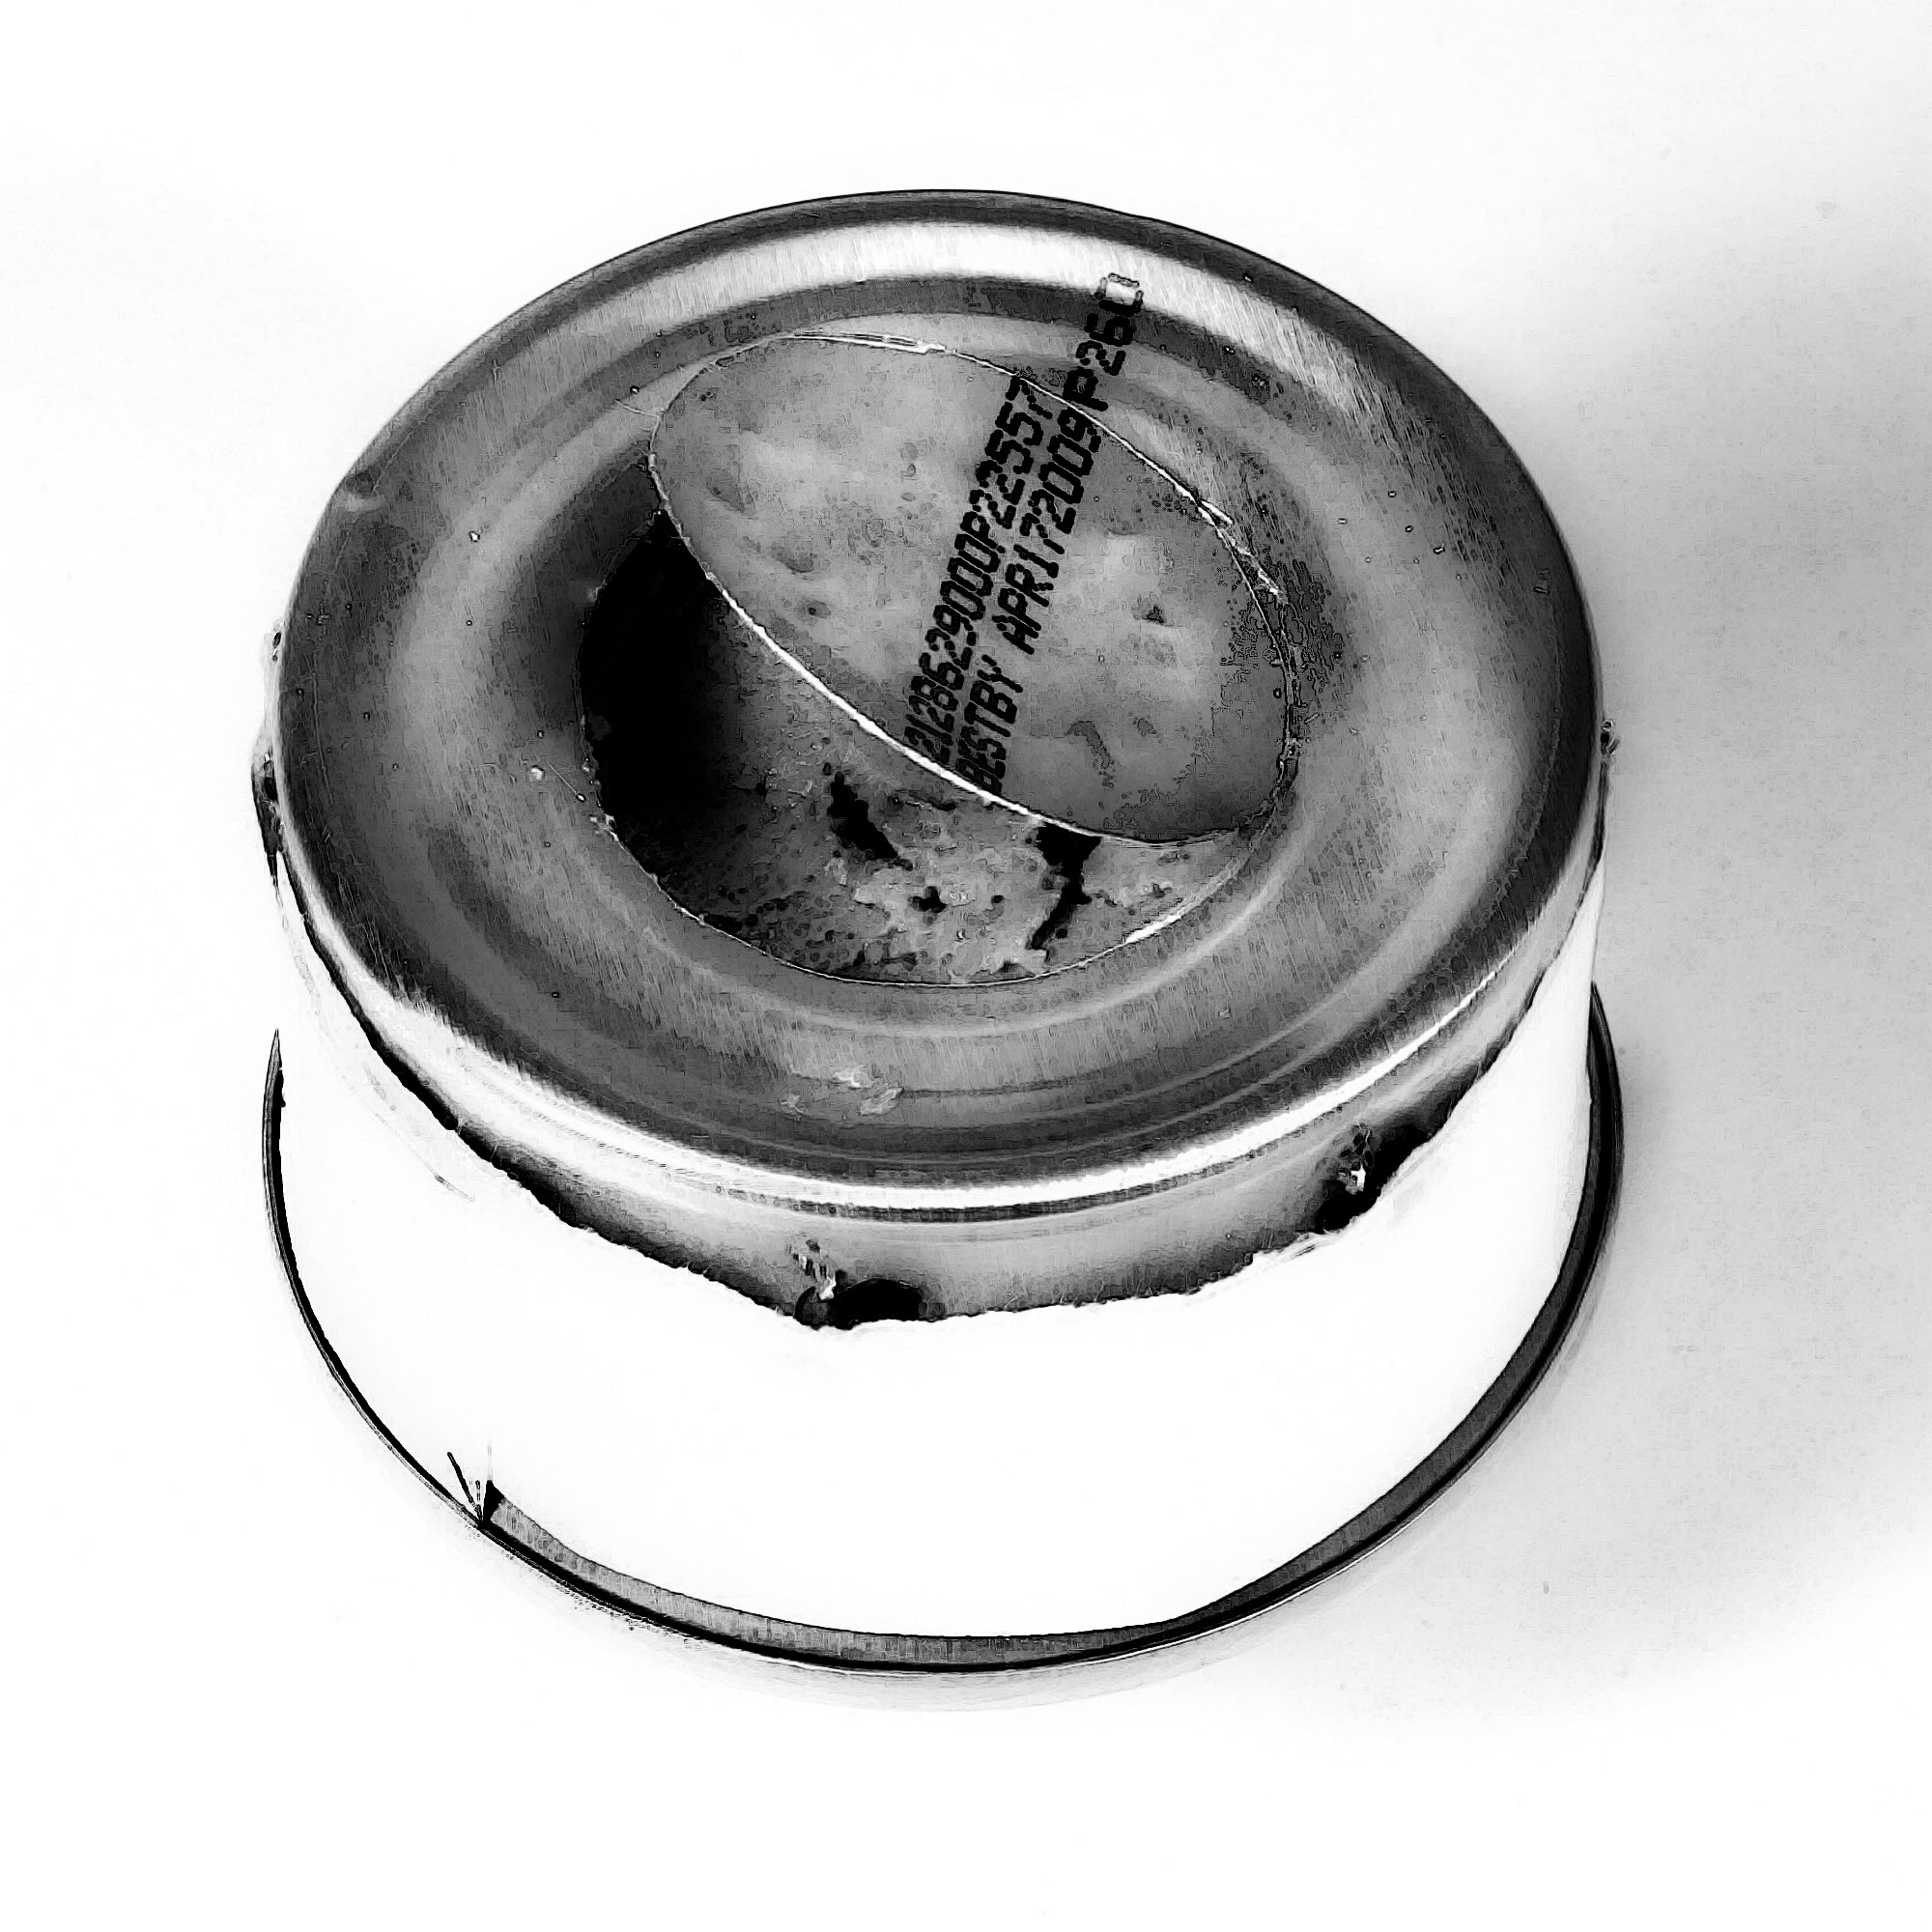
Some tapping with the blunt end of the utility knife will help. Tap lightly and see if anything happens. If not, then keep scoring. Eventually you’ll get a section of the can’s bottom to break through where you’ve been scoring it. Wiggle it. It will take some wiggling until the metal fatigues and lets go. Work with it. Work your way around until the whole disk pops free. Watch those fingers, though. This is extremely sharp metal.
You will end up with a pretty clean cut that needs a minimum of dressing to make it smooth and safe.
5: Cleanup.
Remove the contents of the can and wash it out. Handle it carefully at this stage because the can still has a lot of viciously sharp edges. Once you’ve scooped out out most of the contents you can clean the can using some kind of brush so you don’t have to handle the can too much. The edges are still razor sharp. The can will be pretty greasy too, and you won’t get into every interior corner so getting it squeaky clean will be impossible.

Concentrate on cleaning the outside of the can and let the residual grease inside combust away when you burn in the stove.
Also you don’t want to try eating what was in the can, or even feeding it to a pet, because it will have metal shavings in it. And at this stage you have been poking pins and drill bits into it for a while. The technical term is “yuk”.
After cleaning the can, put on your work gloves again and smooth the sharp edges of the vent holes and the central burner hole using sandpaper until the stove is safe to handle without gloves.
6: Adding an optional wick.
Cut a 0.5 inch-wide (13 mm) strip of fiberglass insulation. You should need about 8" to 10" (200 - 250 mm). Roll it up and stuff it into the can through the central hole. Be sure that the fiberglass doesn’t cover the ventilation holes you drilled.
Fiberglass insulation (which does not burn) will form a wick for the stove. It will help to prevent spills if you should knock the stove over, and will slow down the burning somewhat, and keep the stove going longer at a lower temperature, but the wick isn’t essential.
If you use a wick, you’ll find that the flame will taper off very slowly as the fuel runs out, to the point that you’ll want to remove your pot from the stove several minutes before the stove actually goes out. The flame will keep getting smaller and smaller and smaller until, although it’s still there, it is just a speck and too small to provide enough heat for anything. If cooking during daylight hours, you will not be able to see the flame as it tapers off. It gets really tiny and dim toward the end.
Without a wick the stove will burn faster in a less controlled way. The stove will suddenly just wink out. When the stove has no wick, and goes out, you know for sure that all the fuel is gone. If you use a wick and blow out the stove because you can’t stand to wait for it, there will still be some fuel down inside, and you will have to be more careful in case the hot stove should reignite some residual fuel when you’re not watching it.
7: Burning in.
The stove needs to be burned in before using it to cook with.
Choose a safe, fireproof area such as a fire grate at a local park, add a small amount of denatured alcohol fuel to the stove, and burn it. About a quarter ounce will do. Check it out afterward and repeat as many times as you need to until you don’t get any smoke or burning smells coming off the stove. This will take care of any leftover grease inside the stove.
Don’t set the stove on a wood fire to burn it in or you will melt it (it’s pretty thin). Take your time. Relax. Keep it fun.
Keep a pot of water nearby in case you need to quench any flames, or the stove gets knocked over while it’s burning.
To use, put down a sheet of aluminum foil (either from a roll or cut out of an oven liner) put fuel in the cup, set it on the foil, and light it. A pot stand (described later) will serve to support your cooking pot over this stove.