Wednesday, March 18, 2020

Heavy Wind Screen

Heavy Wind Screen

Name: Oven-liner-foil wind screen.

Description of difficulty: Can be completed by the semi-dead.

Overview: Made from one of those big, flat oven liners that you find at the supermarket. These are made from a heavy form of aluminum foil. It’s pretty light, fairly simple to make, and more durable than the wind screen made of the aluminum foil that comes on a roll. It’s a design that wraps around the stove and cook pot, but leaves the top open. This is a good one to use with a wood-burning stove.

Technical details:

Height and Diameter: Size depends on the size of the stove and pot, and the diameter of the pot you use with it. Its diameter should be a couple of inches larger than the stove, to allow free flow of air, and some stand off to keep the screen away from flames. The screen described here is approximately six inches in diameter by 7.5 inches high (152 by 191 mm).

Weight: For this one, 1.3 ounces (37 g).

Materials list:

Heavy foil oven liner
Foil tape (dryer vent tape, aluminum on one side, adhesive on the back)
Hole punch
Ruler
Scribe (Pushpin, heavy safety pin or heavy needle)
Sandpaper (100 grit, or thereabouts)
Scissors (beaters that you can cut aluminum with)
Work gloves

Overview of construction process: Cut several sections of foil and tape them together.

Step-by-step construction:

1: Measure and mark.

If you can mark off one piece measuring 7.5" by 20" (191 by 508 mm), go for it — you won’t need to tape any smaller pieces together. Otherwise, measure off two or more pieces measuring 7.5" high by the appropriate width (which depends on how many pieces you’ll need). With your scribing tool, mark the lines to cut along.

2: Cut.

Put on your work gloves and cut out the piece(s) you need. Scissors will work for this.

3: Tape edges.

If you have more than one piece, lay the pieces together on a flat surface and apply foil tape to one side, overlapping halfway onto each piece. Repeat on the other side. Then apply foil tape around the outer edge of the assembled wind screen.

4: Punch holes.

Scribe two lines along one long edge (whichever one you want to be the bottom). Make one line 0.5" (13 mm) in from the edge and the other one 0.75" (19 mm) in. On one line, mark 1" (25 mm) intervals. On the other line, start 0.5" (13 mm) farther in from one end, and then make a mark at each 1" (25 mm) interval.

When you do this, you’ll have two sets of marks, at different heights and offset by 0.5" (13 mm) from each other.

Then use the hole punch to make a set of holes along each line, one at every mark. You’ll get two lines of offset holes along the bottom of the wind screen.

5: Finish.

Use sandpaper and take off any remaining sharp edges. If you want this wind screen to be closeable, you can either use a paper clip to fasten the ends together, or fold each end so you can hook the two of them together. Just fold over the ends — the last half inch or so. Have the fold facing out on one end, and have the other facing in so you can hook them together.

From upper left to lower right: (1) 4 pieces of foil laid out (2) foil laid out ready for taping (3) foil pieces taped togeter (4) outer edges taped


Finished, all taped together.

The heavy screen is made from heavier foil (surprise!), and you probably won’t get one piece big enough to do it all. This illustration shows four pieces which are cut, laid together, and taped together. Then the whole thing gets its outer edges taped. Use aluminum dryer vent tape for this.


Top view of the completed wind screen.


You can fold the two ends over and hook them together when in use. Or use a paper clip. Or nothing. Whatever suits you.

Wednesday, March 11, 2020

Light Wind Screen

Light Wind Screen

Name: Folded aluminum foil wind screen.

Description of difficulty: Even the dead can do this.

Overview: Made of ordinary household aluminum foil, this is a light, foldable and simple to make wind screen that is surprisingly durable if treated with just a little respect.

It’s a full-coverage design that totally wraps around and over the top of the stove and cook pot, providing complete protection from the elements (especially wind, of course), and retaining the maximum amount of heat in a small space around the pot.

It is also a little delicate. If you don’t keep the stove’s flame away from it, it gets crumbly. If you handle it too roughly it will tear, but on the other hand, you can fold it up into a small package of whatever shape you need.

Technical details:

Size: Depends on the size of the stove and pot, and the diameter of the pot you use with it. Its diameter should be at least two inches larger than the pot, to allow flames to lick around inside, when they need to. If flame touches this wind screen, it weakens it, and the wind screen will get brittle and begin to crumble when you fold it. Be sure to make it large enough in diameter to keep it well away from flame.
Weight: Roughly 0.8 ounce (23 g), depending on size.

Materials list:

Household aluminum foil
Stapler (optional)

Overview of construction process: Measure off a length of foil and just fold it and finish it with your bare hands.

Step-by-step construction:

1: Work area.

This is easiest if you have a long stretch of kitchen counter top, or a long, smooth workbench or table.

2: Measure out the foil.

These directions will give you a wind screen three layers thick. For a heavier and sturdier one, use four layers (overkill). If you are easy on your gear, you can try one two layers thick (slightly light). Just measure out different lengths of foil and fold accordingly.

Measure the diameter of your pot (be generous, add a couple inches). Multiply that by three. Then multiply multiply again by three. Unroll that much aluminum foil. This will be the length of your raw wind screen, before folding.

Example: If your pot is five inches (125 mm) in diameter, then you want between 45 and 47 inches of foil (1140 to 1195 mm). This doesn’t have to be exact, but too long is OK, and too short is useless.

3: Fold the foil and finish the edges.

Fold the foil twice, ending with a piece one third the original length, and sharply crease the folds using a fingernail or the side of a plastic pen. You want clean, precise alignment and razor-sharp creases.

You now have a long rectangle of foil that is three layers thick. Fold one long edge over about 0.25" (6 mm) and crease it, then do it again. Repeat for the other long edge, then for the short edge where the loose ends are. The fourth side is OK as is.

4: Roll and secure.

You now have a rectangle of foil 12" (305 mm) by whatever length — let’s say it’s 22 inches (550 mm)), having three of its edges neatly and tightly folded with a precise crease.

Bring together the two short ends, and fold them over each other about 0.5 inch (13 mm), and put in another tight crease. Then do it one more time. You now have a hollow cylinder of aluminum foil with nice, neat folded edges.

5: Staple ends (optional).

It’s easier to keep this together if you staple the two ends together as well as folding them. Take the folds you just made in the ends and put four or five staples right through all the folds at regular intervals.

Your wind screen is now ready for its first use.

The process looks like this (top left to bottom right)...

Now you have a cylinder. To use, stick a hand in one end and smoosh it with the other hand to form a flat cone for a chimney. While using, keep flame away from the foil or it will get brittle and crumble.

Above: Triple-folded foil, foil with border, and foil rolled into cylinder.

Above: Foil rolled into cylinder.

Above: Cylinder reshaped by having one end formed into a cone-like chimney (the real thing has a flatter, crinklier shape, as you can see from the photo at the top).

Pot Stand

Pot Stand

(for alcohol stoves)

Name: Pot stand, pot support.

Description of difficulty: Pretty easy, but the pointy sharp edges can bite.

Overview: Cut a rectangular piece of hardware cloth, form it into a cylinder, and lock the ends together. The little leftover bumps on the top and bottom edges will always be there to scratch you, but will help this thing hold onto both the pot and the ground, making it more stable.

Technical details:

Height: 2.125" (54 mm).
Diameter: Variable, depending on the size of your pot.
Weight: 0.5 to 1 ounce (14 - 28 g), depending on size.

Materials list:

Hardware cloth, one half inch size
Wire cutter (side cutter)
Needle nosed pliers
Sandpaper (100 grit, or thereabouts)

Step-by-step construction:

1: Decide on size.

Measure the diameter of the pot you’re going to use. Multiply this number by three and subtract one inch (25 mm).

Example, for a 5 inch (127 mm) pot: Diameter = 5". Multiply by 3 yielding 15". Subtract 1" yielding 14". So for a 5 inch pot, start with a piece of hardware cloth 14 inches (356 mm) long.

2: Cut a piece of hardware cloth.

Put on your work gloves. Use the wire cutter to snip out a rectangle of hardware cloth five squares wide (about 2.6 inches, or 66 mm), and matching the length you determined in the first step.

3: Trim off the stubs.

Use the wire cutter to snip off the leftover stubs and generally make the piece as innocuous as you can. No matter what you do this thing will always have a little bite to it, which is one of its advantages.

4: Bend into a cylinder.

Gently bend the piece you cut into a hollow cylinder and hold it against the bottom of your pot to see how much overlap you have. The finished pot stand should be about one inch (25 mm) smaller in diameter than your pot, leaving a half inch (13 mm) overhang all around when you set the pot on it.

5: Trim off excess.

You want to end up with one extra square on each end (one half inch) but no more. Cut away the vertical pieces of wire in this overlap, leaving six, half inch (13 mm) stubs of wire projecting out horizontally from each end. You’ll use these to lock the two ends together to form the final cylinder.

6: Tie the ends together.

Gently squeeze the hardware cloth into its final cylindrical shape and use the needle nose pliers to bend the stubs of wire on one side over the vertical parts of the woven wire on the other end, and vice versa. When you’re done, you’ll have a tight cylinder of woven wire cloth that holds itself together.

It will also be at or near the optimum height for the stoves described here. Ideally the bottom of your cook pot should be about 1.4" (35 mm) above the top edge of the stove. This height will allow for complete combustion without keeping the pot too far above the stove.

7: Burn it in.

This is made from galvanized steel wire, i.e. steel wire dipped in zinc to keep it from rusting. When zinc is heated it gives off toxic fumes. Don’t breathe the fumes and don’t get them in your food.

To avoid this, set your new pot stand on a small wood fire for awhile. Not a big hot fire, but a small, cool one. Let it bake and fume and smoke. Be sure that you’ve got all the zinc singed pretty well, and it should be as safe as it’s going to get.

If any of this bothers you, then think about using a pot support made of something else. The varieties are endless. Check the “more info” section at the end of all this for additional resources.

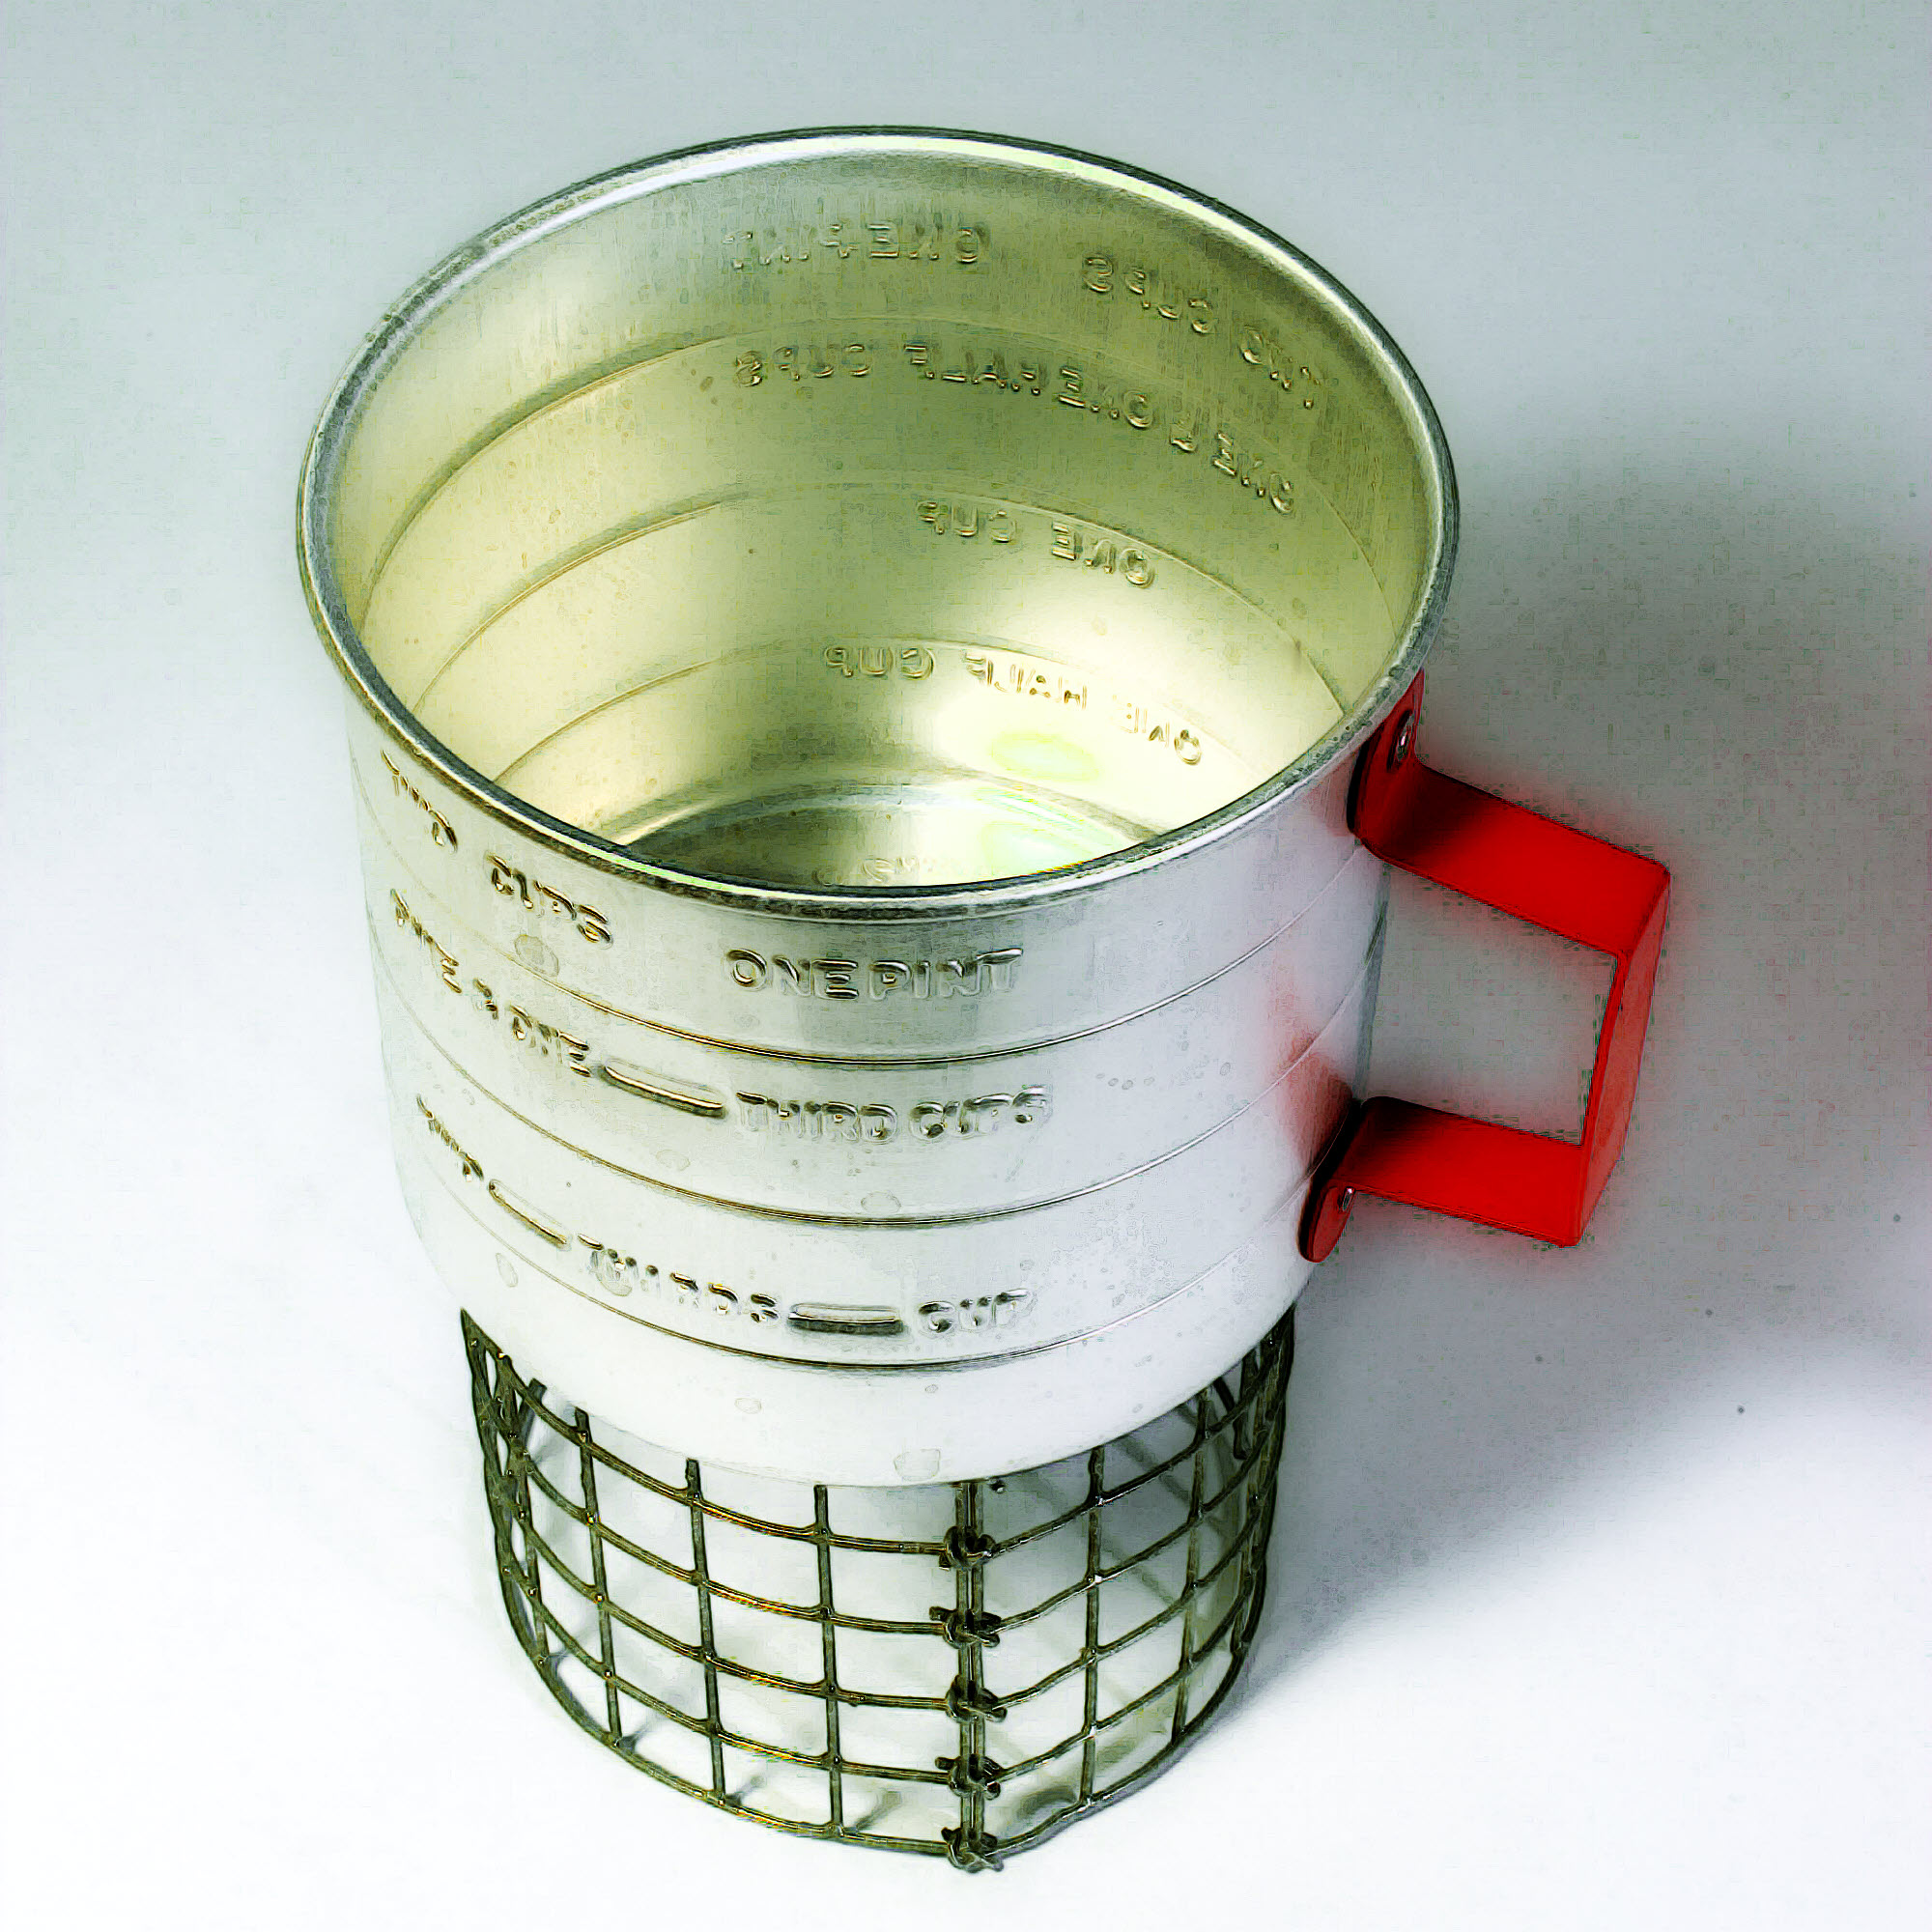
Sixteen ounce cup/pot on pot stand. The little nubs on the hardware cloth grip both the pot and the ground under it.

Wednesday, March 4, 2020

Batch-Loaded, Inverted Down-Draft Gassifier

Batch-Loaded, Inverted Down-Draft Gassifier

(wood gas stove)

Name of stove: Inverted downdraft wood gas.

Type of stove: A wood-burner that works with one charge of fuel at a time to produce a hot, smokeless fire.

URL of original instructions: Rick “Risk” Allnut did a lot of work (http://bit.ly/Ky3CCG), as did Ray Garlington (http://bit.ly/L3xpjN) Unfortunately, both web sites are now gone, and you'll have to work with the Internet Archive.

For general info on light weight do-it-yourself stoves, see the Zenstoves links page at http://bit.ly/9fZe6O.

Also check out the Sierra stove at http://bit.ly/dv0Cp6, or at the Intrnet Archive (https://bit.ly/2z0dWln and https://bit.ly/2yTEHYR).

Description of difficulty: Requires drilling a lot of holes, cutting and positioning springy and prickly hardware cloth, reaching into a sharp-edged small can to place bolts. Not too hard. Not harder than the DOSIP semi-pressurized alcohol stove, but if you have large hands you’ll need to start with a bigger can. Overall, this is no harder than anything else here, but is larger and involves working with steel rather than aluminum. You’ll need some “real” tools.
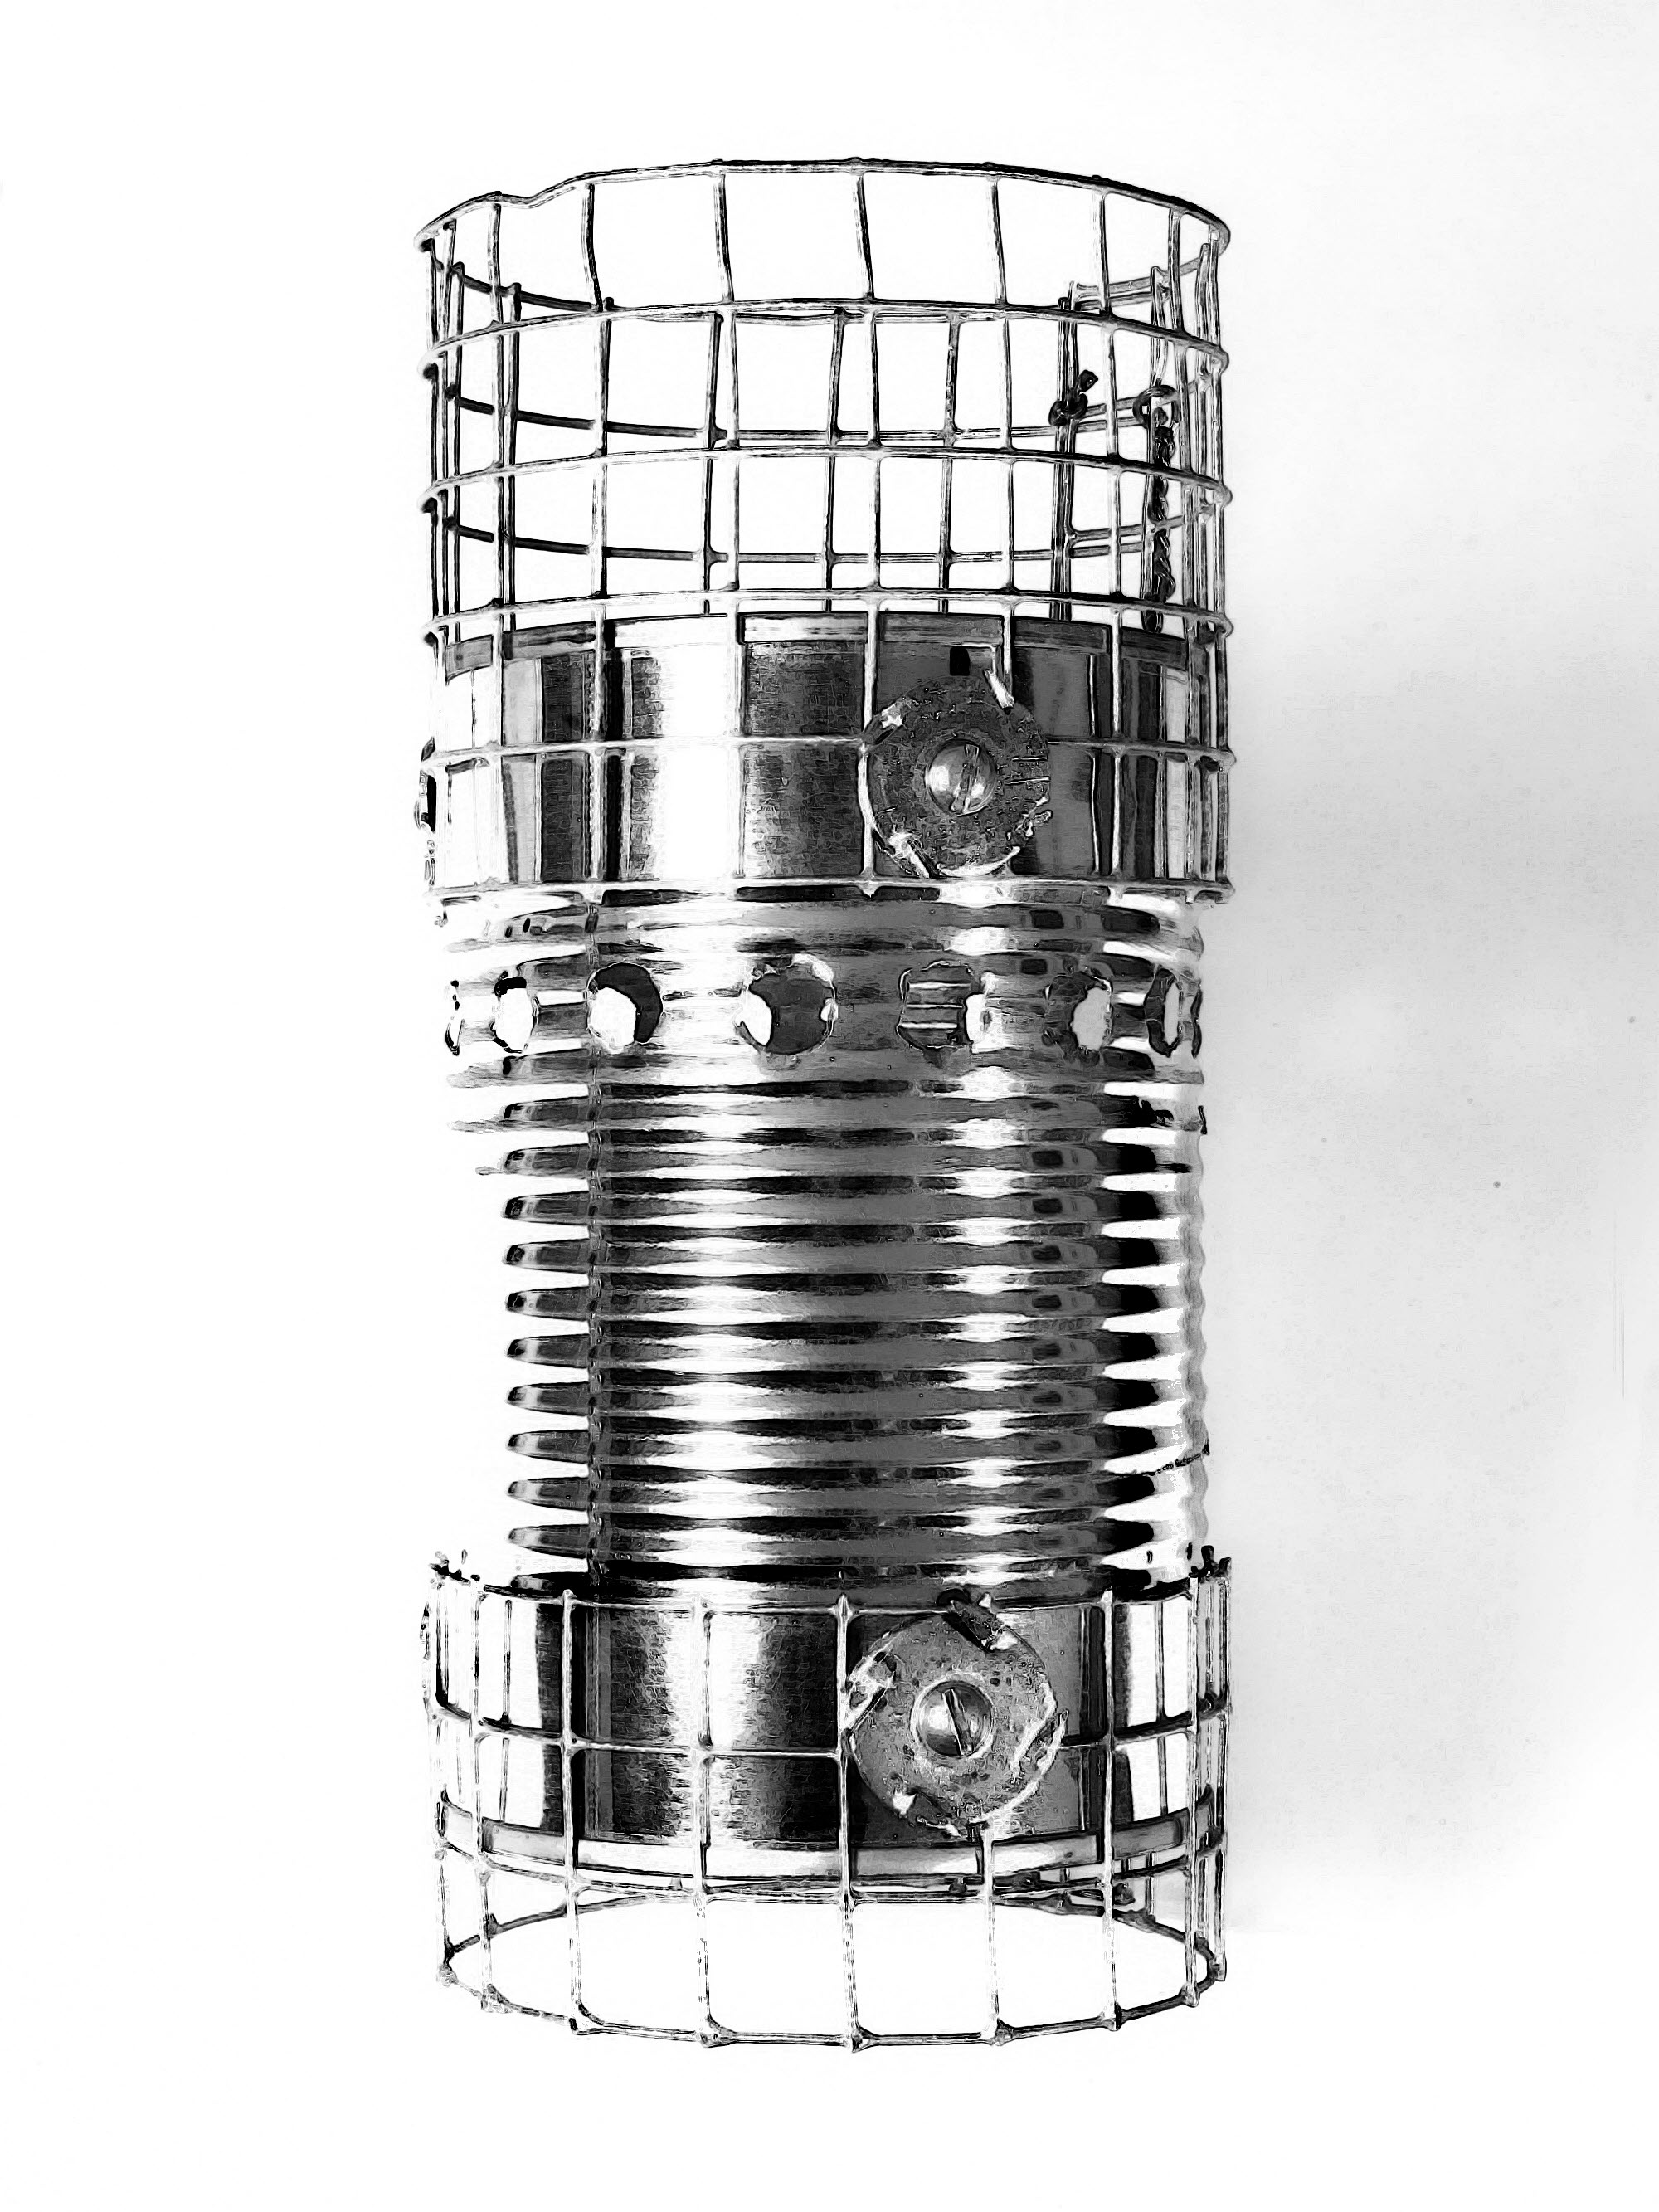
Overview: This is about the simplest wood-burning stove that’s worth building. There is a whole subculture of stove makers who have followed ZZ Manufacturing’s lead and have produced wood-burning stoves with battery-powered fans, to match the “Sierra” commercial stove. All of these home-made stoves are clever, and some of them are elegant and well-finished. Then again, they are all dependent on battery power and electrical circuits.

A big step down from a stove with an electric fan is a can with some holes punched into it. This will do, but it is crude and smoky.

The wood gas stove falls in between, but not exactly in the middle. This stove is extremely simple, much more so than a can with a battery and computer fan, but yet it is also extremely sophisticated, and still has absolutely no moving parts whatsoever.

The operating principle of the wood gas stove is that burning wood produces smoke, and it is also actually not the wood but the smoke that burns. It is also the smoke that makes a stove smoky (Duh!), so the trick is to generate lots of smoke and then burn it before it gets into your eyes.

Commercial wood gas stoves use fans and flaps and doors and whatnot to control the flow of air and smoke, but our stove is just a cylinder in which you burn wood. That’s a big plus. The fuel supply (if you have dry wood) is infinite, so you don’t need to carry any. The stove is dead simple. Once you get it built, that’s it — nothing to adjust or maintain.

This stove also operates a little differently. Take the name: “inverted downdraft”. Well, that’s an updraft, an “inverted downdraft” is. Commercial wood gas stoves pull air in from the top and force it down from top to bottom using fans. This air flow is a downdraft. Our stove lets air flow from bottom to top, which is either an inverted downdraft or an updraft, depending on how fancy you want to sound.

OK, aside from being really simple in principle, the inverted downdraft wood gas stove is a little harder to make than most of the alcohol stoves here, even the fancier ones. You need an electric drill and a punch, and you have to assemble some parts using bolts and nuts and so on, so it’s a bigger deal to make it. But once it’s done, it’s done.

It is also larger and heavier, and although you don’t have to carry fuel, you do have to scrounge fuel on the trail, and you’re dependent on finding suitable, dry fuel as you travel.

To use this stove, fill it about half full of fine, dry twigs, no larger than the thickness of a pencil. Even that is a little thick. Ideally, the pieces should be about an inch long and about a quarter inch thick, but it can be hard to break twigs that short, especially so as they get thicker. Finer is generally better, but also harder to find.

Once the stove is loaded with fuel, sprinkle a bit of stove oil or alcohol onto the top of the wood — maybe a teaspoonful — as a primer. This should soak in a bit, and supposedly stove oil works better, but alcohol works fine. Light it at the top, and the wood burns from the top down.

The heat of the flames at the top vaporizes the wood below the flame, and the open bottom of the stove allows fresh air to rush in and create a strong updraft. Additional air holes near the top of the stove mix in more air. All these vents, combined with keeping the cooking pot two inches or more above the top of the stove allows complete combustion.

Fuel should be loaded in horizontal layers. Oddly, having the fuel densely layered-in is better than having it loose. Dropping in twigs vertically or letting them all jumble together does not work as well. Short pieces of fuel all laid down flat in layers works best.

When loaded, lit, and used properly, this stove will burn almost without smoke. You will get an occasional wisp or two, but that should be about it. This is totally unlike the average wood fire or can stove, which has to be constantly tended, and which smokes before it gets going, while it’s burning, and after it burns down again.

The wood gas stove burns cleanly, and quiets down from a roaring blowtorch to a cool smolder once all the volatile gases have burned off. At the end you get a clean, warm charcoal glow, which eventually burns out, leaving a little clean ash behind.

If you don’t get enough fuel into the stove to complete your cooking, let it burn out and then recharge with fresh fuel, prime it again, light it, and start over with the new charge of fuel. Adding more fuel while the stove is burning will produce lots of smoke. Maybe that’s OK from time to time, but don’t be surprised by it. If this stove does not produce enough heat for you, build one using a larger can that holds more fuel. Scale up the measurements accordingly.

Technical details:

Warning: The stove described here is made using just about the smallest possible can. Larger stoves may be easier to make but will also be heavier and bulkier. You can twiddle to your heart’s content. If you are a normal-sized man with normal-sized hands then you probably need to use a larger can, or check a different set of plans to see how other people did it. To make this stove you have to reach one hand inside the can to get a nut threaded onto a bolt, and the can recommended here is less than three inches in diameter. If you can manage this with tools instead of your hand, OK, otherwise you’ll need a bigger can.
Height (can only): 4.4" (112 mm).
Diameter (can only): 2.9" (74 mm).
Full dimensions (including top and bottom supports): Height: 6.6" (168 mm); Diameter: 2.9" (74 mm).
Weight: 3.8 ounces (108 g).
Volume: Doesn’t hold liquid fuel, but about an 8-ounce (237 ml) equivalent, when filled with broken twigs.
Composition: Steel. Steel can (Del Monte sliced peaches in the 15.25 ounce size), galvanized hardware cloth top and bottom (to serve as integral legs and pot stand), plus a few bolts, nuts and washers.
Cost: Free, if you have the materials. Requires some ½" hardware cloth, some bolts, washers, and nuts.

Materials list:

One empty 15.25 ounce (451 ml) Del Monte sliced peaches can or equivalent.
Marking pen
Galvanized ½" hardware cloth (a piece 4" by 24" (102 by 610 mm ought to be enough)
Ruler
Sandpaper (100 grit, or thereabouts)
Electric or manual drill, with 1/16" (or 3/32"), and 1/4" bits
Paper hole punch
Sheet of paper
Tape
Wire cutters
Screwdriver
Pliers
Work gloves
Wire
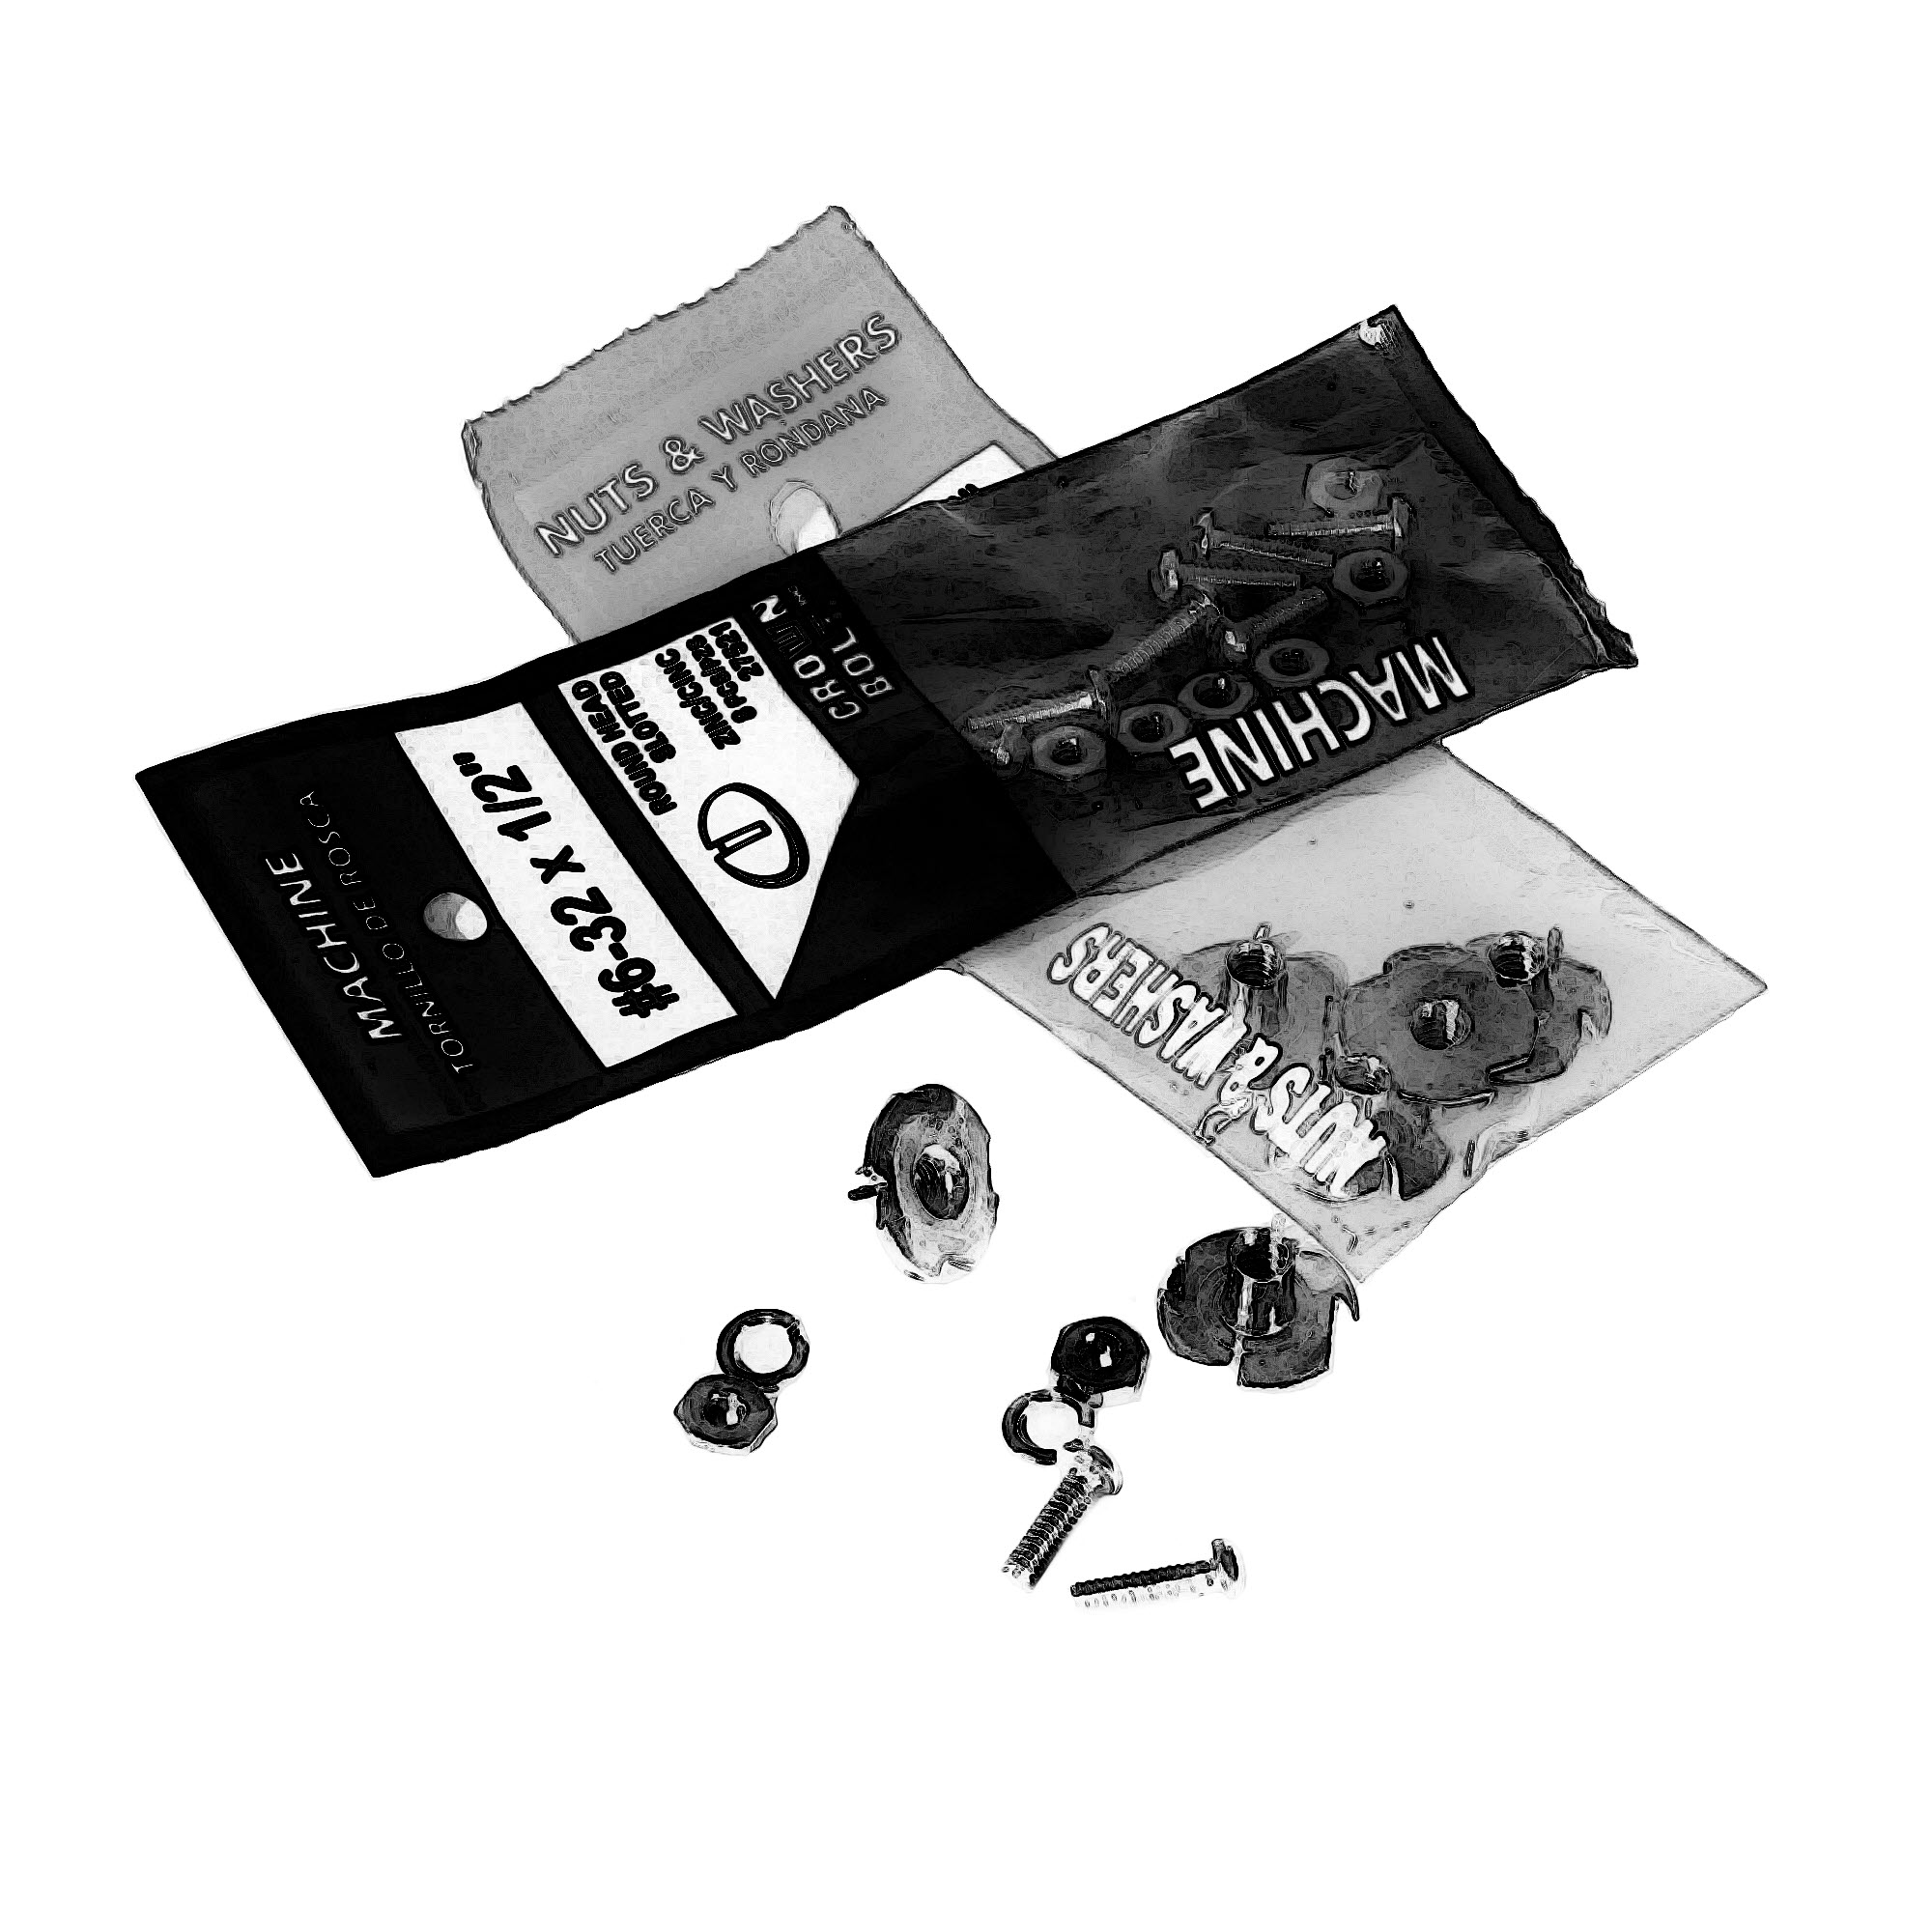
#6-32 x ½" slot-head machine screws (or equivalent)
#10-24 x 5/16" Tee Nuts (or equivalent flat washers)
Lock washers

Overview of construction process: Drill some holes in the bottom and sides of the can, then bolt a collar of hardware cloth to both the top and bottom.

Step-by-step construction:

1: Start.

Open the can. Eat the contents. Remove the top of the can, the label, and wash the can. Sand down any sharp edges inside the top of the can.

Now try to stick your hand inside the can. If you can’t, then you need a bigger can. This is OK. A bigger can is both taller and wider. Wider means more stable. It also means that the stove will be able to hold more fuel, making it easier to cook for two or more people. Look for a can about twice as tall as it is wide (think “smokestack”).

2: Drill ventilation holes in the bottom.

You will end up with two sets of holes, one in the bottom of the can, and one in the side of the can. We start with the bottom of the can.

Lay a ruler across the bottom of the can. Try to find the widest point, which means your ruler will be bisecting the can’s bottom. Mark the halfway point. Repeat this two or three times and you should have a set of points that pretty well overlap, and indicate the center of the can. Put a big dot there.

Mark two more spots between the first dot and the outside edge of the can’s bottom at approximately 0.5" (13 mm) intervals. This won’t quite work out evenly, but think of it as a good chance to exercise your intelligence and judgment.

Repeat this on the opposite side of the central dot, and then at 90 degrees, so you have a cross pattern. Then make some more marks in an X pattern. Altogether, if you use this size can, you’ll have about 33 dots.

Drill these out, first making a pilot hole with a small bit, and then with the large bit. It might help to take a nail or something else you can use as a punch and first make a small dent in the can’s bottom at each dot before drilling each hole. Place the punch, give it a light tap, then drill the pilot hole.

Then use a small bit and drill a line of holes just inside the can bottom’s outer edge. Check the accompanying photograph.

When you’re done, you’ll have the bottom of the can chock full-o-holes. This will form a fire grate.

3: Drill ventilation holes in the side of the can.

Now for some fresh air vents near the top of the can.

Make a ventilation template by taking a full-sized sheet of paper (8.5" by 11") and cutting off a strip along the long edge. It should be 1.5" (38 mm) to 2" (50 mm) wide.

Take this strip of paper and wrap it around the can, overlapping the ends. Mark the point where the paper overlaps itself, remove the paper from the can, and cut off the short end.

Measure down from the top rim of the can about 1.4" (36 mm) and see where you are. The side of the peach can is corrugated. You want to be in the trough (low point) of one of these corrugations. Find the nearest trough and record that distance. It might be 1.4" or 1.5" or 1.55" or 1.6", but it shouldn’t be less than 1.4". Let’s assume that it is exactly 1.4".

Take your actual measurement and mark your strip of paper with it. You want to get a line running the length of this paper strip, and 1.4" (36 mm) in from the factory edge, but use your actual measurement. Then fold the paper in half four times and crease it hard. Unfold it and punch a hole at each point where the line you drew intersects with a crease. You will have 15 holes.

Wrap the paper strip around the can again, with one side of it snug up with the top of the can, and tape it in place. Arrange it so that none of the holes or the taped ends fall over the seam in the side of the can.

Mark the can at the center of each hole you punched in the paper strip, and put a sixteenth mark at the point where the two ends of the paper strip meet, in line with the other marks.

Now drill a small hole at each mark, then go back and drill them out to full size with a larger bit.

Now you’ll have the bottom of the can full of holes, and you’ll have another 16 holes in the side of the can roughly 1.4" (36 mm) from the top edge of the can, and the can will have no top. Sand off any sharp edges.

4: Drill holes for the pot support.

Take a strip of paper as before and wrap it around the can, then cut it to length. It should be 0.6" (16 mm) wide. It will turn out to be just about exactly nine inches (229 mm) long. “Just about exactly” is close enough for us.

Measure in three inches (76 mm) from one end and draw a line across the strip. Repeat from the other end. Now you’ll have a strip 0.6" wide by nine inches long (16 by 229 mm), with two marks dividing it into thirds.

Wrap this strip of paper around the top of the can. Arrange it so that none of the marks or the taped ends fall over the seam in the side of the can. Then use a small drill to bore a hole at each mark.

This hole may be big enough, depending on the size of your drill bit and the size of the machine screws you’re using. But you can drill them out a little larger if you like. And in fact this might be better because it gives you a little fudge factor for positioning. Bottom line, as they say, you can always make the hole bigger later on, but no matter how often you drill it, it will never get smaller.

Just so you have three holes equally spaced around the can, and about 0.6" (16 mm) down from the top edge of the can.

5: Drill holes for the stove base.

Do the same as in the last step, but use a strip of paper 0.5" (13 mm) wide. Wrap this around the bottom of the can. Arrange the paper strip so that none of the marks or the taped ends fall over the seam in the side of the can and drill your holes.

OK, now you have a can with three evenly-spaced holes in its side, near the top, and another three near the bottom.

6: Cut and attach stove base.

Warning: To do this part, you’ll have to stick your hand inside the can in order to get a lock washer and nut attached to the three machine screws that hold the stove base in place. If the can described here is too narrow for your hand, then you’ll need to use a larger can. Or figure out another way to do this. Also, make sure you’ve dulled any of the can’s sharp edges, or you WILL get cut.
The pot support and stove base are both made from half-inch hardware cloth.

Hardware cloth, if you’re not familiar with it, is sort of like cheesecloth, but with a looser weave, and made from steel wire instead of cotton. And then it’s galvanized (coated with zinc) to keep it from rusting.

For the stove base and pot support, you want to cut hardware cloth, gently bend it into a cylinder, and then bolt it to the stove. And look out for the edges. There is a sharp nubbin of wire every half inch, and they all bite.

Put on your work gloves to protect your hands. Using your wire cutter, cut a piece of hardware cloth 1.5" by 10.5" (38 by 267 mm). Using your wire cutter again, trim back any stray pieces of wire as much as you can. Sand down any nubbins that are still too sharp.

Bend the strip of hardware cloth into a loose cylinder to match the shape of the can. There should be one square of overlap at the ends (½ inch) when you wrap this around the can.

Slide a machine screw through one of the flat washers. (Note: I used Tee nuts, flattened their teeth with a pliers, and used a hacksaw to cut their necks off, to make them flat enough to fit. I did this because I couldn’t find any flat washers that were both big enough in diameter and as light as these). Use what you can find — you just need some fairly light washer that’s big enough in diameter to cover the 1/2" by 1/2" hole in the hardware cloth.

Squeeze the hardware cloth together with one hand and fit it over the bottom end of the can. A heavy rubber band might be helpful to hold this together. With the other hand, slide the machine screw with the washer attached through the topmost square in the hardware cloth where the two ends overlap, and then through the hole in the top of the can.

Reach inside the can and slip a lock washer over the machine screw, and then thread on a nut. Hold the nut in place first with your fingertips, and then with a pliers and tighten the screw with a screwdriver, but don’t cinch it down yet. Just get it snug.

Place the other two machine screws, make sure that everything is in place and level, then tighten down all three screws to the max.

Now one “rung” of the hardware cloth should be resting on the bottom edge of each machine screw, and the flat washers on the outside will be holding the hardware cloth tight against the side of the can.

Go back to the place where the two ends of the hardware cloth overlap and add a piece or two of wire as needed to hold those two ends tightly together. Twist the wire it into place using a pliers, then clip off the excess and tuck it in so it won’t snag on anything or cut you.

When you’re done, you’ll have the bottom of the can sitting 1/2 inch (13 mm) off the ground, held up by the cylinder of hardware cloth firmly attached to the can. This will provide enough room for air to flow in and up through the stove. There will be one “rung” of hardware cloth up against the BOTTOM of the machine screws.

7: Cut and attach pot support.

Put on your work gloves to protect your hands. Using your wire cutter, cut a piece of hardware cloth 2.5" by 10.5" (64 by 267 mm). Using your wire cutter again, trim back stray pieces of wire and sand down any nubbins that are still too sharp.

Repeat the process you used to make the pot support.

The pot support will have its weight bearing down on the TOP of the screws that hold it, while the stove base will have its weight bearing up on the BOTTOM of the screws there. This probably doesn’t matter too much since the screws and washers are going to be squeezing everything pretty tightly together, and the whole shebang isn’t really that heavy. You’ll see how it works as you put it together. Now you know.

OK, done. The parts won’t all be exactly square with each other, but they should be close enough so you can’t tell from a foot away. The stove should stand straight and not be obviously leaning.

One advantage of the hardware cloth is that it has all those little sharp, pointy nubbins. These are like sharp little teeth, and while you have to be careful not to cut yourself or snag clothing on these, they also help to hold your pot in place, and on the bottom side they will grip too (even though you want to use this stove on a fireproof sheet of metal, just to be safe).

8: Burning in and testing.

The stove needs to be fired before using it to cook with.

The hardware cloth you’ve used is galvanized, and the inside of the can may be as well, depending on what product it was used for. Both these parts need to be seriously scorched before you use the stove to cook with, because zinc is the galvanizing stuff, and fumes from zinc are toxic. You don’t want to breathe these fumes or get them into your food.

Choose a safe, fireproof area such as a fire grate at a local park and charge the stove with dry twigs until it is about half full (don’t overfill, less fuel is better, leave the side vents uncovered). Then light the stove and let it burn out. This will take around 20 minutes, because once the wood burns down you’ll be left with charcoal, which will slowly burn down without smoke. You will be surprised at how long this takes.

Repeat this a couple of times. You should see very little wood smoke, and after the first burn, you should notice no smoke from the galvanized metal parts, or smell anything odd. The zinc smoke is very acrid. Don’t breathe it. Keep a pot of water nearby in case you need to quench any flames, or the stove gets knocked over while it’s burning.

As always, watch for problems, take your time. Relax, and keep it fun. Try boiling a pot of water. Yowsa! This stove puts out a huge amount of heat compared to the alcohol ones, and it burns just about forever, relatively speaking.

9: Using.

Plan on using a pot lifter. You’ll want to take your pot off the stove before the fuel burns out, and you won’t be able to grab it with your bare hands, or gloved hands either. You do not want to introduce the sleeves of your clothing to the roaring flame that this stove produces. Using a pot gripper will allow you to manage the handling of your pot(s), and you may be able to both heat water for a meal, and then put on some more water for a hot drink without burning a second batch of fuel.

If you try putting on a pot of water and just letting the stove burn out, you may just boil away all your water, so plan ahead. You can buy a separate pot gripper or lifter at outdoor shops, or you can get a small pliers to take along. Maybe your pot has a bail handle that will let you use a tent stake or a long stick. Whatever works for you.

To use this stove, put down a sheet of aluminum foil (either from a roll or cut out of an oven liner) charge with fuel, set the stove on the foil, and light it.

The fuel for this stove is twigs. Finer twigs are better — they should be no thicker than a pencil, and should be broken into one inch (25 mm) pieces if possible. Unless you find extremely thin twigs you will not be able to break them this short, but shorter is better. Do your best. Experiment.

Once the stove is charged, sprinkle a bit of flammable oil or alcohol on top of the fuel. Use about one teaspoonful and let it soak in briefly. Do not under any circumstances use gasoline, turpentine, thinner, acetone, or anything else explosive. Lamp oil is said to be best, kerosene is not explosive and should work. I’ve used only alcohol, which evaporates, or soaks in a little too fast, but it does work, and I always have it around for my alcohol stoves. You may be able to use some light paper, or fine, wispy, dry inner bark, if you can find this. But you will have to experiment.

Once lightly primed with a flammable liquid, light the fuel at the top.

The fuel will take half a minute or so to get fully lit. Before long you’ll have a flame that looks a lot like it’s coming out of a jet engine with the afterburner turned up to 11, and there will be almost no smoke.

Three things are critical: good ventilation through the bottom of the stove, where most of the air enters, ventilation from the holes around the side of the stove, which inject extra air into the smoke and flame, and the height of the pot support.

The height of the pot support is critical. The pot should be two inches (50 mm) or more from the top of the stove. The stove we’ve just made here has a space that is a little less than that, but it works well enough most of the time. Decreasing the free space between the top of the stove and the pot results in a stove that smokes badly, so if you have problems with smoke, chances are that the ventilation through the bottom isn’t good enough, the vents in the side of the stove aren’t good enough, or the pot support is too short. In the last case, make a taller pot support and retrofit it. You may also have fuel problems, but fuel varies from use to use, so it’s hard to make a strict, foolproof rule.

Note: The vents in the side of the stove are also critical, and should be able to breathe freely, and should not be drilled higher in the stove. A little lower down is OK, but too high up is not. You need to inject fresh air into the smoke to help it burn, and that’s what these side vents do.

The can used for these plans is very small and narrow. Because of that it’s also relatively unstable. It’s one of those ultralight tradeoffs. Using a wider can for your stove will give you a more stable stove, and your stove can also be taller overall while retaining stability. This is one of your personal choices, which is what the ultralight idea is all about anyway. Feel free to experiment.

Various views of the can that is the basis for this stove. Evenly spaced holes in the bottom provide the primary ventilation. Holes in the side of the can, higher up, give the combustion process a boost, allowing the thick rising smoke to burn cleanly in a constant bath of fresh air. The pot stand and bottom support are not shown here, but just bolt on. The core of this stove is very simple and solid — just one steel can.

Now for something completely different...

For more information, check out "A WOOD-GAS STOVE FOR DEVELOPING COUNTRIES" by T. B. Reed and Ronal Larson The Biomass Energy Foundation, Golden, CO. It's a PDF file that you can find here and here

ABSTRACT

Through the millennia wood stoves for cooking have been notoriously inefficient and slow. Electricity, gas or liquid fuels are preferred for cooking - when they can be obtained. In the last few decades a number of improvements have been made in woodstoves, but still the improved wood stoves are difficult to control and manufacture and are often not accepted by the cook.

Gasification of wood (or other biomass) offers the possibility of cleaner, better controlled gas cooking for developing countries. In this paper we describe a wood-gas stove based on a new, simplified wood gasifier. It offers the advantages of "cooking with gas" while using a wide variety of biomass fuels. Gas for the stove is generated using the "inverted downdraft gasifier" principle. In one mode of operation it also produces 20-25% charcoal (dry basis).

The stove operates using natural convection only. It achieves clean "blue flame" combustion using an "air wick" that optimizes draft and stabilizes the flame position.

The emissions from the close coupled gasifier-burner are quite low and the stove can be operated indoors.

Keywords: inverted downdraft gasifier, domestic cooking stove, natural draft


The following image pretty much represents my design though also based based on what they developed...

DOSIP Stove

DOSIP Stove

Name of stove: DOSIP (DOuble-wall, SemI-Pressurized, based on the original Pepsi-can stove).

Type of stove: Try guessing this, using only the name.

URL of original instructions: Based on Scott Henderson’s original Pepsi Can stove. This was later refined to two stoves: the Pepsi-G Stove and Scott’s Mini Stove, a smaller version. (See archived instructions at http://bit.ly/Khbsze and http://bit.ly/Jl6ty4 and for general info on light weight do-it-yourself stoves, see the Zenstoves links page at http://bit.ly/9fZe6O)

Description of difficulty: Higher than the previous stoves, but a little more fun to make, if you like to play with tiny intricate parts having insanely sharp edges. Can be maddening to fit together because the parts just don’t want to go. Sometimes. And you need to take extra special care not to cut your fingers to pieces. It’s by no means impossible or even hard, but can be a little bit slow the first time through especially if you want to do it without getting cut.

Overview: This is a light, hot-burning, nicely-finished type of stove, very similar to the commercially-made Swedish Trangia, but free, and shinier. It is much more complicated to make than the other alcohol stoves listed here, and really no more or less effective but if made carefully enough the result looks professional.

The higher the operating pressure of a stove, the faster and hotter it burns, and the sooner the fuel is gone. Too much pressure, too big a flame, too small a pot, and you’ve wasted a lot of your fuel — the flame just laps up around the outside of the pot and the heat is lost. Generally speaking, the slower-burning stoves are more frugal than the fast and hot ones, but a stove that’s too feeble just won’t work either — heat will leak away just as fast as it goes into the pot. A stove for the ultralight backpacker must be in the sweet spot between cool efficiency and hot waste.

Technical details:

Height: 1" (25 mm)
Diameter: 2.1" (53 mm)
Weight: 0.35 ounce (10 g)
Volume: 1 ounce (30 ml)
Composition: Aluminum cans and aluminized tape.

Materials list:

Two empty 5.5 ounce (163 ml) aluminum juice cans
Foil tape (dryer vent tape, aluminum with adhesive on the back)
Hammer
Ruler
Magazines
Marking pen
Pushpin, heavy safety pin or heavy needle
Sandpaper (100 grit, or thereabouts)
Scissors (beaters that you can cut aluminum with)
Scribe (Pushpin, heavy safety pin or heavy needle)
Sheet of paper
Tape
Utility knife
Work gloves

Overview of construction process: You’ll cut the bottom off two juice cans, and squeeze them together with another, flat sheet of aluminum forming an open vertical cylinder in between. This cylinder forms the stove’s double wall where the fuel boils.

Step-by-step construction:

1: Get two 5.5-ounce juice cans.

These are the ones that V-8 juice or various fruit juices come in. It’s a lot easier working with the larger 12 fluid ounce cans because they’re bigger, but using the smaller cans will give you the smallest, lightest stove. Empty, rinse and dry two cans.

2: Punch burner holes.

A pushpin is the easiest and safest way to get burner holes formed. Watch your fingers, though.

Work with the bottom of one can. There is a ridge on the bottom of the can. Between this ridge and the can wall is a shallow depression, a sort of shoulder. Place the pin on this shoulder and push it through. Tapping it ever so gently with a light hammer works well for this.

Start by placing one hole, then put another one on the opposite side. Punch the third hole on the rim halfway between the first two holes, and put the fourth one opposite that.

Now you’ll have four holes equally spaced around the rim on the bottom of the can. Place each of the next four holes right in between those holes. When done, you’ll have eight holes pretty evenly spaced around the rim of the can.

Go ahead and keep this up until you’ve got either 32 holes, or you get tired, or you’ve go as many holes as you can stand to punch, as evenly spaced as you can get them. Having “too many” holes is better than having “too few”, so don’t get upset if you end up with closer to 40 holes than 32. After the first few, it gets harder and harder to keep them exactly spaced, or at least it gets easier to see that they aren’t exactly spaced, so you’ll probably have to stick in a few extra holes to fill in ugly-looking gaps.

Think of your result as having that “authentic” hand-made look rather than being a failed attempt at achieving perfection. Some holes will always be too far apart, too close to each other, or a little high or low on the rim. Too bad. That’s life. Enjoy it.

If you are impossibly tidy and incapable of enjoying a little randomness, then you can make a template from paper, calculate exactly where each hole should be, use this template to mark the can, and then punch the holes. And they will be absolutely perfect. Happy now?

3: Cut central vent hole.

For this stove, the vent hole is a big one, right in the middle.

Put on your gloves. Still working with the same can, use the utility knife, and put its point inside the can bottom’s central concavity. Keep the point of the knife there with a medium amount of pressure and turn the can around and around. You want to score the aluminum until you can pop out the whole bottom in one disk.

This will take a while, so be patient, and try to make things more efficient by keeping the knife point running in one track, like a phonograph needle in the record groove (for any of you old enough to remember records). OK, I’m repeating this paragraph in all instruction sets, I know. Chill out.

Go around and around and around and around , until you’ve cut deeply enough that you can tap the bottom of the can and it breaks loose. Don’t be in a hurry. This will take like what seems forever. You may have to keep scoring the can for 50 or 100 revolutions. Going slowly is not only safer, but it will give you a better result. Let it happen in its own time.

The bottom of the can will first break through in just one spot — the whole thing won’t suddenly pop out cleanly, but you can keep working at it until you’ve got it all removed.

Some tapping with the blunt end of the utility knife will help. Tap lightly and see if anything happens. If not, then keep scoring. Eventually you’ll get a section of the can’s bottom to break free. Make it wiggle. It will take some wiggling until the metal fatigues and lets go. Work with it. Work your way around until the whole disk pops free.

You will end up with a pretty clean cut that needs a minimum of dressing to make it smooth and safe.

4: Cut away the top of the can.

We’re still working with the first can here. Stand the can up next to a stack of magazines. Be sure your work gloves are on. Leather ones are best. Be sure your utility knife has a sharp, new blade in it.

Lay the utility knife on its side on top of the magazines and put the blade’s point up to the can. At this point you’ll have the can sitting upright, with the burner holes on the bottom, on your work surface.

Adjust the blade’s height by adding or removing magazines (or pieces of cardboard or sheets of paper, for fine tuning) until the knife point is 0.8" (20 mm) above the work surface.

The point of the blade should be just touching the side of the can. Hold the knife down solidly, on its side, with one hand and rotate the can with the other hand, scoring the side of the can. Keep some pressure on the side of the can, but not enough to dent it.

Keep turning the can carefully for several revolutions. You want to make a deeper and deeper score line in the side of the can, and you want to keep the knife in the same groove on each pass. This is impossible to do perfectly, but get as close as you can.

When you think you’ve cut most of the way through the side wall of the can you need to stress it. Use the back side of your knife’s blade (the dull side) or your thumb. Press hard enough to flex the side of the can a little without denting it, and move back and forth along the score line.

Stress a short section of the the can wall this way over and over again. What you’re doing here is trying to fatigue the metal of the can until it breaks apart. This will give you a cleaner result than if you cut through the can with the knife.

This part of the process is trial and error, so just keep at it until you find a scored part of the can’s wall that just lets go. You can go back to scoring the side again for awhile, to deepen the cut if this doesn’t seem to be working. It takes a while to start working.

Once part of the scored line breaks through you can keep working along it, turning the can and breaking it apart along your scored line until the top part separates from the bottom part. Once you get the process started, it will be a give and take between stressing the metal and gently pulling the two halves of the can away from each other.

Work very gently. The two main things to keep in mind are not to damage the can and not to get cut. The can will separate when it’s ready.

When done with this step you’ll have the bottom 0.8" (20 mm) of the can separated from the top.

5: Cut the bottom off the second can.

Repeat what you just did, but with the bottom of the second can. When you’ve removed it, you will have a can bottom that’s intact (no holes or cuts). It will be 0.8" (20 mm) high.

6: Make stove’s inner wall.

Take one of the cans that you’ve removed the bottom from and hack off the top, saving the middle part. You want to end up with a rectangle of sheet metal from the side of the can. The can’s bottom is already off, and now you want to remove its top.

Put on your gloves first. This is a part that’s tricky to do without getting sliced to bits. Seriously. This stuff has razor sharp edges as I’ve said elsewhere. The easiest way to do this is with a scissors. You won’t want to use the scissors for anything else after you cut metal with it, so get an old pair, or buy a pair to use just for making stoves. Shorter scissors really help in tight places like this. Coleman sells a pair of folding camp scissors for about three bucks. They’re about the right size and price, and they work well.

OK, this can still has a top. Cut from the end of the can where the bottom used to be (you’ve just removed it, remember?). Cut up toward the top of the can until you get to the can’s shoulder, then gently turn the scissors and begin cutting around the circumference of the can until you’ve cut off the top too.

What you’ll have left is the piece of the can that used to form the can’s side wall. It’s a sheet of aluminum that wants to stay curled up into a cylinder.

Gently flatten it out and tape it shiny side up to a sheet of cardboard (the thin, solid stuff from a tablet of paper or the side of a breakfast cereal box works pretty well). You want this sheet of metal to be flat, and you don’t want it to suddenly lunge at you, so tape it down well.

With a scribe and a ruler, mark off a rectangular piece measuring 1" by 6.5" or 25 by 166 mm. (You can use the point of a pin or needle as a scribe.) Cut this piece out. You can either use the ruler and the utility knife to keep scoring the metal and flexing it until it breaks free, or use the scissors on it. The scissors method is easier, but is harder to cut a straight line with.

Find the midpoint of the long side and mark it, then measure 2.75" (70 mm) to each side, and make a mark at each of those points. You are going to cut a slit in each end, but in opposite sides of the strip. To make these slits, cut a little more than half way through the strip, one cut from the left side and the other cut from the right side. (Or from the “top” and “bottom”, if you prefer to think of it that way.) You ought to have about 0.5" (13 mm) extra material at each end of the strip.

Now make three marks. Start at one of the slits you just cut, and stay on one long side of the strip. Let’s say we’re working from left to right. So make the first mark 1" (25 mm) from the slit. Then make the second mark 2.75" (70 mm) to the right of the slit, and make the third mark 4.5" (115 mm) to the right of the slit.

Now use the paper punch and punch a hole at each of these new marks, cutting through the edge of the aluminum sheet (the hole should lap over the edge a little bit — in other words, the hole won’t be fully round, more like an archway). You’ll have three notches in one edge of the sheet.

An alternate way to do this is to use your scissors and cut a triangular notch at each of these points. The shape of the notches doesn’t really matter.

Now gently bend this sheet of aluminum into a cylinder and hook one slit over the other. The excess “ears” of sheet metal will be on the outside of the cylinder. This cylinder will hold itself together because the two slits will have locked together.

This cylinder will go inside the stove and form its inside wall. The three notches you cut in one edge will be fuel entry ports. They will let fuel flow into the hollow space between the walls of the stove.

You can put a bit of tape over the two ears of excess sheet metal to hold them flat. If you have too much overlap you can trim this down a little, but the shorter the ears get the harder it is to make them lie flat, so a little extra metal is a non-issue.

7: Prepare top for joining.

With the scissors, cut eight slits into the top of the stove (the piece with the burner holes punched into it). The slits should stop about 2 mm short of the shoulder (where the metal curves). In inches, this is between 1/16" and 1/8". These slits will allow the top of the stove to fit over the bottom. Since both the top and the bottom are made from the same size of juice can bottoms, they’re the same diameter, and are hard to fit together, so you’ll create some slack by cutting these slits.

Deems Burton (Pika Stoves — see “more info” section) manages to stretch the metal in one can and fits two cans together that way. Check it out.

8: Join top, bottom, and inner wall.

This step will test your manual dexterity and your patience.

Place the inner wall (the cylinder of sheet metal you just made) into the bottom of the stove, with the notches down. The can bottom has a groove in it, and this wall should fit just about perfectly into that groove. If the wall is the wrong size — too big or too small in diameter to fit — then you’ll have to cut another one. But you should be OK.

This piece (the inner wall) can be held in place by a tiny bit of tape or glue (or even a couple of drops of honey, which will burn away), but you probably won’t need to do this.

Now for the tricky part. You have three pieces to juggle.

Carefully fit the top of the stove over the bottom while keeping the inner wall in place. The top has the burner vents in it, the bottom is an intact can bottom, and the strip you cut is the inner wall, and will fit snugly in between the stove’s top and bottom.

You may need a thin knife blade, jeweler’s screwdriver, or maybe a scrap of leftover sheet metal (with dulled edges) to help with this. The stove’s top half has those slits around its side and they form eight little flaps, like pleats in a skirt. (Or pleats in a kilt, for us manly men.)

You want to ease the top down over the bottom so all of those flaps are on the outside of the stove’s bottom, which has no slits in it. The trick is to get all the flaps started and then push the top and bottom together. You may need to get one flap started and then work your way around until they’re all overlapping the bottom part of the stove a little bit.

This is where the knife blade, etcetera. can come in handy. You will need at least three hands to do this, if not more. Tentacles, if you have them, are great. Human hands never seem to have quite enough fingers for this part, but it is possible, so keep at it. The magic seems to happen about the time you get dizzy and everything begins to blur. Then, suddenly, it all fits perfectly. You never quite know exactly how though.

You might need to add a little tape to hold things in place as you work. One problem is that you’ll get a flap or two from the top of the stove in place, and the top will be sitting there at an angle, and you go to the other side and try to wiggle those flaps into position, and while you’re doing that, the first flaps slip off, and so on. Arrr.

Yes, this part can be maddening, but if you’re careful you can do it. Just keep trying. Be sure not to bend anything out of place or the stove will leak flames (and maybe fuel) when you use it. On the other hand, sometimes things just seem to slip into place. Partly it depends on the size of the slits you’ve cut. But cut them too long and you’ll have to build another stove top (the burner part) from the beginning.

When you have the top of the stove overlapping the bottom, set the stove down on a solid, flat surface, check to see that the inner wall is in place and lined up properly, be sure that everything is level, then gently lay a thin book, small piece of wood, or something else flat and stiff over the top of the stove. Now gently push it down into place. Gently.

When you’ve got this done right, the top and bottom should end up fitting together snug and level, and the inner wall should be tight. The inner wall will be holding the top and bottom apart by a millimeter or so.

You have to be really careful not to crush the stove or bend anything during this process. Again as always, work slowly.

The inner wall (the rectangular piece you cut and bent into a cylinder) fits into the grooves that the cans came with. As far as your stove is concerned, one of these is in the top of the stove and the other is in the bottom of the stove. This third piece, the strip you cut, gives the stove a hollow side wall and allows fuel to flow between the inner and outer walls, where it heats, vaporizes, and shoots out the burner holes in the top.

Once again, you don’t need a stove this complicated, but it is cool to make, and even cooler to see in operation.

9: Tape stove together.

Unroll an inch or so of the dryer vent tape and cut it off so you have a clean edge to work with. Throw that first piece away. Then unroll a little more than 6.5" (166 mm), and cut it lengthwise to get a piece that will fit around the stove. The outer wall of the stove should be 18 mm to 20 mm high (0.7" to 0.8"), and that’s how wide you should cut the tape. Remove the backing and carefully apply the sticky side of the tape to the stove and trim the free end so that you have a clean seam where the two ends meet.

Gently smooth it out with the flat side of a fingernail so you have a wrinkle-free surface. You’ll end up with a silver stove covered with silver tape. Looking down through the central vent hole at the inside of the stove you’ll see a clean joint where the inner wall overlaps with itself, where it’s hooked together, and three equally-spaced notches (not perfectly equally-spaced, but no one will be able to tell. (Heh, heh.)

The more carefully you’ve measured and cut, the more professional your stove will look. When you show it off, there will be people who won’t believe that you made it (especially if you can get the burner holes more evenly spaced than I can).

10: Burning in.

The stove needs to be fired before using it to cook with.

The original cans were covered with printing. This will stink and smoke until you get that burned off.

Choose a safe, fireproof area such as a fire grate at a local park, add a small amount of denatured alcohol fuel to the stove, and burn it. About a quarter ounce will do. Check it out afterward and repeat as many times as you need to until you don’t get any smoke or burning smells coming off the stove.

Don’t set the stove on a wood fire to burn it in or you will melt it (it’s pretty thin), and you will burn the tape you put around the outside. Take your time. Relax. Keep it fun.

Keep a pot of water nearby in case you need to quench any flames, or the stove gets knocked over while it’s burning. Watch for problems.

If you used any tape or glue to hold the various parts together, or there is any juice residue inside the stove, you’ll want to be sure you get that burned out before cooking on the stove. And of course there is that aluminized tape you wrapped around the outside of the stove. That needs to burn in too. Surprisingly, although the stove gets hot when it runs, this tape seems to hold up pretty well.

This type of stove is more elegant than the other alcohol stoves described here, but it also is more complex and has more parts that must fit together properly. Don’t be scared though. If you got the parts to slip together without destroying anything you’re probably home free. Just be sure to thoroughly check out the stove before you take it backpacking as your only source of heat.

To use, put down a sheet of aluminum foil (either from a roll or cut out of an oven liner) put fuel in the cup, set it on the foil, and light it. A pot stand (described later) will serve to support your cooking pot over this stove.

When you light the stove, you may not see flames if working in bright daylight, and the stove will need a minute or two to get up to working temperature.

When it does get up to working temperature, you’ll see a burner that looks like a miniature gas range. Eager blue flames will shoot out of the burner holes. The flames look cool but they’re seriously hot, so be careful. Seriously. If you use an alcohol stove with a hardware cloth pot support, you may see the support glowing bright red. That means it’s hot, more than hot enough to bite you hard enough to hurt. Once again, be careful.

The only sound you should hear while the stove is running is fuel boiling inside it after the stove reaches working temperature.

One can bottom is the top of the stove and another is the bottom. A flat band bent into a hoop forms the inner wall. Fuel runs through notches at the bottom of that wall, and as the stove burns it gets hot and vaporizes fuel there. The hot vapor shoots out the pinholes in the top of the stove where it burns. Some flame also comes out the large center hole.